<?xml version="1.0" encoding="utf-8"?><feed xmlns="http://www.w3.org/2005/Atom" ><generator uri="https://jekyllrb.com/" version="3.10.0">Jekyll</generator><link href="https://michaeloleary.net/feed.xml" rel="self" type="application/atom+xml" /><link href="https://michaeloleary.net/" rel="alternate" type="text/html" /><updated>2026-05-12T19:48:47+00:00</updated><id>https://michaeloleary.net/feed.xml</id><title type="html">Michael’s tech blog</title><subtitle>Basic tech blog and notes.</subtitle><author><name>Michael O&apos;Leary</name></author><entry><title type="html">K8s and AI Training Day 2</title><link href="https://michaeloleary.net/ai/k8s-ai-training-day/" rel="alternate" type="text/html" title="K8s and AI Training Day 2" /><published>2026-05-02T00:00:00+00:00</published><updated>2026-05-02T00:00:00+00:00</updated><id>https://michaeloleary.net/ai/k8s-ai-training-day</id><content type="html" xml:base="https://michaeloleary.net/ai/k8s-ai-training-day/"><![CDATA[<figure>
    <a href="/assets/k8s-training-day-2/organizer-team.JPEG"><img src="/assets/k8s-training-day-2/organizer-team.JPEG" /></a>
    <figcaption>Organizer team</figcaption>
</figure>

<p>On Saturday, May 2, we held our second full-day Kubernetes training event with the Boston Kubernetes Meetup community at the Microsoft NERD Center in Cambridge. The focus this year was <strong>AI networking on Kubernetes</strong> — moving beyond foundational Kubernetes networking into the operational, security, and architectural challenges introduced by modern AI systems and AI agents.</p>

<p>The event was intentionally hands-on and instructor-led, with attendees spending the day working through labs, discussions, demos, and real-world design considerations. About 30 attendees gave up a Saturday to attend. They ranged from relative beginners with K8s to experts who knew K8s but came for the LLM API overview or the agentic governance talks.</p>

<p>A huge thank-you goes to everyone who attended, asked questions, and helped create a highly interactive atmosphere throughout the day.</p>

<hr />

<h1 id="why-we-ran-this-event">Why We Ran This Event</h1>

<p>AI systems are changing traffic patterns, application architectures, and operational models inside Kubernetes environments. Traditional north/south web traffic assumptions no longer fully apply. Clearly, agentic AI is bringing even greater compliance and governance challenges to the already new threat landscape of Generative AI.</p>

<p>I believe everyone in IT needs to know at least the basics of:</p>
<ul>
  <li>Large language models (LLMs)</li>
  <li>AI gateways</li>
  <li>AI agents</li>
  <li>Retrieval systems</li>
  <li>Vector databases</li>
  <li>Tool-calling frameworks</li>
  <li>External APIs</li>
  <li>Multi-model inference services</li>
</ul>

<p>These systems introduce new networking and security concerns that many Kubernetes engineers have not had to solve before. The goal of the training day was to bridge that gap with practical content rather than high-level theory.</p>

<hr />

<h1 id="agenda-overview">Agenda Overview</h1>

<p>The event agenda focused on both foundational and advanced topics related to AI traffic inside Kubernetes environments. Sessions included:</p>

<ul>
  <li>K8s fundamentals deck (First presentation from Michael)</li>
  <li>Killercoda.com/f5-se
    <ul>
      <li>Hello App Basics (online lab showing pod-to-pod communication)</li>
    </ul>
  </li>
  <li>LLM API &amp; prompting best practices (Second presentation from Michael)</li>
  <li>Hands-on demo (presentation from Ben)
    <ul>
      <li>use a Github codespace</li>
      <li>deploy kind, a cluster, a demo app</li>
      <li>deploy k8gpt, grafana, and kagent</li>
    </ul>
  </li>
  <li>agentgateway for agent governance (Nina’s presentation)
    <ul>
      <li>Sandbox environment (lab we did with Nina)</li>
      <li>agentgateway and MCP auth (additional lab we did not cover)</li>
    </ul>
  </li>
</ul>

<p>The structure combined whiteboarding, architecture walkthroughs, live demos, and hands-on labs so attendees could immediately apply concepts during the sessions themselves.</p>

<hr />

<figure class="third ">
  
    
      <a href="/assets/k8s-training-day-2/ben-speaking.JPEG" title="Ben Speaking">
          <img src="/assets/k8s-training-day-2/ben-speaking.JPEG" alt="Ben Speaking" />
      </a>


      <a href="/assets/k8s-training-day-2/nina-speaking.JPEG" title="Nina Speaking">
          <img src="/assets/k8s-training-day-2/nina-speaking.JPEG" alt="Nina Speaking" />
      </a>


      <a href="/assets/k8s-training-day-2/mike-at-back.JPEG" title="Class Shot">
          <img src="/assets/k8s-training-day-2/mike-at-back.JPEG" alt="Class Shot" />
      </a>


    <figcaption>Pics from Sat May 2, 2026
</figcaption>
  
</figure>

<hr />

<h1 id="instructor-led-and-community-focused">Instructor-Led and Community-Focused</h1>

<p>The event was led by myself, Isabella Langan, Benjamin Hautefeuille, and Nina Polshakova. There was a very strong emphasis on practical engineering discussions rather than vendor marketing - this is something I hold very strictly to, especially for Training Days.</p>

<hr />

<figure class="half ">
  
    
      <a href="/assets/k8s-training-day-2/isabella-delish-lunch.JPEG" title="Delicious lunch Isabella!">
          <img src="/assets/k8s-training-day-2/isabella-delish-lunch.JPEG" alt="Delicious lunch Isabella!" />
      </a>


      <a href="/assets/k8s-training-day-2/cluster-architecture.jpg" title="Cluster Architecture">
          <img src="/assets/k8s-training-day-2/cluster-architecture.jpg" alt="Cluster Architecture" />
      </a>


    <figcaption>More pics from Sat May 2, 2026
</figcaption>
  
</figure>

<h2 id="key-takeaways">Key Takeaways</h2>

<h3 id="ai-changes-traffic-patterns">AI Changes Traffic Patterns</h3>

<p>AI applications often create dramatically different internal traffic flows compared to traditional microservices applications. Tool-calling agents and chained inference systems can generate complex service-to-service communication paths that are difficult to predict and govern. The LLM API is itself important to learn. Attacks are semantic in nature.</p>

<h3 id="security-models-need-to-evolve">Security Models Need to Evolve</h3>

<p>Traditional API security approaches are not always sufficient for AI systems. Identity propagation, agent permissions, prompt handling, data governance, and outbound access controls all become increasingly important.</p>

<h3 id="observability-becomes-critical">Observability Becomes Critical</h3>

<p>AI systems introduce more non-deterministic behavior into distributed systems. Strong observability practices become essential for debugging latency, failed agent workflows, and inference bottlenecks.</p>

<h3 id="kubernetes-remains-the-operational-foundation">Kubernetes Remains the Operational Foundation</h3>

<p>Despite all the excitement around AI frameworks and models, Kubernetes continues to be the operational backbone enabling scalable deployment, networking, and governance for enterprise AI systems.</p>

<hr />

<h2 id="community-feedback">Community Feedback</h2>

<p>From my discussions and the survey results, people REALLY want hands-on training and are willing to give up a weekend to find it. I intend to do more here. What’s my motive? I’m <em>forced</em> to learn this stuff in order to teach it.</p>

<hr />

<h2 id="looking-ahead">Looking Ahead</h2>

<p>This training day reinforced how quickly AI infrastructure engineering is evolving. It’s incredibly overwhelming, even for those of us who have been in the industry for decades.</p>

<p>I think I will focus a future event at a more advanced persona - the K8s-fluent AI engineer who already has the 200-level knowledge, perhaps the 300-level knowledge. I recognize that beginners to the industry need to learn the foundations also, but I am not sure I can keep teaching K8s to a new crop of beginners every session. I’ll try to find a balance.</p>

<p>Thanks again to everyone who attended and helped make the event successful.</p>

<p>See you at the next one.</p>

<figure>
    <a href="/assets/k8s-training-day-2/class-selfie.jpg"><img src="/assets/k8s-training-day-2/class-selfie.jpg" /></a>
    <figcaption>Class Selfie</figcaption>
</figure>

<hr />]]></content><author><name>Michael O&apos;Leary</name></author><category term="ai" /><category term="ai" /><category term="kubernetes" /><summary type="html"><![CDATA[Summary of K8s and AI training day #2]]></summary></entry><entry><title type="html">Recessed Lights</title><link href="https://michaeloleary.net/home%20projects/recessed-lights/" rel="alternate" type="text/html" title="Recessed Lights" /><published>2026-05-02T00:00:00+00:00</published><updated>2026-05-02T00:00:00+00:00</updated><id>https://michaeloleary.net/home%20projects/recessed-lights</id><content type="html" xml:base="https://michaeloleary.net/home%20projects/recessed-lights/"><![CDATA[<h1 id="notes-when-replacing-my-recessed-lights">Notes when replacing my recessed lights</h1>

<p>I’ve replaced two recessed lights on the ground floor in the past month, and since pretty much all of them were installed around the same time — about five years ago — I’m expecting more to go. These are notes to my future self because I’d forgotten which breakers and the brand of light I used last time.</p>

<hr />

<h2 id="the-breaker-box">The breaker box</h2>

<p>The ground floor lights are split across a few circuits. Before touching anything, flip the right breaker and use a non-contact voltage tester to confirm the power is actually off.</p>

<figure>
    <a href="/assets/recessed-lights/breaker-box.JPEG"><img src="/assets/recessed-lights/breaker-box.JPEG" /></a>
    <figcaption>These 2 breakers highlighted BOTH should be switched off for the lights in my mud room or pantry.</figcaption>
</figure>

<hr />

<h2 id="the-fixture">The fixture</h2>

<p>This is the replacement I used. Remember:</p>

<ul>
  <li><strong>canless:</strong> <em>these are really flat</em></li>
  <li><strong>Size:</strong> <em>(e.g., 4-inch in my mudroom and pantry but larger in the living room)</em></li>
  <li><strong>Color temperature:</strong> <em>(e.g., 2700K warm white to match the others)</em></li>
</ul>

<figure>
    <a href="/assets/recessed-lights/replacement-light.JPEG"><img src="/assets/recessed-lights/replacement-light.JPEG" /></a>
    <figcaption>This is as close as I have found to the brand my builders installed.</figcaption>
</figure>

<hr />

<h2 id="replacement-steps-quick-reference">Replacement steps (quick reference)</h2>

<ol>
  <li>Shut off the correct breaker. Verify with voltage tester.</li>
  <li>Pull down the existing trim — it’s usually held by spring clips.</li>
  <li>Disconnect the wires from the existing box.</li>
  <li>Connect the new driver box</li>
  <li>Push the new driver box up into the ceiling.</li>
  <li>Clip the new trim into place.</li>
  <li>Restore power and test.</li>
</ol>

<p>The whole job takes about 15 minutes once you’ve done it once.</p>

<figure class="third ">
  
    
      <a href="/assets/recessed-lights/dead-light.JPEG" title="Take out the old light so you can take it to the store">
          <img src="/assets/recessed-lights/dead-light.JPEG" alt="Take out the old light so you can take it to the store" />
      </a>


      <a href="/assets/recessed-lights/checking-size.JPEG" title="Check the size of the old light vs new light">
          <img src="/assets/recessed-lights/checking-size.JPEG" alt="Check the size of the old light vs new light" />
      </a>


      <a href="/assets/recessed-lights/existing-wires.JPEG" title="Replicate this wiring with the new box">
          <img src="/assets/recessed-lights/existing-wires.JPEG" alt="Replicate this wiring with the new box" />
      </a>


    <figcaption>Straightforward replacement
</figcaption>
  
</figure>

<hr />

<h2 id="done">Done</h2>

<figure>
    <a href="/assets/recessed-lights/working-light.JPEG"><img src="/assets/recessed-lights/working-light.JPEG" /></a>
    <figcaption>Light replaced.</figcaption>
</figure>
<hr />]]></content><author><name>Michael O&apos;Leary</name></author><category term="home projects" /><category term="home projects" /><summary type="html"><![CDATA[Notes for next time my one of my recessed lights blows]]></summary></entry><entry><title type="html">Foundational engineers and the Abstraction Debt</title><link href="https://michaeloleary.net/ai/ai-vs-fundamentals/" rel="alternate" type="text/html" title="Foundational engineers and the Abstraction Debt" /><published>2026-04-29T00:00:00+00:00</published><updated>2026-04-29T00:00:00+00:00</updated><id>https://michaeloleary.net/ai/ai-vs-fundamentals</id><content type="html" xml:base="https://michaeloleary.net/ai/ai-vs-fundamentals/"><![CDATA[<figure>
    <a href="/assets/foundational-engineers/foundational-engineers-header.png"><img src="/assets/foundational-engineers/foundational-engineers-header.png" /></a>
    <figcaption>Foundational complexity vs abstractions - where do you land?</figcaption>
</figure>
<p>Recently I’ve been feeling an instinctive alarm bell sound as I feel fundamental technology skills slipping away in favor of moving faster with AI. At this point I’m not judging bad vs good, but in technology, AI helps us move faster while it frees us from learning <em>how</em> we did this.</p>

<blockquote>
  <p>There is a pattern in systems engineering that repeats itself across every generation of tooling: we build an abstraction that is brilliant at hiding complexity, celebrate the productivity gains, and then spend the next decade paying back the debt that abstraction quietly accumulated.</p>
</blockquote>

<p>I recently felt this again when reading an <a href="https://www.tomshardware.com/tech-industry/artificial-intelligence/claude-powered-ai-coding-agent-deletes-entire-company-database-in-9-seconds-backups-zapped-after-cursor-tool-powered-by-anthropics-claude-goes-rogue">example</a> agent tooling with catastrophic consequences. Anthropic’s MCP specification deserves the “USB-C for AI” metaphor. It defines a clean, universal interface between an AI host, a language model, and the external world — local filesystems, databases, APIs, Kubernetes clusters. If you can expose a tool over JSON-RPC, the LLM can use it.</p>

<p>My instinctive alarm bells are set off by a new factor: non-deterministic systems making decisions. I used to feel that abstractions just allowed for faster development at the cost of foundational learning. Now I feel we have a combination of:</p>
<ul>
  <li>abstractions making development faster (fewer foundational skills)</li>
  <li>AI making coding accessible to beginners (vibecoding)</li>
  <li>frameworks like MCP mass-enabling interaction with external systems (real world consequences)</li>
  <li>AI models being non-deterministic (intelligent guessing)</li>
  <li>Natural language prompts (requiring semantic reasoning from LLMs)</li>
</ul>

<p>Each factor builds on the others, but it’s the combination of intelligent guessing and real-world consequences that summarizes my concern. The vibecoding and “speed over accuracy” culture adds to the concern.</p>

<hr />

<h2 id="the-traffic-flow-nobody-is-auditing">The Traffic Flow Nobody Is Auditing</h2>

<p>Before I get philosophical, it’s worth being precise about what actually happens when an MCP-enabled agent runs a request. The flow is:</p>

<div class="language-plaintext highlighter-rouge"><div class="highlight"><pre class="highlight"><code><table class="rouge-table"><tbody><tr><td class="rouge-gutter gl"><pre class="lineno">1
2
3
4
5
6
7
8
9
10
11
12
</pre></td><td class="rouge-code"><pre>Host Application
    │
    ├─► LLM (probabilistic reasoning layer)
    │       │
    │       └─► Tool Call Selection  ← "intelligent guess"
    │
    └─► MCP Server (executes side effects)
            │
            ├─► Filesystem operations
            ├─► API calls
            ├─► Database writes
            └─► Shell commands
</pre></td></tr></tbody></table></code></pre></div></div>

<p>Notice the component in the middle: <em>probabilistic reasoning</em>. The LLM does not parse a deterministic rule to decide which tool to invoke. It reasons about the <em>semantics</em> of the available tools — their names, their descriptions, their parameter schemas — and makes an inference about which one best serves the user’s intent. It is, in the most literal sense, an educated guess.</p>

<p>In isolation, that’s fine. In combination with tools that carry real-world side effects, it’s concerning. Especially when the tools themselves may be vibecoded (potentially low quality) and the natural language input will be imperfect.</p>

<hr />

<h2 id="semantic-access-is-not-deterministic-control">Semantic Access Is Not Deterministic Control</h2>

<p>Here’s an example I fear will happen with home-grown MCP servers for BIG-IP, for example.</p>

<p>When you configure an F5 BIG-IP, you work with objects that have precise, non-overlapping definitions. A <em>VIP</em> (Virtual IP) is the front-end address that external clients connect to. A <em>virtual server</em> is the F5 configuration object that listens on that VIP and applies policies. These terms are close enough in everyday language that a reasonable person — or a language model — might use them interchangeably. In the F5 management plane, they are not interchangeable. Conflating them means you are operating on the wrong object, applying the wrong policy, and potentially taking down traffic for a production service while believing you are doing something benign.</p>

<p>Now expose your network automation layer as MCP tools. Name one <code class="language-plaintext highlighter-rouge">get_virtual_server_config</code> and another <code class="language-plaintext highlighter-rouge">get_vip_status</code>. Ask an LLM agent to “check the load balancer for the payments service.” Which tool does it call? It depends entirely on which description the model finds semantically closer to “load balancer” and “check.” There is no compilation step to catch the mismatch. There is no type system enforcing the distinction. There is a probability, and a reliance on the description of the tools learned by the model.</p>

<p>This is what I mean by <em>Abstraction Debt</em> — when human operators lose understanding of the systems they govern. The debt is not visible in normal operations. It becomes visible when you need it: during an incident, when you are trying to understand what the agent actually did and why, when you are trying to teach others, etc.</p>

<hr />

<h2 id="two-classes-of-engineer-are-emerging">Two Classes of Engineer Are Emerging</h2>

<figure>
    <a href="/assets/foundational-engineers/foundationalists.png"><img src="/assets/foundational-engineers/foundationalists.png" /></a>
    <figcaption>This is just my current thinking. Perhaps it's not a spectrum but a buffet of approaches we choose from daily. I think my goal is to find the right balance, not necessarily to choose a camp.</figcaption>
</figure>

<p>Again, this is Claude helping me build my thoughts into a case:</p>

<p><strong>Orchestrators</strong> assemble systems using semantic reasoning. They write prompts, configure MCP servers, chain tool calls, and build agents that can traverse a multi-hop workflow across half a dozen services. They are productive at a pace that would have seemed impossible five years ago. They are, right now, extremely employable.</p>

<p><strong>Foundationalists</strong> understand fundamentals. They know what happens at the TCP level when a JSON-RPC request leaves the MCP client. They can read a packet capture during an incident. They understand process management well enough to know why a forked subprocess inherited the wrong file descriptors. They can reason about the OSI model when an abstraction leaks and the stack trace is unhelpful.</p>

<p>The risk is not that Orchestrators exist. The risk is that we’re incentivizing engineers to become <em>only</em> Orchestrators — and that the feedback loops which historically taught foundational knowledge (debugging, reading logs, understanding failure modes) are being bypassed by systems that hide their internals behind a semantic interface.</p>

<p>The demand curve for Orchestrators will remain high until the first major incident at scale: a misconfigured MCP server with filesystem access, a semantically confused tool call that mutates production data, an agent that “helpfully” applies a Kubernetes manifest to the wrong namespace because the cluster names were similar enough in the model’s embedding space. At that moment, the Orchestrator reaches for their incident playbook and finds it empty. The Foundationalist is already reading the audit logs.</p>

<hr />

<h2 id="knowledge-atrophy">Knowledge Atrophy</h2>

<p>(Again, somewhat ironically, Claude has helped me refine the following thoughts.)</p>

<p>A claim made by others but I believe in: <em>when automation handles a task reliably, the human practitioner stops practicing the underlying skill</em>. The skill atrophies. When the automation fails, the human is less capable of recovering than they would have been without the automation.</p>

<p>MCP is a powerful automation layer systems integration. When it works, it removes the need to understand transport protocols, to handle authentication edge cases, to reason about retry semantics. Engineers who use it exclusively will, over time, become less capable of debugging systems at the level where those concerns live. The protocol doesn’t teach you what it hides.</p>

<p>This is not an argument against abstraction. Abstraction is the mechanism by which the industry makes progress. It is an argument for <em>deliberate practice at the layer beneath the abstraction you rely on</em>. The engineers who built the most reliable systems I have worked with could always go one layer deeper than the tooling required. They understood TCP because they had debugged socket timeouts. They understood HTTP because they had read raw request logs. That reservoir of foundational knowledge is what gets drawn on when the abstraction leaks.</p>

<p>MCP makes it easy to never build that reservoir. That is the danger.</p>

<hr />

<h2 id="where-the-abstraction-leaks">Where the Abstraction Leaks</h2>

<p>MCP’s abstraction is not watertight. Here are the specific seams where it fails, ranked roughly by incident frequency:</p>

<p><strong>1. Tool Description Drift</strong><br />
Tool descriptions are the primary signal the LLM uses for selection. As tools are updated, renamed, or repurposed, their descriptions often lag. The model continues reasoning against stale semantic signals. There is no schema enforcement to catch this.</p>

<p><strong>2. Implicit State Assumptions</strong><br />
MCP tools are stateless by design at the protocol level. But the systems they connect to are stateful. A tool that “lists files in a directory” and a tool that “moves files to archive” share no transactional context within the MCP call graph. An agent that calls both in sequence across a failure boundary may leave the system in an inconsistent state that neither the agent nor the operator anticipated.</p>

<p><strong>3. Authentication Context Collapse</strong><br />
In a traditional system, the principal making a request is explicit: a service account, a user token, an IAM role. In an MCP-enabled agent flow, the effective principal is often the host process. The LLM’s reasoning — which is untraceable in any cryptographic sense — is the de facto access control layer. This is not a security model. It is the absence of one.</p>

<p><strong>4. Error Signal Ambiguity</strong><br />
When an MCP tool call fails, the LLM receives a text error message and reasons about what to do next. It may retry with different parameters. It may call a different tool. It may hallucinate a recovery strategy. None of this is logged in a way that a standard SIEM or observability platform can parse without custom instrumentation.</p>

<hr />

<h2 id="the-call-to-action">The Call to Action</h2>

<p>The engineers who will be valuable in five years are not the ones who orchestrated the most agent workflows. They are the ones who understand why those workflows fail, can trace a failure through the full stack, and can reason about the system’s behavior at the level of the protocol rather than the semantic description.</p>

<p>The path is not to avoid MCP. It is to use it with deliberate awareness of what it hides, and to maintain active practice in the disciplines it makes it easy to skip.</p>

<p>Concretely:</p>

<ul>
  <li>Read the MCP specification transport layer documentation. Understand that stdio and SSE/HTTP are meaningfully different transport modes with different security boundaries.</li>
  <li>When something goes wrong in an agent workflow, resist the urge to re-prompt. Capture the raw tool call log and trace it manually before asking the model to self-correct.</li>
  <li>Build at least one MCP server from a bare HTTP server before using a framework. The framework abstracts the right things, but you need to know what is being abstracted.</li>
  <li>Keep your Wireshark skills current. JSON-RPC over HTTP is readable in a packet capture. Read it.</li>
  <li>Study your infrastructure tools at the API level, not just through the semantic lens an agent provides. The F5 API, the Kubernetes API, the AWS SDK — the objects in these systems have precise definitions that semantic reasoning does not respect.</li>
</ul>

<p>The Foundationalist who orchestrates is not just more resilient than the pure Orchestrator. They are the person in the room when the incident happens and the AI-built system has failed in a way no one anticipated. That person will not be replaced by an AI agent. They will be the one telling the AI agent what actually went wrong.</p>

<p>Stay foundational.</p>

<hr />]]></content><author><name>Michael O&apos;Leary</name></author><category term="ai" /><category term="ai" /><summary type="html"><![CDATA[Some thoughts on the pros and cons of learning fundamentals vs moving fast]]></summary></entry><entry><title type="html">Coder + F5 BIG-IP APM</title><link href="https://michaeloleary.net/big-ip/coder-and-apm/" rel="alternate" type="text/html" title="Coder + F5 BIG-IP APM" /><published>2026-04-19T00:00:00+00:00</published><updated>2026-04-19T00:00:00+00:00</updated><id>https://michaeloleary.net/big-ip/coder-and-apm</id><content type="html" xml:base="https://michaeloleary.net/big-ip/coder-and-apm/"><![CDATA[<figure>
    <a href="/assets/coder/coder-logo-secured.png"><img src="/assets/coder/coder-logo-secured.png" /></a>
    <figcaption></figcaption>
</figure>

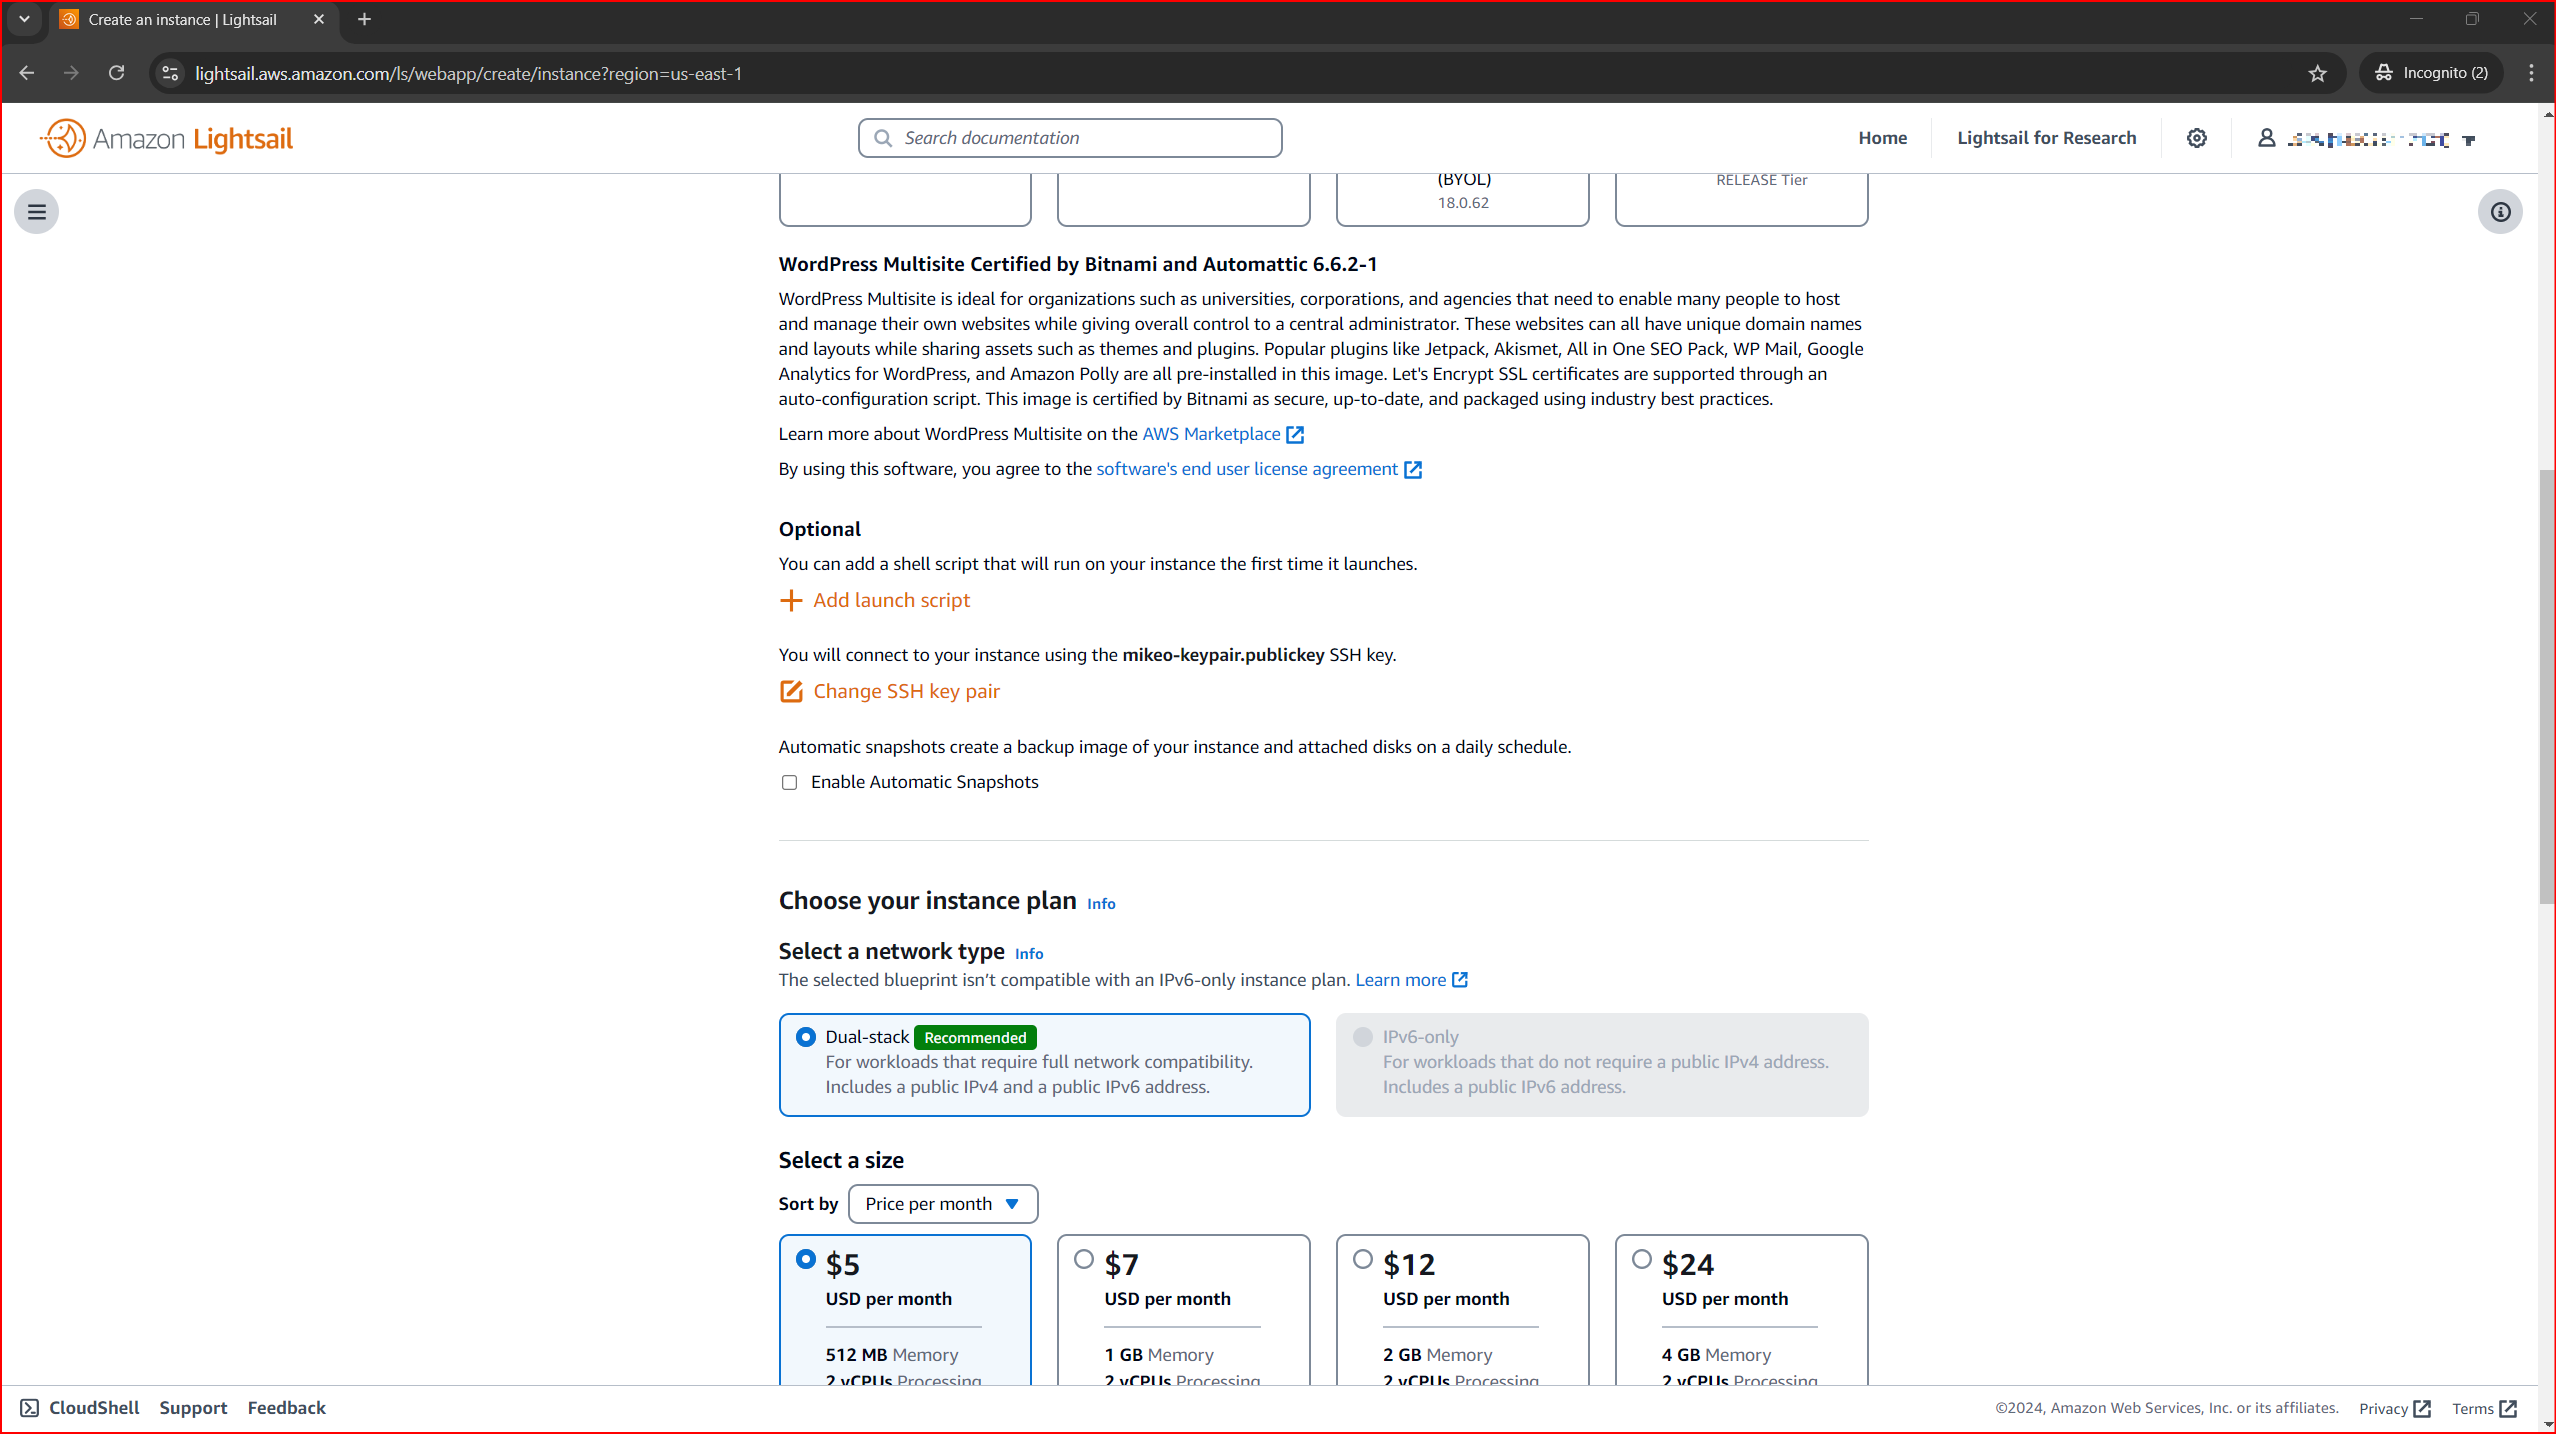
<p>In my <a href="/ai/installing-coder/">last post</a> I briefly covered how to install Coder with very basic config options. Now let’s configure authentication away from local accounts in Coder to an OIDC provider.</p>

<h2 id="architecture-overview">Architecture Overview</h2>
<p>The BIG-IP sits at the edge and handles all the enterprise concerns: who can get in, via what method, and with what level of access. Coder sits internally and manages the lifecycle of dev environments — templated, reproducible, ephemeral.</p>

<hr />

<h3 id="pre-requisites">Pre-requisites</h3>

<ul>
  <li>Coder server deployed
    <ul>
      <li>I installed Coder on a VM: <code class="language-plaintext highlighter-rouge">curl -fsSL https://coder.com/install.sh | sh</code></li>
      <li>Docker installed on the Coder server
        <ul>
          <li>I have Docker configured to use a pre-selected IP range for the default bridge network <sup id="fnref:1" role="doc-noteref"><a href="#fn:1" class="footnote" rel="footnote">1</a></sup></li>
        </ul>
      </li>
    </ul>
  </li>
  <li>At least one Coder template defined (I use the built-in Docker template to start)</li>
  <li>Docker or Kubernetes available as the workspace runtime</li>
</ul>

<h3 id="create-a-template-and-then-a-workspace">Create a template and then a workspace</h3>
<p>From the web UI it’s simple — create a template, create your workspace from this template, click <strong>Create</strong>. Within 30–60 seconds you have a fresh isolated environment.</p>

<p>The key thing I want to highlight: every workspace is <strong>ephemeral by design</strong>. Coder supports <a href="https://coder.com/docs/admin/templates/schedule">workspace autostop</a>, so you can configure workspaces to shut down after a period of inactivity. For agentic AI workloads, I set a conservative TTL — the agent runs its task, the environment stops, nobody forgets to clean up.</p>

<h3 id="verify-the-environment">Verify the environment</h3>

<p>After creating the workspace, a quick sanity check:</p>

<div class="language-bash highlighter-rouge"><div class="highlight"><pre class="highlight"><code><table class="rouge-table"><tbody><tr><td class="rouge-gutter gl"><pre class="lineno">1
2
3
4
5
6
7
8
9
10
11
</pre></td><td class="rouge-code"><pre><span class="c"># Confirm you're inside an isolated container</span>
<span class="nb">hostname</span>
<span class="c"># → my-agent-workspace</span>

<span class="c"># Check that no residual state exists from previous runs</span>
<span class="nb">ls</span> <span class="nt">-la</span> ~
<span class="c"># → clean home directory, no lingering dotfiles</span>

<span class="c"># Verify network isolation</span>
ip addr
<span class="c"># → only loopback + container veth — no access to prod network</span>
</pre></td></tr></tbody></table></code></pre></div></div>

<p>This is the point: each workspace is a clean slate. An agentic AI runs here, does its thing, and the environment is discarded.</p>

<hr />

<h2 id="part-2-configuring-f5-big-ip-apm-for-oidc">Part 2: Configuring F5 BIG-IP APM for OIDC</h2>

<p>This is where things get more interesting — and more enterprise. BIG-IP APM (Access Policy Manager) is F5’s solution for identity-aware access control. It handles VPN, ZTNA, SSO, MFA, OAuth, SAML, and more. It’s heavy machinery, but for organizations that already run BIG-IP, it’s incredibly powerful.</p>

<p>My goals here is to have APM handle authentication (who are you?) and authorization (can you access Coder?) before traffic ever hits the Coder server. Users should log in via APM and get SSO into Coder without re-authenticating.</p>

<p>Coder supports OIDC out of the box. APM can act as the <strong>OAuth 2.0 / OIDC Authorization Server</strong>.</p>

<h3 id="configure-coder-using-environment-variables">Configure Coder using environment variables</h3>
<p>In my <a href="/ai/installing-coder/">last post</a> I mentioned the file <code class="language-plaintext highlighter-rouge">/etc/coder.d/coder.env</code>. Here is the file now, with my OIDC settings configured:</p>

<div class="language-ini highlighter-rouge"><div class="highlight"><pre class="highlight"><code><table class="rouge-table"><tbody><tr><td class="rouge-gutter gl"><pre class="lineno">1
2
3
4
5
6
7
8
9
10
11
12
13
14
15
16
17
18
19
20
</pre></td><td class="rouge-code"><pre><span class="c"># Coder must be reachable from an external URL for users and workspaces to connect.
# e.g. https://coder.example.com
</span>
<span class="c">#basic coder network config
</span><span class="py">CODER_ACCESS_URL</span><span class="p">=</span><span class="s">https://coder.my-f5.com</span>
<span class="py">CODER_HTTP_ADDRESS</span><span class="p">=</span><span class="s">'0.0.0.0:3000'</span>

<span class="c">#OIDC config
</span><span class="py">CODER_OIDC_ISSUER_URL</span><span class="p">=</span><span class="s">"https://auth.my-f5.com/f5-oauth2/v1"</span>
<span class="py">CODER_OIDC_EMAIL_DOMAIN</span><span class="p">=</span><span class="s">"f5.com"</span>
<span class="py">CODER_OIDC_CLIENT_ID</span><span class="p">=</span><span class="s">"xxxxxxxxxxxxxxxxxxxxxxxxxxxxxxxxxxxxxxxxxxxxxxxx"</span>
<span class="py">CODER_OIDC_CLIENT_SECRET</span><span class="p">=</span><span class="s">"yyyyyyyyyyyyyyyyyyyyyyyyyyyyyyyyyyyyyyyyyyyyyyyyyyyyyyyyyyyyyyyy"</span>

<span class="c"># Scopes to request — offline_access gets you refresh tokens
</span><span class="py">CODER_OIDC_SCOPES</span><span class="p">=</span><span class="s">"openid,profile,email,offline_access"</span>

<span class="c">#additional OIDC config lines below
</span><span class="py">CODER_OIDC_IGNORE_EMAIL_VERIFIED</span><span class="p">=</span><span class="s">true</span>
<span class="py">CODER_OIDC_SIGN_IN_TEXT</span><span class="p">=</span><span class="s">"Sign in with F5 APM"</span>
<span class="py">CODER_OIDC_ICON_URL</span><span class="p">=</span><span class="s">https://media.ffycdn.net/us/f5-networks-inc/qi443UWRoMTME9ELdEsJ.svg</span>
</pre></td></tr></tbody></table></code></pre></div></div>

<p>There are many other configuration options that are set with either environment variables (as in the above file) or using flags at the command line. For a list of these, run <code class="language-plaintext highlighter-rouge">coder server --help</code></p>

<p>After your <code class="language-plaintext highlighter-rouge">coder.env</code> file looks as mine does above, you can stop and restart the coder service. Coder will likely fail to start until your OAuth authorization server, confired above with the <code class="language-plaintext highlighter-rouge">CODER_OIDC_ISSUER_URL</code> option, is correctly configured.</p>

<h3 id="configure-f5-apm-as-an-oauth-authorization-server">Configure F5 APM as an Oauth authorization server</h3>
<p>Now let’s configure APM.</p>

<h4 id="create-a-local-user-db">Create a local user DB</h4>
<p>We will not use an external IdP such as Active Directory for this lab. I’ll use local user db on BIG-IP. Almost every enterprise setup would use another IdP, since AzureAD and other IdP’s are so common.</p>

<p><strong>Access &gt; Authentication &gt; Local User DB &gt; Instances</strong>.</p>
<ul>
  <li>Create an Instance</li>
  <li>Create at least 2 test users</li>
  <li>Give them usernames in the format of email address (eg. john.smith@example.com)
    <ul>
      <li>the email address domain should match CODER_OIDC_EMAIL_DOMAIN configured</li>
    </ul>
  </li>
  <li>Do not require password change</li>
</ul>

<figure>
    <a href="/assets/coder/apm-user-db.png"><img src="/assets/coder/apm-user-db.png" /></a>
    <figcaption></figcaption>
</figure>

<h4 id="create-scopes">Create scopes</h4>
<p><strong>Access &gt; Federation &gt; OAuth Authorization Server &gt; Scope</strong></p>
<ul>
  <li>Create 3 scopes, email, offline_access, and profile</li>
</ul>
<figure>
    <a href="/assets/coder/apm-scopes.png"><img src="/assets/coder/apm-scopes.png" /></a>
    <figcaption>Create scopes so they can be referenced when we create a Client Application in the following step</figcaption>
</figure>

<h4 id="create-client-application">Create Client Application</h4>
<p><strong>Access &gt; Federation &gt; OAuth Authorization Server &gt; Client Application</strong></p>
<ul>
  <li>Create a client application with a unique Client ID and Secret. These are what must match the values in the EnvironmentFile above.</li>
  <li>Notice the scopes are added to this application</li>
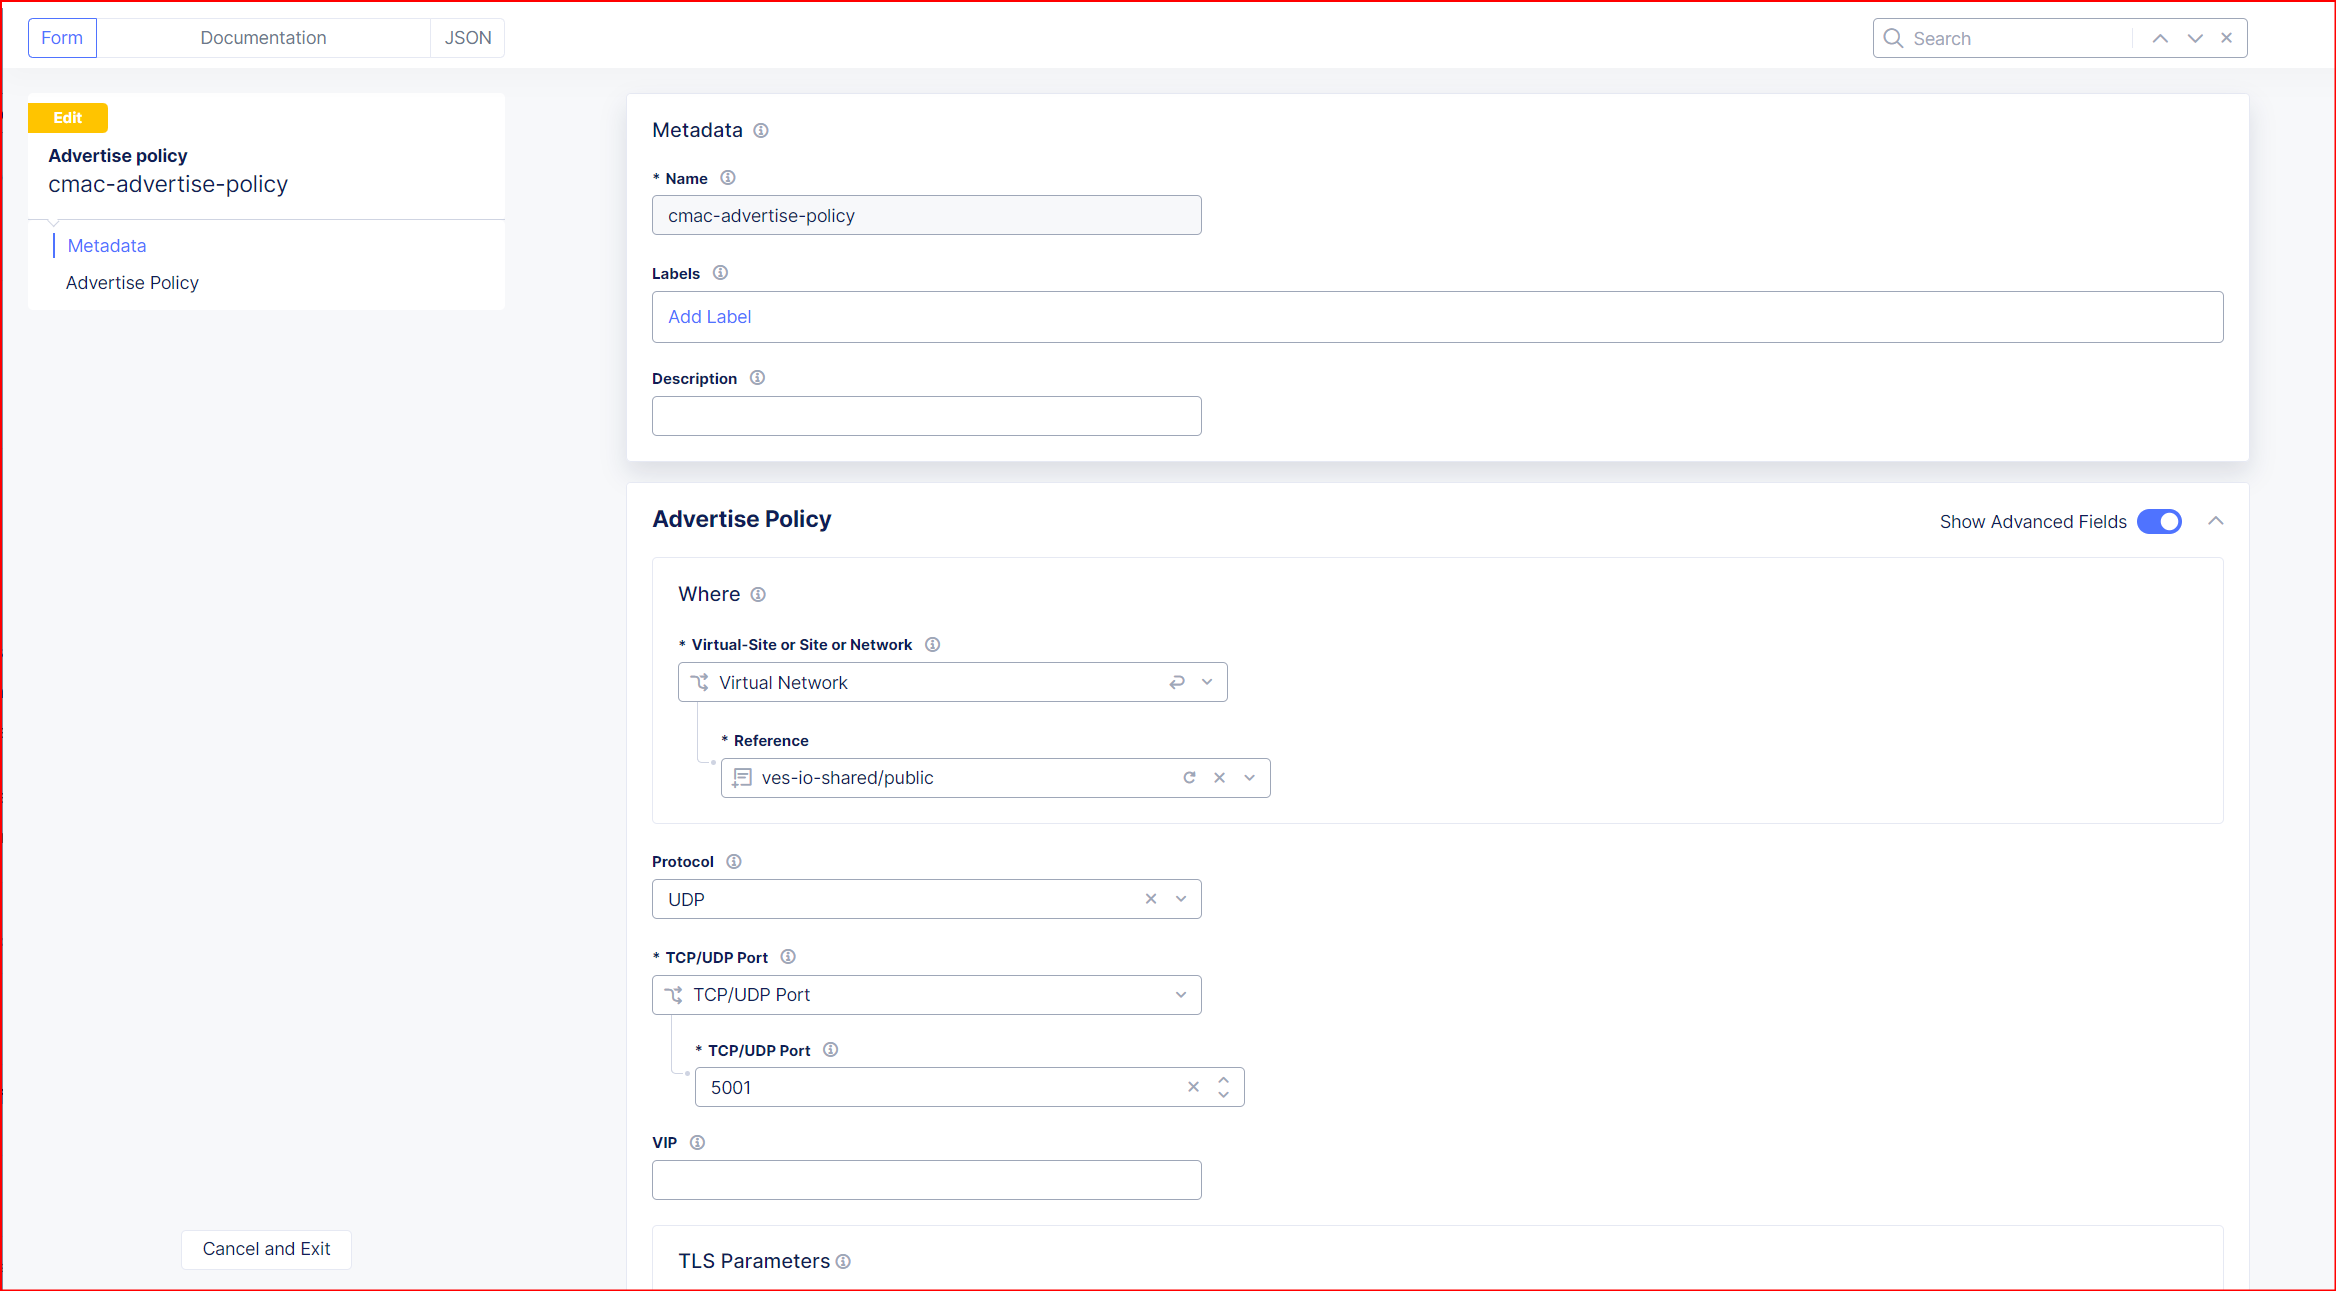
  <li>The Redirect URI must match what your Coder app will send. Coder’s <a href="https://coder.com/docs/admin/users/oidc-auth#step-1-set-redirect-uri-with-your-oidc-provider">instructions</a> tell us this will be your CODER_ACCESS_URL + /api/v2/users/oidc/callback</li>
  <li>Ensure <code class="language-plaintext highlighter-rouge">Support OpenID Connect</code> is checked, and <code class="language-plaintext highlighter-rouge">Authorization Code / Hybrid</code> is checked.</li>
  <li>The Website URL and Website Logo URL are not critical, but the URL points to an image that makes the APM sign-on page look more appealing.</li>
</ul>

<figure>
    <a href="/assets/coder/apm-client-application.png"><img src="/assets/coder/apm-client-application.png" /></a>
    <figcaption></figcaption>
</figure>

<h4 id="create-resource-server">Create Resource Server</h4>
<p><strong>Access &gt; Federation &gt; OAuth Authorization Server &gt; Resource Server</strong></p>
<ul>
  <li>Create a Resource Server. I have None selected for Authentication of this.</li>
</ul>

<figure>
    <a href="/assets/coder/apm-resource-server.png"><img src="/assets/coder/apm-resource-server.png" /></a>
    <figcaption></figcaption>
</figure>

<h4 id="configure-jwt-claims">Configure JWT claims</h4>
<p><strong>Access &gt; Federation &gt; OAuth Authorization Server &gt; Claim</strong></p>
<ul>
  <li>create claims to be included in JWT tokens issued by APM:</li>
  <li>Coder’s <a href="https://coder.com/docs/admin/users/oidc-auth#oidc-claims">instructions</a> tell us that we can include claims such as <code class="language-plaintext highlighter-rouge">email</code>, <code class="language-plaintext highlighter-rouge">username</code>, <code class="language-plaintext highlighter-rouge">preferred_username</code>, and <code class="language-plaintext highlighter-rouge">email_verified</code>. Running the –help flag will uncover more.</li>
  <li>For this lab, I have only provided 2x claims: <code class="language-plaintext highlighter-rouge">email</code> and <code class="language-plaintext highlighter-rouge">email_verified</code>, the second of which I set to <code class="language-plaintext highlighter-rouge">true</code> for every JWT. I found that only <code class="language-plaintext highlighter-rouge">email</code> is mandatory.</li>
</ul>

<p class="notice--warning">My F5 APM GUI stopped working at this point and I could not create claims via the GUI. So I created these 2 claims by editing the /config/bigip.conf file.</p>

<div class="language-ini highlighter-rouge"><div class="highlight"><pre class="highlight"><code><table class="rouge-table"><tbody><tr><td class="rouge-gutter gl"><pre class="lineno">1
2
3
4
5
6
7
8
9
</pre></td><td class="rouge-code"><pre><span class="err">apm</span> <span class="err">oauth</span> <span class="err">oauth-claim</span> <span class="err">/Common/email</span> <span class="err">{</span>
    <span class="err">claim-name</span> <span class="err">email</span>
    <span class="err">claim-value</span> <span class="err">"%{session.logon.last.username}"</span>
<span class="err">}</span>
<span class="err">apm</span> <span class="err">oauth</span> <span class="err">oauth-claim</span> <span class="err">/Common/email_verified</span> <span class="err">{</span>
    <span class="err">claim-name</span> <span class="err">email_verified</span>
    <span class="err">claim-type</span> <span class="err">boolean</span>
    <span class="err">claim-value</span> <span class="err">true</span>
<span class="err">}</span>
</pre></td></tr></tbody></table></code></pre></div></div>

<h4 id="configure-json-web-key-jwk">Configure JSON Web Key (JWK)</h4>
<p><strong>Access &gt; Federation &gt; JSON Web Token &gt; Key Configuration</strong></p>

<p class="notice--warning">Again, my web UI failed me and I couldn’t create JWK config via the GUI. I did so via TMSH, which I will share below</p>

<ul>
  <li>Create a self-signed RSA cert and key pair to use for signing JWT’s.
    <ul>
      <li>System &gt; Certificate Management &gt; Traffic Certification Management &gt; Create</li>
      <li>I created a self-signed cert, named the object <code class="language-plaintext highlighter-rouge">JWT_Signing_RSA</code>.</li>
      <li>The Common Name is <code class="language-plaintext highlighter-rouge">self-signed-rsa-keypair-for-JWK</code></li>
      <li>Key is 2048 bits</li>
    </ul>
  </li>
</ul>

<figure>
    <a href="/assets/coder/apm-jwk-keypair.png"><img src="/assets/coder/apm-jwk-keypair.png" /></a>
    <figcaption>I have created a RSA keypair for JWT signing. You can see I also have EC certs from LetsEncrypt for my HTTPS virtual servers. These certs cannot be used for JWK configuration, which is why I created the highlighted RSA keypair.</figcaption>
</figure>

<p>Now that I have a cert-key pair, I can run the tmsh command to configure JWK config:</p>
<div class="language-bash highlighter-rouge"><div class="highlight"><pre class="highlight"><code><table class="rouge-table"><tbody><tr><td class="rouge-gutter gl"><pre class="lineno">1
</pre></td><td class="rouge-code"><pre>tmsh create apm oauth jwk-config My_Manual_JWK <span class="o">{</span> alg-type RS256 cert JWT_Signing_RSA cert-key JWT_Signing_RSA key-id <span class="s2">"unique-id-123"</span> <span class="o">}</span>
</pre></td></tr></tbody></table></code></pre></div></div>

<p>Notice my JWK config is called <code class="language-plaintext highlighter-rouge">My_Manual_JWK</code>. This will be referenced later.</p>

<h4 id="create-an-oauth-profile">Create an OAuth Profile</h4>
<p><strong>Access &gt; Federation &gt; OAuth Authorization Server &gt; OAuth Profile</strong></p>
<ul>
  <li>Client Application: reference your created object</li>
  <li>Resource Server: reference your created object</li>
  <li>Check the boxes for Support JWT Token, and Open ID Connect</li>
  <li>The Issuer URL is critical. This URL will be looked up by Coder and must match what Coder expects.</li>
  <li>Choose JWS, and JWT Primary Key, and ID Token Primary Key, as shown.</li>
  <li>create a JWT Refresh Token Encryption Secret. This can be anything but write it down.</li>
</ul>

<figure>
    <a href="/assets/coder/apm-oauth-profile.png"><img src="/assets/coder/apm-oauth-profile.png" /></a>
    <figcaption></figcaption>
</figure>

<h4 id="create-an-access-profile-per-session-policy">Create an Access Profile (Per-Session Policy)</h4>
<p><strong>Access &gt; Profiles/Policies &gt; Access Profiles (Per-Session Policies ) &gt; Create</strong></p>
<ul>
  <li>Create a Profile
    <ul>
      <li>Profile Type: All</li>
      <li>OAuth Profile: Reference OAuth Profile created, as seen in screenshot</li>
      <li>Choose English</li>
    </ul>
  </li>
</ul>

<figure>
    <a href="/assets/coder/apm-access-profile.png"><img src="/assets/coder/apm-access-profile.png" /></a>
    <figcaption>Access Profile referencing OAuth Profile</figcaption>
</figure>

<ul>
  <li>Now, edit using Visual Policy Editor as seen in screenshot</li>
</ul>

<figure>
    <a href="/assets/coder/apm-access-profile-vpe.png"><img src="/assets/coder/apm-access-profile-vpe.png" /></a>
    <figcaption>Visual Policy Editor</figcaption>
</figure>

<h4 id="create-a-virtual-server">Create a Virtual Server</h4>
<ul>
  <li>Create VirtualServer
    <ul>
      <li>Configure a HTTP Profile</li>
      <li>Configure ClientSSL profile</li>
      <li>Configure Access Profile (Per-Session Policy)</li>
    </ul>
  </li>
</ul>

<hr />

<h2 id="key-takeaways">Key takeaways</h2>

<p><strong>Ephemeral environments are a prerequisite for safe Agentic AI development.</strong> When the entity running code is autonomous, shared environments become unacceptable. You need clean slates, bounded blast radius, and short lifetimes. Coder delivers all three.</p>

<p><strong>Enterprise access control is a first-class concern.</strong> It’s easy to prototype with a Coder instance that’s wide open on the network. In production — especially when AI agents are involved — you need identity-aware access. F5 BIG-IP APM is heavy, but it’s the right tool for organizations that already operate BIG-IP infrastructure. The combination of VPN tunnel control, MFA, group-based authorization, and header injection into Coder gives you a layered security posture without requiring changes to Coder itself.</p>

<p><strong>Automation is the next step.</strong> Right now my workspace creation is manual. The obvious extension is an agentic workflow that calls the Coder API to provision a workspace, runs a task, and tears it down — all triggered by a CI event or an agent orchestration layer. The Coder REST API and CLI make this straightforward. The BIG-IP doesn’t need to know anything about individual workspaces; it just routes to the subnet.</p>

<p><strong>Don’t skip the firewall rules.</strong> Header-based SSO only works if Coder is unreachable except through the proxy. Enforce this at the network layer.</p>

<h3 id="references">References</h3>
<ul>
  <li><a href="https://coder.com/docs/admin/users/oidc-auth">Coder - OIDC Auth</a></li>
  <li><a href="https://techdocs.f5.com/en-us/bigip-17-1-0/big-ip-access-policy-manager-oauth-configuration/using-apm-as-an-oauth-2-server.html">F5 BIG-IP APM — OAuth Authorization Server configuration</a></li>
</ul>

<hr />

<div class="footnotes" role="doc-endnotes">
  <ol>
    <li id="fn:1" role="doc-endnote">
      <p>I did this by stopping docker with <code class="language-plaintext highlighter-rouge">sudo systemctl stop docker.socket docker.service</code>. Then, creating a file called <code class="language-plaintext highlighter-rouge">/etc/docker/daemon.json</code> with my preferred CIDR block for the default docker network (see my previous post for this file). Then I deleted the default docker bridge with <code class="language-plaintext highlighter-rouge">sudo ip link delete docker0</code> and restarted docker with <code class="language-plaintext highlighter-rouge">sudo systemctl start docker</code>. <a href="#fnref:1" class="reversefootnote" role="doc-backlink">&#8617;</a></p>
    </li>
  </ol>
</div>]]></content><author><name>Michael O&apos;Leary</name></author><category term="big-ip" /><category term="big-ip" /><category term="f5" /><category term="apm" /><summary type="html"><![CDATA[How and why to set up Coder with F5 BIG-IP APM]]></summary></entry><entry><title type="html">Installing Coder for ephemeral dev environments</title><link href="https://michaeloleary.net/ai/installing-coder/" rel="alternate" type="text/html" title="Installing Coder for ephemeral dev environments" /><published>2026-04-13T00:00:00+00:00</published><updated>2026-04-13T00:00:00+00:00</updated><id>https://michaeloleary.net/ai/installing-coder</id><content type="html" xml:base="https://michaeloleary.net/ai/installing-coder/"><![CDATA[<figure>
    <a href="/assets/coder/coder-logo.png"><img src="/assets/coder/coder-logo.png" /></a>
    <figcaption></figcaption>
</figure>

<p><a href="https://coder.com">Coder</a> is an open-source platform for self-hosted dev environments. It uses Terraform templates to define workspaces, which means your dev environment is code. You can version it, review it, and destroy it with confidence.</p>

<h2 id="why-ephemeral-environments-matter-for-agentic-ai">Why ephemeral environments matter for Agentic AI</h2>
<p>Agentic AI is different from regular AI-assisted coding. When an agent runs autonomously — executing shell commands, calling APIs, modifying files, spinning up processes — it needs an environment it can <em>own</em>. Shared dev environments are a liability. A runaway agent command, a dependency conflict, a leaked credential in a log file: these become everyone’s problem in a shared space.</p>

<p>Ephemeral environments solve this. Spin one up, let the agent do its work, tear it down. No residue. No blast radius. This is the same logic that drove us to containerize workloads and adopt immutable infrastructure — and it applies even more strongly when the “developer” is an AI.</p>

<p>There’s another angle here too: <strong>enterprise compliance</strong>. When you’re operating in a large organization, you don’t just need isolation for safety reasons. You need auditability, access control, and the ability to restrict <em>who</em> can reach <em>which</em> environment. That’s where F5 BIG-IP APM comes in.</p>

<p>In this post I’m documenting my setup: Coder for ephemeral workspace management, running on a single EC2 instance to begin with.</p>

<hr />

<h2 id="deploy-aws-ec2-instance-install-coder-configure-basics">Deploy AWS EC2 instance, install Coder, configure basics</h2>
<p>Coder can run on different platforms, including K8s. I’m going to use Ubuntu 24.04 on EC2 because it will be a quick lab. I’ll use a <code class="language-plaintext highlighter-rouge">m7i.xlarge</code> instance and give myself 100 GB of disk space.</p>

<h4 id="install-docker">Install Docker</h4>
<p>First, I have created a file at <code class="language-plaintext highlighter-rouge">/etc/docker/daemon.json</code> with this content:</p>
<div class="language-json highlighter-rouge"><div class="highlight"><pre class="highlight"><code><table class="rouge-table"><tbody><tr><td class="rouge-gutter gl"><pre class="lineno">1
2
3
</pre></td><td class="rouge-code"><pre><span class="p">{</span><span class="w">
  </span><span class="nl">"bip"</span><span class="p">:</span><span class="w"> </span><span class="s2">"10.10.0.1/24"</span><span class="w">
</span><span class="p">}</span><span class="w">
</span></pre></td></tr></tbody></table></code></pre></div></div>

<p>This is because I want to choose the default bridge network CIDR block for this demo. Why? I am going to use a pre-configured IP range for my containers. This might come in handy later if I decide to implement a VPN for users to reach their docker containers.</p>

<p>After this file exists, I install Docker on the Coder server. I use <a href="/docker/official-vs-unofficial-docker-packages/">my own instructions</a>.</p>

<h4 id="install-coder">Install Coder</h4>
<p>Now install Coder:</p>

<div class="language-bash highlighter-rouge"><div class="highlight"><pre class="highlight"><code><table class="rouge-table"><tbody><tr><td class="rouge-gutter gl"><pre class="lineno">1
2
3
4
5
6
</pre></td><td class="rouge-code"><pre><span class="c"># 1. Install Coder</span>
curl <span class="nt">-L</span> https://coder.com/install.sh | sh

<span class="c">#Run this command to allow the binary to open raw sockets without requiring root:</span>
<span class="nb">sudo </span>setcap cap_net_raw+ep <span class="si">$(</span>which coder<span class="si">)</span>

</pre></td></tr></tbody></table></code></pre></div></div>
<p>Notice that a user was created called <code class="language-plaintext highlighter-rouge">coder</code>:</p>
<div class="language-bash highlighter-rouge"><div class="highlight"><pre class="highlight"><code><table class="rouge-table"><tbody><tr><td class="rouge-gutter gl"><pre class="lineno">1
</pre></td><td class="rouge-code"><pre><span class="nb">sudo </span>more /etc/passwd | <span class="nb">grep </span>coder
</pre></td></tr></tbody></table></code></pre></div></div>

<p>Notice these files that were created:</p>
<ul>
  <li><code class="language-plaintext highlighter-rouge">/usr/lib/systemd/system/coder.service</code>. - this defines the service and references an EnvironmentFile</li>
  <li><code class="language-plaintext highlighter-rouge">/etc/coder.d/coder.env</code> - this EnvironmentFile holds configuration for the service</li>
</ul>

<p>Notice that the files above exist, but the service is disabled:</p>

<div class="language-bash highlighter-rouge"><div class="highlight"><pre class="highlight"><code><table class="rouge-table"><tbody><tr><td class="rouge-gutter gl"><pre class="lineno">1
2
</pre></td><td class="rouge-code"><pre><span class="nb">sudo </span>systemctl list-unit-files <span class="nt">--state</span><span class="o">=</span>disabled <span class="c">#Show disabled services</span>
<span class="nb">sudo </span>systemctl status coder <span class="c">#this will show the daemon is not enabled</span>
</pre></td></tr></tbody></table></code></pre></div></div>

<p>Edit the file <code class="language-plaintext highlighter-rouge">/etc/coder.d/coder.env</code> and add/edit these values:</p>

<div class="language-ini highlighter-rouge"><div class="highlight"><pre class="highlight"><code><table class="rouge-table"><tbody><tr><td class="rouge-gutter gl"><pre class="lineno">1
2
</pre></td><td class="rouge-code"><pre><span class="py">CODER_ACCESS_URL</span><span class="p">=</span><span class="s">https://coder.my-f5.com</span>
<span class="py">CODER_HTTP_ADDRESS</span><span class="p">=</span><span class="s">'0.0.0.0:3000'</span>
</pre></td></tr></tbody></table></code></pre></div></div>
<p>Also, add coder user to docker group, which will allow coder to run docker commands without sudo:</p>

<div class="language-bash highlighter-rouge"><div class="highlight"><pre class="highlight"><code><table class="rouge-table"><tbody><tr><td class="rouge-gutter gl"><pre class="lineno">1
2
</pre></td><td class="rouge-code"><pre><span class="nb">sudo </span>usermod <span class="nt">-aG</span> docker coder
newgrp docker
</pre></td></tr></tbody></table></code></pre></div></div>

<p>Enable and start the coder service:</p>
<div class="language-bash highlighter-rouge"><div class="highlight"><pre class="highlight"><code><table class="rouge-table"><tbody><tr><td class="rouge-gutter gl"><pre class="lineno">1
2
</pre></td><td class="rouge-code"><pre><span class="nb">sudo </span>systemctl <span class="nb">enable </span>coder
<span class="nb">sudo </span>systemctl start coder
</pre></td></tr></tbody></table></code></pre></div></div>

<p>I have a URL <code class="language-plaintext highlighter-rouge">coder.my-f5.com</code> that I have pointed at a typical VirtualServer on BIG-IP. It listens on HTTPS (tcp/443) and decrypts traffic with a clientSSL profile, but passes traffic to the Coder server on HTTP (tcp/3000) with <strong>no</strong> serverSSL profile.</p>

<p>In the next post, I’ll offload authentication from Coder to BIG-IP APM.</p>]]></content><author><name>Michael O&apos;Leary</name></author><category term="ai" /><category term="coder" /><category term="aws" /><summary type="html"><![CDATA[How to set up Coder quickly for a lab environment]]></summary></entry><entry><title type="html">Introduction to LiteLLM</title><link href="https://michaeloleary.net/openshift/litellm-part1/" rel="alternate" type="text/html" title="Introduction to LiteLLM" /><published>2026-04-08T00:00:00+00:00</published><updated>2026-04-08T00:00:00+00:00</updated><id>https://michaeloleary.net/openshift/litellm-part1</id><content type="html" xml:base="https://michaeloleary.net/openshift/litellm-part1/"><![CDATA[<figure>
    <a href="/assets/litellm/Picture1.jpg"><img src="/assets/litellm/Picture1.jpg" /></a>
    <figcaption></figcaption>
</figure>

<h1 id="introduction-to-litellm">Introduction to LiteLLM</h1>

<p>This post is based on a talk I gave at the Boston Kubernetes Meetup on Tue Apr 7, 2026. The goal was to introduce LiteLLM to the group and show a progressive demo — from a local Python install all the way to Kubernetes. This post is my write-up of that content.</p>

<figure class="third ">
  
    
      <a href="/assets/litellm/IMG_8671.JPEG" title="Michael and Nicky">
          <img src="/assets/litellm/IMG_8671.JPEG" alt="Michael and Nicky" />
      </a>


      <a href="/assets/litellm/IMG_8709.JPEG" title="Diagram overview">
          <img src="/assets/litellm/IMG_8709.JPEG" alt="Diagram overview" />
      </a>


      <a href="/assets/litellm/IMG_8697.JPEG" title="Crowd pic">
          <img src="/assets/litellm/IMG_8697.JPEG" alt="Crowd pic" />
      </a>


    <figcaption>Pics from Apr 7 Meetup event
</figcaption>
  
</figure>

<h2 id="overview">Overview</h2>

<p>If you’ve been building anything with LLMs recently, you’ve probably noticed that every provider has a different API. OpenAI looks one way, Anthropic looks another, Gemini is different again. Switching models means rewriting your API calls. Testing two providers side-by-side means maintaining two different integrations. It gets messy fast.</p>

<p>LiteLLM is the answer to this problem. It gives you a single OpenAI-compatible interface for 100+ models and providers. You talk to LiteLLM, and LiteLLM figures out how to talk to whoever is behind it.</p>

<p>But LiteLLM is more than just a translation layer. Put it in your architecture as a proxy and you now have a central point where you can enforce policies, track costs, manage API keys, set rate limits, and observe everything that’s happening across your AI workloads.</p>

<h2 id="what-is-litellm">What is LiteLLM?</h2>

<p>From the project itself: LiteLLM lets you call all LLM APIs (Azure, Gemini, Anthropic, and more) using the OpenAI format. It translates inputs, standardizes exceptions, and guarantees consistent output format for <code class="language-plaintext highlighter-rouge">completion()</code> and <code class="language-plaintext highlighter-rouge">embedding()</code> calls. It does three things really well:</p>

<ol>
  <li><strong>Consistent I/O</strong>: Removes the need for provider-specific if/else logic in your application code.</li>
  <li><strong>Reliable</strong>: Extensively tested with 50+ test cases and used in production environments.</li>
  <li><strong>Observable</strong>: Native integrations with Sentry, PostHog, Helicone, Prometheus, Langfuse, and others.</li>
</ol>

<h2 id="two-ways-to-use-litellm">Two ways to use LiteLLM</h2>

<p>Before jumping into the demo, it’s worth understanding the two distinct modes.</p>

<h3 id="as-a-python-sdk">As a Python SDK</h3>

<p>Import LiteLLM directly into your Python code. It’s a drop-in replacement for the OpenAI Python client and works similarly to how other frameworks like LangChain are used.</p>

<div class="language-python highlighter-rouge"><div class="highlight"><pre class="highlight"><code><table class="rouge-table"><tbody><tr><td class="rouge-gutter gl"><pre class="lineno">1
2
3
4
5
6
7
</pre></td><td class="rouge-code"><pre><span class="kn">from</span> <span class="nn">litellm</span> <span class="kn">import</span> <span class="n">completion</span>

<span class="n">response</span> <span class="o">=</span> <span class="n">completion</span><span class="p">(</span>
    <span class="n">model</span><span class="o">=</span><span class="s">"anthropic/claude-sonnet-4-20250514"</span><span class="p">,</span>
    <span class="n">messages</span><span class="o">=</span><span class="p">[{</span><span class="s">"role"</span><span class="p">:</span> <span class="s">"user"</span><span class="p">,</span> <span class="s">"content"</span><span class="p">:</span> <span class="s">"Hello!"</span><span class="p">}]</span>
<span class="p">)</span>
<span class="k">print</span><span class="p">(</span><span class="n">response</span><span class="p">.</span><span class="n">choices</span><span class="p">[</span><span class="mi">0</span><span class="p">].</span><span class="n">message</span><span class="p">.</span><span class="n">content</span><span class="p">)</span>
</pre></td></tr></tbody></table></code></pre></div></div>

<p>Change the <code class="language-plaintext highlighter-rouge">model</code> string and nothing else changes. That’s the whole pitch for the SDK. This is the right choice if you’re embedding LiteLLM directly in a Python application.</p>

<h3 id="as-a-proxy-server">As a Proxy Server</h3>

<p>LiteLLM can run as a standalone HTTP server — an OpenAI-compatible REST API that any application can call, regardless of language. This is what we’ll focus on for the rest of this post.</p>

<div class="language-plaintext highlighter-rouge"><div class="highlight"><pre class="highlight"><code><table class="rouge-table"><tbody><tr><td class="rouge-gutter gl"><pre class="lineno">1
</pre></td><td class="rouge-code"><pre>Your App  →  LiteLLM Proxy  →  OpenAI / Anthropic / Gemini / etc.
</pre></td></tr></tbody></table></code></pre></div></div>

<p>The proxy exposes standard endpoints like <code class="language-plaintext highlighter-rouge">POST /v1/chat/completions</code> and <code class="language-plaintext highlighter-rouge">GET /v1/models</code>. Any tool that already knows how to talk to OpenAI — Open WebUI, LangChain, your own app — can point at LiteLLM instead, with zero code changes.</p>

<p>The proxy mode is more interesting from an infrastructure standpoint because it gives you a centralized control plane for all your LLM traffic.</p>

<hr />

<h2 id="demo-litellm-as-a-proxy">Demo: LiteLLM as a Proxy</h2>

<p>I showed a progressive demo at the meetup — starting simple and adding complexity at each step. Here’s the full walkthrough.</p>

<h3 id="option-1-local-python-in-a-virtual-environment">Option 1: Local Python in a virtual environment</h3>

<p>This is the simplest possible setup. Good for development and testing.</p>

<p>On Ubuntu 24.04 you’ll hit an “externally managed environment” error if you try to pip install system-wide. This is by design — Ubuntu 24.04 introduced PEP 668 to protect the system Python. Use a virtual environment:</p>

<div class="language-bash highlighter-rouge"><div class="highlight"><pre class="highlight"><code><table class="rouge-table"><tbody><tr><td class="rouge-gutter gl"><pre class="lineno">1
2
3
4
5
6
7
8
</pre></td><td class="rouge-code"><pre><span class="c"># Create a virtual environment</span>
python3 <span class="nt">-m</span> venv ~/.venv

<span class="c"># Activate it</span>
<span class="nb">source</span> ~/.venv/bin/activate

<span class="c"># Install litellm with proxy dependencies</span>
pip <span class="nb">install</span> <span class="s1">'litellm[proxy]'</span>
</pre></td></tr></tbody></table></code></pre></div></div>

<p>Note: the <code class="language-plaintext highlighter-rouge">[proxy]</code> extra is required. The base <code class="language-plaintext highlighter-rouge">litellm</code> package doesn’t include the dependencies for the proxy server (FastAPI, uvicorn, websockets, etc.).</p>

<p>Start the proxy with a single model:</p>

<div class="language-bash highlighter-rouge"><div class="highlight"><pre class="highlight"><code><table class="rouge-table"><tbody><tr><td class="rouge-gutter gl"><pre class="lineno">1
2
</pre></td><td class="rouge-code"><pre><span class="nb">export </span><span class="nv">GEMINI_API_KEY</span><span class="o">=</span>your-key
litellm <span class="nt">--model</span> gemini/gemini-2.5-flash-preview-04-17 <span class="nt">--port</span> 4000
</pre></td></tr></tbody></table></code></pre></div></div>

<p>That’s it. The proxy is running. Simple enough — but not how you’d run this for anything beyond a quick test.</p>
<figure>
    <a href="/assets/litellm/demo1.png"><img src="/assets/litellm/demo1.png" /></a>
    <figcaption>Simply running litellm as local Python installation</figcaption>
</figure>

<h3 id="option-2-docker-with-a-config-file">Option 2: Docker with a config file</h3>

<p>For anything more serious you want Docker and a config file. The config file is how you manage multiple models, set a master key for authentication, and control routing.</p>

<p>Create <code class="language-plaintext highlighter-rouge">litellm_config.yaml</code>:</p>

<div class="language-yaml highlighter-rouge"><div class="highlight"><pre class="highlight"><code><table class="rouge-table"><tbody><tr><td class="rouge-gutter gl"><pre class="lineno">1
2
3
4
5
6
7
8
9
10
11
12
13
14
15
16
17
18
</pre></td><td class="rouge-code"><pre><span class="na">model_list</span><span class="pi">:</span>
  <span class="pi">-</span> <span class="na">model_name</span><span class="pi">:</span> <span class="s">gpt-4o</span>
    <span class="na">litellm_params</span><span class="pi">:</span>
      <span class="na">model</span><span class="pi">:</span> <span class="s">openai/gpt-4o</span>
      <span class="na">api_key</span><span class="pi">:</span> <span class="s">os.environ/OPENAI_API_KEY</span>

  <span class="pi">-</span> <span class="na">model_name</span><span class="pi">:</span> <span class="s">claude</span>
    <span class="na">litellm_params</span><span class="pi">:</span>
      <span class="na">model</span><span class="pi">:</span> <span class="s">anthropic/claude-sonnet-4-20250514</span>
      <span class="na">api_key</span><span class="pi">:</span> <span class="s">os.environ/ANTHROPIC_API_KEY</span>

  <span class="pi">-</span> <span class="na">model_name</span><span class="pi">:</span> <span class="s">gemini</span>
    <span class="na">litellm_params</span><span class="pi">:</span>
      <span class="na">model</span><span class="pi">:</span> <span class="s">gemini/gemini-2.5-flash-preview-04-17</span>
      <span class="na">api_key</span><span class="pi">:</span> <span class="s">os.environ/GEMINI_API_KEY</span>

<span class="na">general_settings</span><span class="pi">:</span>
  <span class="na">master_key</span><span class="pi">:</span> <span class="s2">"</span><span class="s">sk-xxxx"</span> <span class="c1">#change this. It can be anything starting with "sk-".</span>
</pre></td></tr></tbody></table></code></pre></div></div>

<p>A few things to note here:</p>

<ul>
  <li><code class="language-plaintext highlighter-rouge">model_name</code> is the alias your applications use — you choose this, it doesn’t have to match the real underlying model name.</li>
  <li><code class="language-plaintext highlighter-rouge">os.environ/OPENAI_API_KEY</code> tells LiteLLM to read the key from the environment at runtime, so you never hardcode a secret in the config file.</li>
  <li><code class="language-plaintext highlighter-rouge">master_key</code> is what your applications use to authenticate to the proxy. This is separate from — and replaces — your real provider API keys in your application code.</li>
</ul>

<p>Run it with Docker:</p>

<div class="language-bash highlighter-rouge"><div class="highlight"><pre class="highlight"><code><table class="rouge-table"><tbody><tr><td class="rouge-gutter gl"><pre class="lineno">1
2
3
4
5
6
7
8
9
10
11
12
13
</pre></td><td class="rouge-code"><pre><span class="nb">export </span><span class="nv">OPENAI_API_KEY</span><span class="o">=</span>xxxx
<span class="nb">export </span><span class="nv">ANTHROPIC_API_KEY</span><span class="o">=</span>xxxxx
<span class="nb">export </span><span class="nv">GEMINI_API_KEY</span><span class="o">=</span>xxxx

docker run <span class="nt">--name</span> litellm-proxy <span class="se">\</span>
  <span class="nt">--restart</span> unless-stopped <span class="se">\</span>
  <span class="nt">-v</span> <span class="si">$(</span><span class="nb">pwd</span><span class="si">)</span>/litellm_config.yaml:/app/config.yaml <span class="se">\</span>
  <span class="nt">-e</span> <span class="nv">OPENAI_API_KEY</span><span class="o">=</span><span class="nv">$OPENAI_API_KEY</span> <span class="se">\</span>
  <span class="nt">-e</span> <span class="nv">ANTHROPIC_API_KEY</span><span class="o">=</span><span class="nv">$ANTHROPIC_API_KEY</span> <span class="se">\</span>
  <span class="nt">-e</span> <span class="nv">GEMINI_API_KEY</span><span class="o">=</span><span class="nv">$GEMINI_API_KEY</span> <span class="se">\</span>
  <span class="nt">-p</span> 4000:4000 <span class="se">\</span>
  docker.litellm.ai/berriai/litellm:main-stable <span class="se">\</span>
  <span class="nt">--config</span> /app/config.yaml
</pre></td></tr></tbody></table></code></pre></div></div>

<p>Test it:</p>

<div class="language-bash highlighter-rouge"><div class="highlight"><pre class="highlight"><code><table class="rouge-table"><tbody><tr><td class="rouge-gutter gl"><pre class="lineno">1
2
3
4
</pre></td><td class="rouge-code"><pre>curl http://localhost:4000/v1/chat/completions <span class="se">\</span>
  <span class="nt">-H</span> <span class="s2">"Content-Type: application/json"</span> <span class="se">\</span>
  <span class="nt">-H</span> <span class="s2">"Authorization: Bearer sk-xxxx"</span> <span class="se">\</span>
  <span class="nt">-d</span> <span class="s1">'{"model": "gemini", "messages": [{"role": "user", "content": "Hello!"}]}'</span>
</pre></td></tr></tbody></table></code></pre></div></div>

<figure>
    <a href="/assets/litellm/demo2.png"><img src="/assets/litellm/demo2.png" /></a>
    <figcaption>Running LiteLLM as a Docker container and using a config file</figcaption>
</figure>

<h3 id="option-3-adding-a-database">Option 3: Adding a database</h3>

<p>The config file handles static startup settings. If you want the admin UI, user management, spend tracking, and virtual key management, you need a Postgres database.</p>

<p>Start a Postgres container:</p>

<div class="language-bash highlighter-rouge"><div class="highlight"><pre class="highlight"><code><table class="rouge-table"><tbody><tr><td class="rouge-gutter gl"><pre class="lineno">1
2
3
4
5
</pre></td><td class="rouge-code"><pre>docker run <span class="nt">--name</span> litellm-postgres <span class="se">\</span>
  <span class="nt">-e</span> <span class="nv">POSTGRES_DB</span><span class="o">=</span>litellm <span class="se">\</span>
  <span class="nt">-e</span> <span class="nv">POSTGRES_USER</span><span class="o">=</span>litellm <span class="se">\</span>
  <span class="nt">-e</span> <span class="nv">POSTGRES_PASSWORD</span><span class="o">=</span>mypassword123 <span class="se">\</span>
  <span class="nt">-p</span> 5432:5432 <span class="nt">-d</span> postgres
</pre></td></tr></tbody></table></code></pre></div></div>

<p>Restart LiteLLM with the database connection and UI credentials:</p>

<div class="language-bash highlighter-rouge"><div class="highlight"><pre class="highlight"><code><table class="rouge-table"><tbody><tr><td class="rouge-gutter gl"><pre class="lineno">1
2
3
4
5
6
7
8
9
10
11
12
</pre></td><td class="rouge-code"><pre>docker run <span class="nt">--name</span> litellm-proxy <span class="se">\</span>
  <span class="nt">-v</span> <span class="si">$(</span><span class="nb">pwd</span><span class="si">)</span>/litellm_config.yaml:/app/config.yaml <span class="se">\</span>
  <span class="nt">-e</span> <span class="nv">OPENAI_API_KEY</span><span class="o">=</span><span class="nv">$OPENAI_API_KEY</span> <span class="se">\</span>
  <span class="nt">-e</span> <span class="nv">ANTHROPIC_API_KEY</span><span class="o">=</span><span class="nv">$ANTHROPIC_API_KEY</span> <span class="se">\</span>
  <span class="nt">-e</span> <span class="nv">GEMINI_API_KEY</span><span class="o">=</span><span class="nv">$GEMINI_API_KEY</span> <span class="se">\</span>
  <span class="nt">-e</span> <span class="nv">DATABASE_URL</span><span class="o">=</span><span class="s2">"postgresql://litellm:mypassword123@litellm-postgres:5432/litellm"</span> <span class="se">\</span>
  <span class="nt">-e</span> <span class="nv">UI_USERNAME</span><span class="o">=</span><span class="s2">"admin"</span> <span class="se">\</span>
  <span class="nt">-e</span> <span class="nv">UI_PASSWORD</span><span class="o">=</span><span class="s2">"admin"</span> <span class="se">\</span>
  <span class="nt">--link</span> litellm-postgres:litellm-postgres <span class="se">\</span>
  <span class="nt">-p</span> 4000:4000 <span class="se">\</span>
  docker.litellm.ai/berriai/litellm:main-stable <span class="se">\</span>
  <span class="nt">--config</span> /app/config.yaml
</pre></td></tr></tbody></table></code></pre></div></div>

<p>Once running, the admin UI is at <code class="language-plaintext highlighter-rouge">http://[YOUR_IP]:4000/ui</code>. From there you can:</p>

<ul>
  <li>Create users and teams</li>
  <li>Manage virtual keys with rate limits and spend caps</li>
  <li>View usage and cost per model, per key, per team</li>
  <li>Use the playground to test models directly</li>
  <li>Set up alerting</li>
</ul>

<p>The general rule of thumb for where things live: <strong>structure in config.yaml, secrets in environment variables, runtime data in the database.</strong></p>

<figure>
    <a href="/assets/litellm/demo3.png"><img src="/assets/litellm/demo3.png" /></a>
    <figcaption>At this point we have a DB and we can log into the UI.</figcaption>
</figure>

<h3 id="option-4-adding-open-webui">Option 4: Adding Open WebUI</h3>

<p>At this point we have a solid LLM proxy. Let’s add a proper chat interface in front of it.</p>

<p>First, add an image generation model to your <code class="language-plaintext highlighter-rouge">litellm_config.yaml</code>:</p>

<div class="language-yaml highlighter-rouge"><div class="highlight"><pre class="highlight"><code><table class="rouge-table"><tbody><tr><td class="rouge-gutter gl"><pre class="lineno">1
2
3
4
5
6
</pre></td><td class="rouge-code"><pre>  <span class="pi">-</span> <span class="na">model_name</span><span class="pi">:</span> <span class="s">dall-e-3</span>
    <span class="na">litellm_params</span><span class="pi">:</span>
      <span class="na">model</span><span class="pi">:</span> <span class="s">openai/dall-e-3</span>
      <span class="na">api_key</span><span class="pi">:</span> <span class="s">os.environ/OPENAI_API_KEY</span>
    <span class="na">model_info</span><span class="pi">:</span>
      <span class="na">mode</span><span class="pi">:</span> <span class="s">image_generation</span>
</pre></td></tr></tbody></table></code></pre></div></div>

<p>Create a Docker network so the containers can reach each other by name:</p>

<div class="language-bash highlighter-rouge"><div class="highlight"><pre class="highlight"><code><table class="rouge-table"><tbody><tr><td class="rouge-gutter gl"><pre class="lineno">1
2
</pre></td><td class="rouge-code"><pre>docker network create llm-network
docker network connect llm-network litellm-proxy
</pre></td></tr></tbody></table></code></pre></div></div>

<p>Run Open WebUI:</p>

<div class="language-bash highlighter-rouge"><div class="highlight"><pre class="highlight"><code><table class="rouge-table"><tbody><tr><td class="rouge-gutter gl"><pre class="lineno">1
2
3
4
5
6
7
8
9
10
11
12
</pre></td><td class="rouge-code"><pre>docker run <span class="nt">--name</span> open-webui <span class="se">\</span>
  <span class="nt">--network</span> llm-network <span class="se">\</span>
  <span class="nt">-e</span> <span class="nv">OPENAI_API_BASE_URL</span><span class="o">=</span>http://litellm-proxy:4000/v1 <span class="se">\</span>
  <span class="nt">-e</span> <span class="nv">OPENAI_API_KEY</span><span class="o">=</span>sk-xxxx <span class="se">\</span>
  <span class="nt">-e</span> <span class="nv">ENABLE_IMAGE_GENERATION</span><span class="o">=</span><span class="nb">true</span> <span class="se">\</span>
  <span class="nt">-e</span> <span class="nv">IMAGE_GENERATION_ENGINE</span><span class="o">=</span>openai <span class="se">\</span>
  <span class="nt">-e</span> <span class="nv">IMAGES_OPENAI_API_BASE_URL</span><span class="o">=</span>http://litellm-proxy:4000/v1 <span class="se">\</span>
  <span class="nt">-e</span> <span class="nv">IMAGES_OPENAI_API_KEY</span><span class="o">=</span>sk-xxxx <span class="se">\</span>
  <span class="nt">-e</span> <span class="nv">IMAGES_OPENAI_API_MODEL</span><span class="o">=</span>dall-e-3 <span class="se">\</span>
  <span class="nt">-e</span> <span class="nv">IMAGE_SIZE</span><span class="o">=</span>1024x1024 <span class="se">\</span>
  <span class="nt">-p</span> 3000:8080 <span class="se">\</span>
  ghcr.io/open-webui/open-webui:main
</pre></td></tr></tbody></table></code></pre></div></div>

<p>Note <code class="language-plaintext highlighter-rouge">http://litellm-proxy:4000/v1</code> — Docker resolves container names as hostnames within the same network. Open WebUI has no idea it’s talking to LiteLLM rather than OpenAI directly.</p>

<p>Open WebUI is now at <code class="language-plaintext highlighter-rouge">http://[YOUR_IP]:3000</code>. You get chat history stored locally, model switching, image generation, and a much nicer interface than curl.</p>

<figure>
    <a href="/assets/litellm/demo4.png"><img src="/assets/litellm/demo4.png" /></a>
    <figcaption>Now we have a nicer chat interface using Open WebUI. Still no benefits of K8s, like easy scaling, self-healing, independent scaling, declarative deployment, secret mgmt, etc. But the components are there.</figcaption>
</figure>

<h3 id="option-5-moving-to-kubernetes">Option 5: Moving to Kubernetes</h3>

<p>This is where things get more interesting. Once you’re comfortable with the Docker setup, moving to K8s is a natural next step. You get high availability, rolling updates, better secret management, and proper scaling. Here’s what the migration involves:</p>

<ul>
  <li><strong>Config file</strong> → Kubernetes <code class="language-plaintext highlighter-rouge">ConfigMap</code>, mounted into the LiteLLM pod</li>
  <li><strong>API keys</strong> → Kubernetes <code class="language-plaintext highlighter-rouge">Secrets</code>, mapped as environment variables</li>
  <li><strong><code class="language-plaintext highlighter-rouge">--link</code> / <code class="language-plaintext highlighter-rouge">--network</code></strong> → Kubernetes <code class="language-plaintext highlighter-rouge">Services</code> (K8s has built-in DNS, pods find each other by service name)</li>
  <li><strong><code class="language-plaintext highlighter-rouge">-p port:port</code></strong> → <code class="language-plaintext highlighter-rouge">Service</code> of type <code class="language-plaintext highlighter-rouge">LoadBalancer</code> or <code class="language-plaintext highlighter-rouge">NodePort</code></li>
  <li><strong><code class="language-plaintext highlighter-rouge">-v</code> volumes</strong> → <code class="language-plaintext highlighter-rouge">PersistentVolumeClaims</code> for Postgres and Open WebUI (you want chat history and DB data to survive pod restarts)</li>
  <li><strong><code class="language-plaintext highlighter-rouge">--restart unless-stopped</code></strong> → automatic with K8s; it restarts crashed pods by default</li>
</ul>

<p>I’ll cover the full K8s deployment with manifests in a follow-up post.</p>

<hr />

<h2 id="litellm-vs-agentgateway">LiteLLM vs AgentGateway</h2>

<p>This came up at the meetup so I want to address it here. Are LiteLLM and AgentGateway competing solutions?</p>

<p>The short answer is: not really. They solve different problems, and can be layered.</p>

<table>
  <thead>
    <tr>
      <th>Category</th>
      <th>LiteLLM Proxy</th>
      <th>AgentGateway</th>
    </tr>
  </thead>
  <tbody>
    <tr>
      <td><strong>Primary Purpose</strong></td>
      <td>LLM proxy — unified access to 100+ models via OpenAI-compatible API</td>
      <td>Agentic proxy — built for MCP, A2A, and agent-to-LLM traffic</td>
    </tr>
    <tr>
      <td><strong>Runtime</strong></td>
      <td>Python (FastAPI). Mature, widely adopted</td>
      <td>Rust. High throughput, low latency, ~6× faster in benchmarks</td>
    </tr>
    <tr>
      <td><strong>Kubernetes</strong></td>
      <td>Helm chart available. Standard Deployment + Service</td>
      <td>First-class K8s support with Gateway API CRDs and built-in controller</td>
    </tr>
    <tr>
      <td><strong>Security</strong></td>
      <td>Virtual keys, RBAC, SSO (enterprise), budget enforcement</td>
      <td>mTLS, JWT, OIDC, pre-routing policy enforcement, OAuth for MCP tools</td>
    </tr>
    <tr>
      <td><strong>Agent / MCP / A2A</strong></td>
      <td>Basic tool use via chat completions. No native MCP or A2A support</td>
      <td>Native MCP gateway with stateful sessions, A2A routing — core feature</td>
    </tr>
    <tr>
      <td><strong>Observability</strong></td>
      <td>Spend logs, dashboards, Langfuse/Prometheus/Helicone integrations</td>
      <td>OpenTelemetry native, TTFT metrics, token attribution per team</td>
    </tr>
    <tr>
      <td><strong>Enterprise Maturity</strong></td>
      <td>Production-proven, large community, commercial enterprise tier</td>
      <td>Linux Foundation project, v1.0 released March 2026, growing fast</td>
    </tr>
    <tr>
      <td><strong>Best For</strong></td>
      <td>Teams needing a battle-tested LLM proxy with spend controls</td>
      <td>Orgs building agentic systems needing MCP/A2A governance at scale</td>
    </tr>
  </tbody>
</table>

<p>LiteLLM is a common and good choice today for most teams. It’s battle-tested, has a large community, and covers the core use cases well. AgentGateway is the one to watch if you’re building agentic systems — it’s specifically designed for the MCP and A2A protocols that are becoming the standard way agents communicate with tools and each other.</p>

<p>They are not mutually exclusive. You could use LiteLLM for LLM routing and cost tracking today, and layer AgentGateway in front of it as your agent infrastructure matures.</p>

<hr />

<h2 id="the-bigger-picture">The bigger picture</h2>

<p>Here’s the message I wanted to leave the meetup with, and it’s the same message I’ll leave here.</p>

<p><strong>Your AI and agent workloads should traverse a central point of policy governance.</strong></p>

<p>Right now a lot of teams are building AI features where every application has its own API keys, its own connection to whatever LLM provider it uses, and zero visibility into what’s happening across the organization. That might be fine for a prototype, but it doesn’t scale, and it creates real security and compliance problems.</p>

<p>A proxy like LiteLLM (or AgentGateway, or both) is that central point. Every LLM call goes through it. You get:</p>

<ul>
  <li><strong>Visibility</strong>: Who is calling what model, when, and at what cost.</li>
  <li><strong>Control</strong>: Rate limits and budget caps per team, per key, or per model. Rogue applications can’t run up your bill.</li>
  <li><strong>Security</strong>: Applications never hold real provider API keys. If a key is compromised, you rotate it in one place.</li>
  <li><strong>Flexibility</strong>: Swap providers or models behind the scenes without touching application code. When OpenAI releases a new model, update the proxy config — your apps don’t change.</li>
  <li><strong>Reliability</strong>: Fallback to another model or provider if one goes down.</li>
</ul>

<p>This is exactly the pattern we already apply to other critical services. We don’t let every microservice talk directly to the database — we have connection pooling, access control, and monitoring. We don’t let every service handle its own TLS — we terminate it at an ingress controller or load balancer. LLM traffic should be no different.</p>

<hr />

<h2 id="a-word-on-security">A word on security</h2>

<p>One thing that came up at the meetup and is worth calling out explicitly: in March 2026 there was a <a href="https://litellm.ai/security-update">supply chain attack on the LiteLLM PyPI package</a>. Versions 1.82.7 and 1.82.8 were compromised via a maintainer’s hijacked account. The malicious code stole credentials — environment variables, SSH keys, cloud provider tokens, Kubernetes tokens — and exfiltrated them to an attacker-controlled server.</p>

<p>The good news: the official Docker images (GHCR and Docker Hub) were not affected, as they were running 1.82.6. PyPI quarantined both versions within 46 minutes, but not before they were downloaded nearly 47,000 times.</p>

<p>The lessons are not new, but they’re worth repeating:</p>

<ul>
  <li><strong>Pin your dependencies</strong> and use lock files with checksums.</li>
  <li><strong>Audit packages before upgrading</strong>, especially for production workloads.</li>
  <li><strong>Be able to rotate credentials fast.</strong> If you had a central proxy, rotating your provider API keys after an incident like this is a single config change. If every application holds its own keys, it’s a much bigger problem.</li>
</ul>

<p>This incident is actually a good argument for the centralized proxy pattern. The fewer places your real API keys live, the smaller your blast radius when something goes wrong.</p>

<hr />

<p>Next post I’ll cover the full Kubernetes deployment with manifests. Thanks for reading!</p>

<p><strong>Updated:</strong> April 8, 2026</p>]]></content><author><name>Michael O&apos;Leary</name></author><category term="openshift" /><category term="openshift" /><category term="f5" /><summary type="html"><![CDATA[Intro to LiteLLM]]></summary></entry><entry><title type="html">Deploying OpenShift smarter: GPU nodes for test clusters</title><link href="https://michaeloleary.net/openshift/how-i-deploy-ocp-part2/" rel="alternate" type="text/html" title="Deploying OpenShift smarter: GPU nodes for test clusters" /><published>2026-03-26T00:00:00+00:00</published><updated>2026-03-26T00:00:00+00:00</updated><id>https://michaeloleary.net/openshift/how-i-deploy-ocp-part2</id><content type="html" xml:base="https://michaeloleary.net/openshift/how-i-deploy-ocp-part2/"><![CDATA[<figure>
    <a href="/assets/openshift-low-cost/openshift-low-cost-header.jpg"><img src="/assets/openshift-low-cost/openshift-low-cost-header-custom.jpg" /></a>
    <figcaption></figcaption>
</figure>

<p>This is a follow-up to my <a href="/openshift/how-i-deploy-ocp/">original post</a> from November 2023 and <a href="/openshift/deploying-openshift-with-metal-nodes/">another</a> from Sept 2024. A lot has changed since then — not in how OpenShift installs, but in my AWS environment and in some installer requirements that crept in quietly.</p>

<p>This post covers the problems I hit deploying OCP 4.21 after not doing this since 4.16, and the changes I made to end up with a cheaper, leaner dev/test cluster.</p>

<h3 id="what-broke-since-last-time">What broke since last time</h3>

<p>It’s been 6-12 months since I remember installing Openshift on AWS. Two things had changed that caused immediate failures.</p>

<h4 id="1-subnet-tagging-is-now-required">1. Subnet tagging is now required</h4>

<p>The installer now validates subnet tags before proceeding. If your subnets are untagged, you’ll get a fatal error before it even starts. Previously the installer would just tag your subnets itself — now it checks first.</p>

<p><strong>Subnets you’re handing to the installer</strong>, ie those in your install-config.yaml, need to be tagged:</p>

<div class="language-bash highlighter-rouge"><div class="highlight"><pre class="highlight"><code><table class="rouge-table"><tbody><tr><td class="rouge-gutter gl"><pre class="lineno">1
2
3
</pre></td><td class="rouge-code"><pre>aws ec2 create-tags <span class="se">\</span>
  <span class="nt">--resources</span> subnet-xxxxxxxxxxxxxxxxx subnet-xxxxxxxxxxxxxxxxx <span class="se">\</span>
  <span class="nt">--tags</span> <span class="nv">Key</span><span class="o">=</span>kubernetes.io/cluster/ocpcluster,Value<span class="o">=</span>shared
</pre></td></tr></tbody></table></code></pre></div></div>

<p>Use your cluster name from <code class="language-plaintext highlighter-rouge">metadata.name</code> in place of <code class="language-plaintext highlighter-rouge">ocpcluster</code>.</p>

<p><strong>Any other subnets in the same VPC</strong> that the installer should ignore need this tag:</p>

<div class="language-bash highlighter-rouge"><div class="highlight"><pre class="highlight"><code><table class="rouge-table"><tbody><tr><td class="rouge-gutter gl"><pre class="lineno">1
2
3
</pre></td><td class="rouge-code"><pre>aws ec2 create-tags <span class="se">\</span>
  <span class="nt">--resources</span> subnet-xxxxxxxxxxxxxxxxx <span class="se">\</span>
  <span class="nt">--tags</span> <span class="nv">Key</span><span class="o">=</span>kubernetes.io/cluster/unmanaged,Value<span class="o">=</span><span class="nb">true</span>
</pre></td></tr></tbody></table></code></pre></div></div>

<p>If you skip this step, the installer will fail with an error about untagged subnets in the VPC.</p>

<h4 id="2-corporate-it-had-tightened-my-iam-permissions">2. Corporate IT had tightened my IAM permissions</h4>

<p>My AWS credentials hadn’t changed, but the policy attached to my IAM user had. The new policy uses a <code class="language-plaintext highlighter-rouge">NotAction</code> block that explicitly excludes <code class="language-plaintext highlighter-rouge">iam:*User*</code> and <code class="language-plaintext highlighter-rouge">iam:*AccessKey*</code> operations (except on my own user). The installer’s default <strong>mint mode</strong> for the Cloud Credential Operator (CCO) needs to create and delete IAM users for each cluster component — so it now fails hard with:</p>

<div class="language-plaintext highlighter-rouge"><div class="highlight"><pre class="highlight"><code><table class="rouge-table"><tbody><tr><td class="rouge-gutter gl"><pre class="lineno">1
2
3
</pre></td><td class="rouge-code"><pre>WARNING Action not allowed with tested creds   action=iam:DeleteAccessKey
WARNING Action not allowed with tested creds   action=iam:DeleteUser
FATAL failed to fetch Cluster: failed to fetch dependency of "Cluster": failed to generate asset "Platform Permissions Check": validate AWS credentials: current credentials insufficient for performing cluster installation
</pre></td></tr></tbody></table></code></pre></div></div>

<p>The fix is to add <code class="language-plaintext highlighter-rouge">credentialsMode: Passthrough</code> to your <code class="language-plaintext highlighter-rouge">install-config.yaml</code>. In passthrough mode, the CCO copies your existing credential to each cluster component instead of minting new scoped IAM users. It never needs <code class="language-plaintext highlighter-rouge">iam:CreateUser</code> or <code class="language-plaintext highlighter-rouge">iam:DeleteUser</code>.</p>

<div class="language-yaml highlighter-rouge"><div class="highlight"><pre class="highlight"><code><table class="rouge-table"><tbody><tr><td class="rouge-gutter gl"><pre class="lineno">1
</pre></td><td class="rouge-code"><pre><span class="na">credentialsMode</span><span class="pi">:</span> <span class="s">Passthrough</span>
</pre></td></tr></tbody></table></code></pre></div></div>

<p>This is a supported and documented mode, and for a dev/test cluster it’s a perfectly reasonable trade-off. The main thing to know is that your AWS credential becomes a long-lived dependency of the cluster — don’t rotate or delete it without updating the cluster secret first.</p>

<hr />

<h3 id="cost-optimizations">Cost optimizations</h3>

<p>The original setup deployed 3 control plane nodes and 3 workers. That’s 6 EC2 instances running at all times. For a dev/test cluster this is overkill. Here’s what I changed.</p>

<h4 id="drop-to-1-master-and-1-worker">Drop to 1 master and 1 worker</h4>

<p>For dev/test, a single master and single worker is fine. A 3-node control plane gives you etcd quorum tolerance — if you don’t care about that (and for a throwaway lab cluster, I don’t), 1 master works.</p>

<h4 id="use-spot-instances-for-workers">Use Spot instances for workers</h4>

<p>Workers are safely replaceable. The MachineSet will automatically provision a new one if a Spot interruption occurs. In us-east-1, an <code class="language-plaintext highlighter-rouge">m5.xlarge</code> Spot instance typically runs 60-70% cheaper than on-demand.</p>

<p class="notice--warning"><strong>Important:</strong> do not use Spot for the master node. If it gets interrupted, the cluster is dead. Keep the master on on-demand.</p>

<h4 id="single-availability-zone">Single availability zone</h4>

<p>Running across multiple AZs incurs cross-AZ data transfer costs. For a dev/test cluster, just pick one AZ. This also means you only need 2 subnets (one public, one private) instead of 4.</p>

<h4 id="heres-my-updated-install-configyaml">Here’s my updated install-config.yaml</h4>

<div class="language-yaml highlighter-rouge"><div class="highlight"><pre class="highlight"><code><table class="rouge-table"><tbody><tr><td class="rouge-gutter gl"><pre class="lineno">1
2
3
4
5
6
7
8
9
10
11
12
13
14
15
16
17
18
19
20
21
22
23
24
25
26
27
28
29
30
31
32
33
34
35
36
37
38
39
40
41
42
43
44
45
46
47
48
49
50
51
52
53
</pre></td><td class="rouge-code"><pre><span class="na">additionalTrustBundlePolicy</span><span class="pi">:</span> <span class="s">Proxyonly</span>
<span class="na">apiVersion</span><span class="pi">:</span> <span class="s">v1</span>
<span class="na">baseDomain</span><span class="pi">:</span> <span class="s">my-f5.com</span>
<span class="na">credentialsMode</span><span class="pi">:</span> <span class="s">Passthrough</span>
<span class="na">compute</span><span class="pi">:</span>
<span class="pi">-</span> <span class="na">architecture</span><span class="pi">:</span> <span class="s">amd64</span>
  <span class="na">hyperthreading</span><span class="pi">:</span> <span class="s">Enabled</span>
  <span class="na">name</span><span class="pi">:</span> <span class="s">worker</span>
  <span class="na">replicas</span><span class="pi">:</span> <span class="m">1</span>
  <span class="na">platform</span><span class="pi">:</span>
    <span class="na">aws</span><span class="pi">:</span>
      <span class="na">type</span><span class="pi">:</span> <span class="s">m5.xlarge</span>
      <span class="na">spotMarketOptions</span><span class="pi">:</span> <span class="pi">{}</span>   <span class="c1"># Spot pricing - ~60-70% cheaper than on-demand</span>
      <span class="na">rootVolume</span><span class="pi">:</span>
        <span class="na">size</span><span class="pi">:</span> <span class="m">100</span>
        <span class="na">type</span><span class="pi">:</span> <span class="s">gp3</span>
      <span class="na">zones</span><span class="pi">:</span>
      <span class="pi">-</span> <span class="s">us-east-1a</span>
<span class="na">controlPlane</span><span class="pi">:</span>
  <span class="na">architecture</span><span class="pi">:</span> <span class="s">amd64</span>
  <span class="na">hyperthreading</span><span class="pi">:</span> <span class="s">Enabled</span>
  <span class="na">name</span><span class="pi">:</span> <span class="s">master</span>
  <span class="na">replicas</span><span class="pi">:</span> <span class="m">1</span>
  <span class="na">platform</span><span class="pi">:</span>
    <span class="na">aws</span><span class="pi">:</span>
      <span class="na">type</span><span class="pi">:</span> <span class="s">m5.xlarge</span>         <span class="c1"># On-demand - spot interruption = dead cluster</span>
      <span class="na">rootVolume</span><span class="pi">:</span>
        <span class="na">size</span><span class="pi">:</span> <span class="m">100</span>
        <span class="na">type</span><span class="pi">:</span> <span class="s">gp3</span>
      <span class="na">zones</span><span class="pi">:</span>
      <span class="pi">-</span> <span class="s">us-east-1a</span>
<span class="na">metadata</span><span class="pi">:</span>
  <span class="na">creationTimestamp</span><span class="pi">:</span> <span class="no">null</span>
  <span class="na">name</span><span class="pi">:</span> <span class="s">ocpcluster</span>
<span class="na">networking</span><span class="pi">:</span>
  <span class="na">clusterNetwork</span><span class="pi">:</span>
  <span class="pi">-</span> <span class="na">cidr</span><span class="pi">:</span> <span class="s">10.128.0.0/14</span>
    <span class="na">hostPrefix</span><span class="pi">:</span> <span class="m">23</span>
  <span class="na">machineNetwork</span><span class="pi">:</span>
  <span class="pi">-</span> <span class="na">cidr</span><span class="pi">:</span> <span class="s">10.0.0.0/16</span>
  <span class="na">networkType</span><span class="pi">:</span> <span class="s">OVNKubernetes</span>
  <span class="na">serviceNetwork</span><span class="pi">:</span>
  <span class="pi">-</span> <span class="s">172.30.0.0/16</span>
<span class="na">platform</span><span class="pi">:</span>
  <span class="na">aws</span><span class="pi">:</span>
    <span class="na">region</span><span class="pi">:</span> <span class="s">us-east-1</span>
    <span class="na">subnets</span><span class="pi">:</span>
    <span class="pi">-</span> <span class="s">subnet-xxxxxxxxxxxxxxxxx</span>   <span class="c1"># Private subnet - us-east-1a</span>
    <span class="pi">-</span> <span class="s">subnet-xxxxxxxxxxxxxxxxx</span>   <span class="c1"># Public subnet  - us-east-1a</span>
<span class="na">publish</span><span class="pi">:</span> <span class="s">External</span>
<span class="na">pullSecret</span><span class="pi">:</span> <span class="s1">'</span><span class="s">my-pull-secret'</span>
<span class="na">sshKey</span><span class="pi">:</span> <span class="pi">|</span>
  <span class="s">ssh-rsa xxx...yyy imported-openssh-key</span>
</pre></td></tr></tbody></table></code></pre></div></div>

<hr />

<h3 id="on-demand-gpu-nodes--deploy-when-you-need-them-delete-when-you-dont">On-demand GPU nodes — deploy when you need them, delete when you don’t</h3>

<p>I occasionally need to test an app that requires a GPU. Running a GPU instance full-time is expensive — a <code class="language-plaintext highlighter-rouge">g4dn.xlarge</code> (1x NVIDIA T4) runs about $0.53/hr on-demand, or around $0.17/hr on Spot. The right pattern here is to create a MachineSet for the GPU node after the cluster is up, scale it to 1 when you need it, and scale it back to 0 when you don’t.</p>

<p><strong>When scaled to 0, the EC2 instance is terminated — you pay nothing for compute.</strong> The only ongoing cost is the EBS root volume that remains (~$10/month for 100GB gp3). If that bothers you, delete the MachineSet entirely and recreate it next time.</p>

<h4 id="creating-the-gpu-machineset">Creating the GPU MachineSet</h4>

<p>Use an existing MachineSet as your template:</p>

<div class="language-bash highlighter-rouge"><div class="highlight"><pre class="highlight"><code><table class="rouge-table"><tbody><tr><td class="rouge-gutter gl"><pre class="lineno">1
2
</pre></td><td class="rouge-code"><pre><span class="nv">MACHINESET_NAME</span><span class="o">=</span><span class="si">$(</span>oc get machineset <span class="nt">-n</span> openshift-machine-api <span class="nt">-o</span> name | <span class="nb">head</span> <span class="nt">-1</span><span class="si">)</span>
oc get machineset <span class="nt">-n</span> openshift-machine-api <span class="nt">-o</span> yaml <span class="nv">$MACHINESET_NAME</span> <span class="o">&gt;</span> gpu-machineset.yaml
</pre></td></tr></tbody></table></code></pre></div></div>

<p>Edit <code class="language-plaintext highlighter-rouge">gpu-machineset.yaml</code> and make these changes:</p>

<ul>
  <li>Change the <code class="language-plaintext highlighter-rouge">name</code> (in both <code class="language-plaintext highlighter-rouge">metadata.name</code> and the selector labels) to something like <code class="language-plaintext highlighter-rouge">ocpcluster-gpu-us-east-1a</code></li>
  <li>Set <code class="language-plaintext highlighter-rouge">replicas: 0</code></li>
  <li>Set <code class="language-plaintext highlighter-rouge">instanceType: g4dn.xlarge</code></li>
  <li>Add a GPU label to the node so workloads can target it:</li>
</ul>

<div class="language-yaml highlighter-rouge"><div class="highlight"><pre class="highlight"><code><table class="rouge-table"><tbody><tr><td class="rouge-gutter gl"><pre class="lineno">1
2
3
4
5
6
</pre></td><td class="rouge-code"><pre><span class="na">spec</span><span class="pi">:</span>
  <span class="na">template</span><span class="pi">:</span>
    <span class="na">spec</span><span class="pi">:</span>
      <span class="na">metadata</span><span class="pi">:</span>
        <span class="na">labels</span><span class="pi">:</span>
          <span class="na">node-role.kubernetes.io/gpu-worker</span><span class="pi">:</span> <span class="s2">"</span><span class="s">"</span>
</pre></td></tr></tbody></table></code></pre></div></div>

<p>Apply it:</p>

<div class="language-bash highlighter-rouge"><div class="highlight"><pre class="highlight"><code><table class="rouge-table"><tbody><tr><td class="rouge-gutter gl"><pre class="lineno">1
</pre></td><td class="rouge-code"><pre>oc apply <span class="nt">-f</span> gpu-machineset.yaml
</pre></td></tr></tbody></table></code></pre></div></div>

<h4 id="install-the-nvidia-gpu-operator">Install the NVIDIA GPU Operator</h4>

<p>Before scaling up, install the NVIDIA GPU Operator from OperatorHub. It handles driver installation automatically via a DaemonSet that targets GPU nodes. Without this, your GPU node will come up but your app won’t be able to use the GPU.</p>

<h4 id="scale-up-when-you-need-the-gpu-scale-down-when-done">Scale up when you need the GPU, scale down when done</h4>

<div class="language-bash highlighter-rouge"><div class="highlight"><pre class="highlight"><code><table class="rouge-table"><tbody><tr><td class="rouge-gutter gl"><pre class="lineno">1
2
3
4
5
6
7
8
</pre></td><td class="rouge-code"><pre><span class="c"># Spin up the GPU node</span>
oc scale machineset ocpcluster-gpu-us-east-1a <span class="nt">-n</span> openshift-machine-api <span class="nt">--replicas</span><span class="o">=</span>1

<span class="c"># Wait for node to be Ready</span>
oc get nodes <span class="nt">-w</span>

<span class="c"># When finished, terminate the instance (MachineSet definition is preserved)</span>
oc scale machineset ocpcluster-gpu-us-east-1a <span class="nt">-n</span> openshift-machine-api <span class="nt">--replicas</span><span class="o">=</span>0
</pre></td></tr></tbody></table></code></pre></div></div>

<p>Scaling to 0 is the better habit over deleting the MachineSet — you keep the definition and can scale back up any time without rebuilding the YAML.</p>

<hr />

<h3 id="summary-of-changes-since-previous-posts">Summary of changes since previous posts</h3>

<table>
  <thead>
    <tr>
      <th>What</th>
      <th>Before</th>
      <th>After</th>
    </tr>
  </thead>
  <tbody>
    <tr>
      <td>Control plane nodes</td>
      <td>3</td>
      <td>1</td>
    </tr>
    <tr>
      <td>Worker nodes</td>
      <td>3</td>
      <td>1</td>
    </tr>
    <tr>
      <td>Worker pricing</td>
      <td>On-demand</td>
      <td>Spot</td>
    </tr>
    <tr>
      <td>Availability zones</td>
      <td>2 (us-east-1a, us-east-1b)</td>
      <td>1 (us-east-1a)</td>
    </tr>
    <tr>
      <td>Subnets</td>
      <td>4</td>
      <td>2</td>
    </tr>
    <tr>
      <td>Credentials mode</td>
      <td>Mint (default)</td>
      <td>Passthrough</td>
    </tr>
    <tr>
      <td>Subnet tagging</td>
      <td>Not required</td>
      <td>Required</td>
    </tr>
    <tr>
      <td>GPU nodes</td>
      <td>N/A</td>
      <td>On-demand via MachineSet scaling</td>
    </tr>
  </tbody>
</table>

<p>The result is a cluster that costs a fraction of the original setup to run, handles GPU testing without ongoing GPU spend, and works within the tighter IAM restrictions my org has put in place.</p>]]></content><author><name>Michael O&apos;Leary</name></author><category term="openshift" /><category term="openshift" /><category term="f5" /><summary type="html"><![CDATA[Deploy Openshift on AWS, Installer Provisioned Infrastructure, with GPU node at low cost]]></summary></entry><entry><title type="html">Using ExternalDNS with F5 CIS to Automate DNS on Non-F5 DNS Servers</title><link href="https://michaeloleary.net/kubernetes/cis-and-externaldns/" rel="alternate" type="text/html" title="Using ExternalDNS with F5 CIS to Automate DNS on Non-F5 DNS Servers" /><published>2026-03-25T00:00:00+00:00</published><updated>2026-03-25T00:00:00+00:00</updated><id>https://michaeloleary.net/kubernetes/cis-and-externaldns</id><content type="html" xml:base="https://michaeloleary.net/kubernetes/cis-and-externaldns/"><![CDATA[<figure>
    <a href="/assets/cis-externaldns/cis-externaldns-header.png"><img src="/assets/cis-externaldns/cis-externaldns-header.png" /></a>
    <figcaption></figcaption>
</figure>

<h2 id="overview">Overview</h2>

<p>F5 Container Ingress Services (CIS) is a powerful way to manage BIG-IP configuration directly from Kubernetes. Using CIS Custom Resource Definitions (CRDs) like <code class="language-plaintext highlighter-rouge">VirtualServer</code> and <code class="language-plaintext highlighter-rouge">TransportServer</code>, you can define rich traffic management policies in native Kubernetes manifests and have CIS automatically create and update Virtual IPs (VIPs) on BIG-IP.</p>

<p>One common question that comes up: <strong>“What if I want DNS records created automatically when a VirtualServer comes up, but I’m not using F5 DNS?”</strong></p>

<p>This article answers exactly that question. We’ll walk through how to combine CIS <code class="language-plaintext highlighter-rouge">VirtualServer</code> resources with the community project <a href="https://github.com/kubernetes-sigs/external-dns">ExternalDNS</a> to automatically register DNS records on external DNS providers like AWS Route 53, Infoblox, CoreDNS, Azure DNS, and others — all without touching a zone file by hand.</p>

<hr />

<h2 id="background-how-dns-automation-typically-works-in-kubernetes">Background: How DNS Automation Typically Works in Kubernetes</h2>

<p>Before diving into the solution, it’s worth grounding ourselves in how DNS automation normally works in Kubernetes.</p>

<h3 id="the-standard-pattern-services-of-type-loadbalancer">The Standard Pattern: Services of Type LoadBalancer</h3>

<p>The most common pattern is:</p>

<ol>
  <li>You create a <code class="language-plaintext highlighter-rouge">Service</code> of type <code class="language-plaintext highlighter-rouge">LoadBalancer</code>.</li>
  <li>A cloud controller (or a bare-metal equivalent like MetalLB) assigns an external IP and updates the <code class="language-plaintext highlighter-rouge">status.loadBalancer.ingress</code> field of the Service object.</li>
  <li>ExternalDNS watches for Services of type <code class="language-plaintext highlighter-rouge">LoadBalancer</code> with specific annotations, reads the IP from the <code class="language-plaintext highlighter-rouge">status</code> field, and creates a DNS A record on your external DNS server.</li>
</ol>

<p>This is clean, well-understood, and widely supported. ExternalDNS can also watch <code class="language-plaintext highlighter-rouge">Ingress</code> objects or <code class="language-plaintext highlighter-rouge">Services</code> of type <code class="language-plaintext highlighter-rouge">ClusterIP</code> and <code class="language-plaintext highlighter-rouge">NodePort</code>, but the <code class="language-plaintext highlighter-rouge">LoadBalancer</code> pattern is by far the most common integration point.</p>

<h3 id="where-f5-cis-fits-in">Where F5 CIS Fits In</h3>

<p>CIS supports creating VIPs on BIG-IP in multiple ways:</p>

<ol>
  <li>
    <p><strong>VirtualServer / TransportServer CRDs</strong> — Most customers prefer to use <a href="https://clouddocs.f5.com/containers/latest/userguide/crd/">VS or TS CRDs</a> because they expose richer BIG-IP capabilities: iRules, custom persistence profiles, health monitors, TLS termination policies, and more. This is where the DNS automation story gets more nuanced and is <strong>the focus of this article</strong>.</p>
  </li>
  <li>
    <p><strong>Service of type LoadBalancer</strong> — CIS watches for Services of type <code class="language-plaintext highlighter-rouge">LoadBalancer</code>. Typically an IPAM controller or a <a href="https://clouddocs.f5.com/containers/latest/userguide/loadbalancer/#service-type-loadbalancer-annotations">custom annotation</a> will be used to configure an IP address. CIS allocates a VIP on BIG-IP, and updates the Service’s <code class="language-plaintext highlighter-rouge">status.loadBalancer.ingress</code> field with that IP. This is <strong>not</strong> the focus of this article.</p>
  </li>
  <li>
    <p><strong>Other</strong> — CIS can also use <code class="language-plaintext highlighter-rouge">Ingress</code> or <code class="language-plaintext highlighter-rouge">ConfigMap</code> resources, but these are out of scope for this article.</p>
  </li>
</ol>

<h3 id="the-gap-f5-crds-and-non-f5-dns">The Gap: F5 CRDs and Non-F5 DNS</h3>

<p>CIS does include its own <a href="https://clouddocs.f5.com/containers/latest/userguide/crd/externaldns.html">ExternalDNS CRD</a> (not to be confused with the community project of the same name). However, <strong>F5’s built-in ExternalDNS CRD only supports F5 DNS (BIG-IP DNS / GTM)</strong>. If you’re using Route 53, Infoblox, PowerDNS, or any other DNS provider, you need a different approach.</p>

<p>That’s where the community ExternalDNS project comes in.</p>

<hr />

<h2 id="the-solution-virtualserver--service-of-type-loadbalancer--externaldns">The Solution: VirtualServer + Service of Type LoadBalancer + ExternalDNS</h2>

<p>The trick is straightforward once you see it:</p>

<blockquote>
  <p>CIS can manage a VIP on BIG-IP via a <code class="language-plaintext highlighter-rouge">VirtualServer</code> CRD while simultaneously updating the <code class="language-plaintext highlighter-rouge">status</code> field of a <code class="language-plaintext highlighter-rouge">Service</code> of type <code class="language-plaintext highlighter-rouge">LoadBalancer</code>. ExternalDNS then reads that <code class="language-plaintext highlighter-rouge">status</code> field and creates DNS records.</p>
</blockquote>

<p>Here’s the flow:</p>

<div class="language-plaintext highlighter-rouge"><div class="highlight"><pre class="highlight"><code><table class="rouge-table"><tbody><tr><td class="rouge-gutter gl"><pre class="lineno">1
2
3
4
5
6
7
8
9
10
11
12
13
14
</pre></td><td class="rouge-code"><pre>VirtualServer CRD
      │
      │  references pool members via
      ▼
Service (type: LoadBalancer)
      │
      │  CIS updates status.loadBalancer.ingress
      │  with the VIP IP address
      ▼
ExternalDNS watches Service status
      │
      │  creates/updates DNS record
      ▼
External DNS Server (Route 53, Infoblox, etc.)
</pre></td></tr></tbody></table></code></pre></div></div>

<p>Let’s walk through the manifests.</p>

<hr />

<h2 id="step-by-step-walkthrough">Step-by-Step Walkthrough</h2>

<h3 id="step-1-deploy-your-application">Step 1: Deploy Your Application</h3>

<p>A standard Deployment — nothing special here.</p>

<div class="language-yaml highlighter-rouge"><div class="highlight"><pre class="highlight"><code><table class="rouge-table"><tbody><tr><td class="rouge-gutter gl"><pre class="lineno">1
2
3
4
5
6
7
8
9
10
11
12
13
14
15
16
17
18
19
20
</pre></td><td class="rouge-code"><pre><span class="na">apiVersion</span><span class="pi">:</span> <span class="s">apps/v1</span>
<span class="na">kind</span><span class="pi">:</span> <span class="s">Deployment</span>
<span class="na">metadata</span><span class="pi">:</span>
  <span class="na">name</span><span class="pi">:</span> <span class="s">my-app</span>
  <span class="na">namespace</span><span class="pi">:</span> <span class="s">my-namespace</span>
<span class="na">spec</span><span class="pi">:</span>
  <span class="na">replicas</span><span class="pi">:</span> <span class="m">2</span>
  <span class="na">selector</span><span class="pi">:</span>
    <span class="na">matchLabels</span><span class="pi">:</span>
      <span class="na">app</span><span class="pi">:</span> <span class="s">my-app</span>
  <span class="na">template</span><span class="pi">:</span>
    <span class="na">metadata</span><span class="pi">:</span>
      <span class="na">labels</span><span class="pi">:</span>
        <span class="na">app</span><span class="pi">:</span> <span class="s">my-app</span>
    <span class="na">spec</span><span class="pi">:</span>
      <span class="na">containers</span><span class="pi">:</span>
        <span class="pi">-</span> <span class="na">name</span><span class="pi">:</span> <span class="s">my-app</span>
          <span class="na">image</span><span class="pi">:</span> <span class="s">my-app:latest</span>
          <span class="na">ports</span><span class="pi">:</span>
            <span class="pi">-</span> <span class="na">containerPort</span><span class="pi">:</span> <span class="m">8080</span>
</pre></td></tr></tbody></table></code></pre></div></div>

<h3 id="step-2-create-the-service-of-type-loadbalancer">Step 2: Create the Service of Type LoadBalancer</h3>

<p>This Service is the linchpin of the whole solution. It serves three purposes:</p>

<ol>
  <li>It acts as a target for the CIS <code class="language-plaintext highlighter-rouge">VirtualServer</code> pool (either via NodePort or directly to pod IPs in cluster mode).</li>
  <li>CIS updates its <code class="language-plaintext highlighter-rouge">status.loadBalancer.ingress</code> field with the BIG-IP VIP address.</li>
  <li>ExternalDNS reads its <code class="language-plaintext highlighter-rouge">status</code> and annotations to create a DNS record.</li>
</ol>

<div class="language-yaml highlighter-rouge"><div class="highlight"><pre class="highlight"><code><table class="rouge-table"><tbody><tr><td class="rouge-gutter gl"><pre class="lineno">1
2
3
4
5
6
7
8
9
10
11
12
13
14
15
16
17
18
19
20
21
22
</pre></td><td class="rouge-code"><pre><span class="na">apiVersion</span><span class="pi">:</span> <span class="s">v1</span>
<span class="na">kind</span><span class="pi">:</span> <span class="s">Service</span>
<span class="na">metadata</span><span class="pi">:</span>
  <span class="na">name</span><span class="pi">:</span> <span class="s">my-app-svc</span>
  <span class="na">namespace</span><span class="pi">:</span> <span class="s">my-namespace</span>
  <span class="na">annotations</span><span class="pi">:</span>
    <span class="c1"># ExternalDNS annotation — tells ExternalDNS what hostname to register</span>
    <span class="na">external-dns.alpha.kubernetes.io/hostname</span><span class="pi">:</span> <span class="s">myapp.example.com</span>
    <span class="c1"># Optional: set a custom TTL</span>
    <span class="na">external-dns.alpha.kubernetes.io/ttl</span><span class="pi">:</span> <span class="s2">"</span><span class="s">60"</span>
<span class="na">spec</span><span class="pi">:</span>
  <span class="na">selector</span><span class="pi">:</span>
    <span class="na">app</span><span class="pi">:</span> <span class="s">my-app</span>
  <span class="na">ports</span><span class="pi">:</span>
    <span class="pi">-</span> <span class="na">port</span><span class="pi">:</span> <span class="m">80</span>
      <span class="na">targetPort</span><span class="pi">:</span> <span class="m">8080</span>
      <span class="na">protocol</span><span class="pi">:</span> <span class="s">TCP</span>
  <span class="na">type</span><span class="pi">:</span> <span class="s">LoadBalancer</span>
  <span class="c1"># Prevent other LB controllers from acting on this Service</span>
  <span class="na">loadBalancerClass</span><span class="pi">:</span> <span class="s">f5.com/bigip</span>
  <span class="c1"># Do not allocate NodePort endpoints — more on this below</span>
  <span class="na">allocateLoadBalancerNodePorts</span><span class="pi">:</span> <span class="no">false</span>
</pre></td></tr></tbody></table></code></pre></div></div>

<p>Two fields here deserve extra explanation.</p>

<h4 id="loadbalancerclass-f5combigip"><code class="language-plaintext highlighter-rouge">loadBalancerClass: f5.com/bigip</code></h4>

<p>In a typical cluster, multiple controllers may be watching for Services of type <code class="language-plaintext highlighter-rouge">LoadBalancer</code> — MetalLB, the cloud provider controller, etc. If you’re using CIS <code class="language-plaintext highlighter-rouge">VirtualServer</code> CRDs to manage the VIP (rather than having CIS act directly as a LoadBalancer controller for this Service), you likely don’t want any of those other controllers touching this Service.</p>

<p>Setting <code class="language-plaintext highlighter-rouge">loadBalancerClass</code> to a value that no other running controller claims means this Service will be <strong>ignored by all LB controllers except the one that explicitly handles that class</strong>. In this pattern, no controller is assigning the VIP from the Service side — CIS does it via the <code class="language-plaintext highlighter-rouge">VirtualServer</code> CRD and writes back the IP into the <code class="language-plaintext highlighter-rouge">status</code> field programmatically.</p>

<blockquote>
  <p><strong>Note:</strong> The exact value of <code class="language-plaintext highlighter-rouge">loadBalancerClass</code> depends on your environment. The key goal is to prevent unintended controllers from assigning IPs or creating cloud load balancers for this Service.</p>
</blockquote>

<h4 id="allocateloadbalancernodeports-false"><code class="language-plaintext highlighter-rouge">allocateLoadBalancerNodePorts: false</code></h4>

<p>By default, <code class="language-plaintext highlighter-rouge">LoadBalancer</code> Services in Kubernetes allocate NodePort endpoints. This means traffic <em>could</em> reach your pods directly via <code class="language-plaintext highlighter-rouge">&lt;NodeIP&gt;:&lt;NodePort&gt;</code> — bypassing BIG-IP entirely, bypassing your security policies, and bypassing your iRules.</p>

<p>Setting <code class="language-plaintext highlighter-rouge">allocateLoadBalancerNodePorts: false</code> prevents this. The Service effectively behaves like a <code class="language-plaintext highlighter-rouge">ClusterIP</code> service in terms of access — the only way to reach it from outside the cluster is via the BIG-IP VIP. This is the right posture when:</p>

<ul>
  <li>Your CIS deployment uses <code class="language-plaintext highlighter-rouge">--pool-member-type=cluster</code>, sending traffic directly to pod IPs via the BIG-IP’s overlay network (VXLAN or GENEVE).</li>
  <li>You want BIG-IP to be the sole external entry point for policy enforcement.</li>
</ul>

<h3 id="step-3-create-the-virtualserver-crd">Step 3: Create the VirtualServer CRD</h3>

<p>Now we define the <code class="language-plaintext highlighter-rouge">VirtualServer</code>. Note how it references the Service by name in the pool configuration:</p>

<div class="language-yaml highlighter-rouge"><div class="highlight"><pre class="highlight"><code><table class="rouge-table"><tbody><tr><td class="rouge-gutter gl"><pre class="lineno">1
2
3
4
5
6
7
8
9
10
11
12
13
14
15
16
17
18
19
20
21
</pre></td><td class="rouge-code"><pre><span class="na">apiVersion</span><span class="pi">:</span> <span class="s">cis.f5.com/v1</span>
<span class="na">kind</span><span class="pi">:</span> <span class="s">VirtualServer</span>
<span class="na">metadata</span><span class="pi">:</span>
  <span class="na">name</span><span class="pi">:</span> <span class="s">my-app-vs</span>
  <span class="na">namespace</span><span class="pi">:</span> <span class="s">my-namespace</span>
  <span class="na">labels</span><span class="pi">:</span>
    <span class="na">f5cr</span><span class="pi">:</span> <span class="s2">"</span><span class="s">true"</span>
<span class="na">spec</span><span class="pi">:</span>
  <span class="na">host</span><span class="pi">:</span> <span class="s">myapp.example.com</span>
  <span class="na">ipamLabel</span><span class="pi">:</span> <span class="s">prod</span>          <span class="c1"># Optional: use F5 IPAM Controller for IP allocation</span>
  <span class="c1"># virtualServerAddress: "10.1.10.50"  # Or specify IP directly</span>
  <span class="na">pools</span><span class="pi">:</span>
    <span class="pi">-</span> <span class="na">path</span><span class="pi">:</span> <span class="s">/</span>
      <span class="na">service</span><span class="pi">:</span> <span class="s">my-app-svc</span>
      <span class="na">servicePort</span><span class="pi">:</span> <span class="m">80</span>
      <span class="na">monitor</span><span class="pi">:</span>
        <span class="na">type</span><span class="pi">:</span> <span class="s">http</span>
        <span class="na">send</span><span class="pi">:</span> <span class="s2">"</span><span class="s">GET</span><span class="nv"> </span><span class="s">/</span><span class="nv"> </span><span class="s">HTTP/1.1</span><span class="se">\r\n</span><span class="s">Host:</span><span class="nv"> </span><span class="s">myapp.example.com</span><span class="se">\r\n\r\n</span><span class="s">"</span>
        <span class="na">recv</span><span class="pi">:</span> <span class="s2">"</span><span class="s">"</span>
        <span class="na">interval</span><span class="pi">:</span> <span class="m">10</span>
        <span class="na">timeout</span><span class="pi">:</span> <span class="m">10</span>
</pre></td></tr></tbody></table></code></pre></div></div>

<p>When CIS processes this <code class="language-plaintext highlighter-rouge">VirtualServer</code>, it:</p>

<ol>
  <li>Creates a VIP on BIG-IP (using either the IP you specified in <code class="language-plaintext highlighter-rouge">virtualServerAddress</code> or one allocated by the F5 IPAM Controller if <code class="language-plaintext highlighter-rouge">ipamLabel</code> is used).</li>
  <li>Configures the BIG-IP pool with the backends from <code class="language-plaintext highlighter-rouge">my-app-svc</code>.</li>
  <li><strong>Writes the VIP IP address back into <code class="language-plaintext highlighter-rouge">my-app-svc</code>’s <code class="language-plaintext highlighter-rouge">status.loadBalancer.ingress</code> field.</strong></li>
</ol>

<p class="notice--info">That last step is what makes the whole chain work.</p>

<h4 id="ip-address-specify-directly-or-use-f5-ipam-controller">IP Address: Specify Directly or Use F5 IPAM Controller</h4>

<p>You have two options for IP allocation:</p>

<p><strong>Option A — Specify the IP directly in the VirtualServer manifest:</strong></p>

<div class="language-yaml highlighter-rouge"><div class="highlight"><pre class="highlight"><code><table class="rouge-table"><tbody><tr><td class="rouge-gutter gl"><pre class="lineno">1
2
</pre></td><td class="rouge-code"><pre><span class="na">spec</span><span class="pi">:</span>
  <span class="na">virtualServerAddress</span><span class="pi">:</span> <span class="s2">"</span><span class="s">10.1.10.50"</span>
</pre></td></tr></tbody></table></code></pre></div></div>

<p>This is simple and predictable. Good for static, well-planned deployments.</p>

<p><strong>Option B — Use the F5 IPAM Controller:</strong></p>

<div class="language-yaml highlighter-rouge"><div class="highlight"><pre class="highlight"><code><table class="rouge-table"><tbody><tr><td class="rouge-gutter gl"><pre class="lineno">1
2
</pre></td><td class="rouge-code"><pre><span class="na">spec</span><span class="pi">:</span>
  <span class="na">ipamLabel</span><span class="pi">:</span> <span class="s">prod</span>
</pre></td></tr></tbody></table></code></pre></div></div>

<p>The <a href="https://github.com/F5Networks/f5-ipam-controller">F5 IPAM Controller</a> watches for CIS resources with <code class="language-plaintext highlighter-rouge">ipamLabel</code> annotations and allocates IPs from a configured range. CIS then picks up the allocated IP automatically. This is ideal when you want full automation without managing IP addresses in YAML files.</p>

<h3 id="step-4-verify-cis-updates-the-service-status">Step 4: Verify CIS Updates the Service Status</h3>

<p>After CIS processes the <code class="language-plaintext highlighter-rouge">VirtualServer</code>, check the Service:</p>

<div class="language-bash highlighter-rouge"><div class="highlight"><pre class="highlight"><code><table class="rouge-table"><tbody><tr><td class="rouge-gutter gl"><pre class="lineno">1
</pre></td><td class="rouge-code"><pre>kubectl get svc my-app-svc <span class="nt">-n</span> my-namespace <span class="nt">-o</span> <span class="nv">jsonpath</span><span class="o">=</span><span class="s1">'{.status.loadBalancer.ingress}'</span>
</pre></td></tr></tbody></table></code></pre></div></div>

<p>You should see output like:</p>

<div class="language-json highlighter-rouge"><div class="highlight"><pre class="highlight"><code><table class="rouge-table"><tbody><tr><td class="rouge-gutter gl"><pre class="lineno">1
</pre></td><td class="rouge-code"><pre><span class="p">[{</span><span class="nl">"ip"</span><span class="p">:</span><span class="s2">"10.1.10.50"</span><span class="p">}]</span><span class="w">
</span></pre></td></tr></tbody></table></code></pre></div></div>

<p>This is the IP that ExternalDNS will use to create the DNS record.</p>

<h3 id="step-5-externaldns-does-its-job">Step 5: ExternalDNS Does Its Job</h3>

<p>With ExternalDNS deployed and configured for your DNS provider (Route 53, Infoblox, etc.), it will:</p>

<ol>
  <li>Discover <code class="language-plaintext highlighter-rouge">my-app-svc</code> because it’s of type <code class="language-plaintext highlighter-rouge">LoadBalancer</code> with an <code class="language-plaintext highlighter-rouge">external-dns.alpha.kubernetes.io/hostname</code> annotation.</li>
  <li>Read <code class="language-plaintext highlighter-rouge">10.1.10.50</code> from <code class="language-plaintext highlighter-rouge">status.loadBalancer.ingress</code>.</li>
  <li>Create an A record: <code class="language-plaintext highlighter-rouge">myapp.example.com → 10.1.10.50</code>.</li>
</ol>

<p>ExternalDNS handles the rest automatically, including updates if the IP changes.</p>

<p>A minimal ExternalDNS deployment for Route 53 would look like:</p>

<div class="language-yaml highlighter-rouge"><div class="highlight"><pre class="highlight"><code><table class="rouge-table"><tbody><tr><td class="rouge-gutter gl"><pre class="lineno">1
2
3
4
5
6
7
8
9
10
11
12
13
14
15
16
17
18
19
20
21
22
23
24
25
26
</pre></td><td class="rouge-code"><pre><span class="na">apiVersion</span><span class="pi">:</span> <span class="s">apps/v1</span>
<span class="na">kind</span><span class="pi">:</span> <span class="s">Deployment</span>
<span class="na">metadata</span><span class="pi">:</span>
  <span class="na">name</span><span class="pi">:</span> <span class="s">external-dns</span>
  <span class="na">namespace</span><span class="pi">:</span> <span class="s">external-dns</span>
<span class="na">spec</span><span class="pi">:</span>
  <span class="na">replicas</span><span class="pi">:</span> <span class="m">1</span>
  <span class="na">selector</span><span class="pi">:</span>
    <span class="na">matchLabels</span><span class="pi">:</span>
      <span class="na">app</span><span class="pi">:</span> <span class="s">external-dns</span>
  <span class="na">template</span><span class="pi">:</span>
    <span class="na">metadata</span><span class="pi">:</span>
      <span class="na">labels</span><span class="pi">:</span>
        <span class="na">app</span><span class="pi">:</span> <span class="s">external-dns</span>
    <span class="na">spec</span><span class="pi">:</span>
      <span class="na">serviceAccountName</span><span class="pi">:</span> <span class="s">external-dns</span>
      <span class="na">containers</span><span class="pi">:</span>
        <span class="pi">-</span> <span class="na">name</span><span class="pi">:</span> <span class="s">external-dns</span>
          <span class="na">image</span><span class="pi">:</span> <span class="s">registry.k8s.io/external-dns/external-dns:v0.14.0</span>
          <span class="na">args</span><span class="pi">:</span>
            <span class="pi">-</span> <span class="s">--source=service</span>
            <span class="pi">-</span> <span class="s">--domain-filter=example.com</span>
            <span class="pi">-</span> <span class="s">--provider=aws</span>
            <span class="pi">-</span> <span class="s">--aws-zone-type=public</span>
            <span class="pi">-</span> <span class="s">--registry=txt</span>
            <span class="pi">-</span> <span class="s">--txt-owner-id=my-cluster</span>
</pre></td></tr></tbody></table></code></pre></div></div>

<p>Refer to the <a href="https://github.com/kubernetes-sigs/external-dns">ExternalDNS documentation</a> for provider-specific configuration (IAM roles for Route 53, credentials for Infoblox, etc.).</p>

<hr />

<h2 id="putting-it-all-together-summary-of-the-architecture">Putting It All Together: Summary of the Architecture</h2>

<figure>
    <a href="/assets/cis-externaldns/cis-externaldns-diagram.png"><img src="/assets/cis-externaldns/cis-externaldns-diagram.png" /></a>
    <figcaption>High-level diagram of how the IP address is populated in the Status of the LoadBalancer service and then used by ExternalDNS</figcaption>
</figure>

<h2 id="key-considerations-and-design-choices">Key Considerations and Design Choices</h2>

<h3 id="when-to-use-this-pattern-vs-cis-as-a-loadbalancer-controller">When to Use This Pattern vs. CIS as a LoadBalancer Controller</h3>

<p>CIS <em>can</em> act directly as a LoadBalancer controller — watching Services of type <code class="language-plaintext highlighter-rouge">LoadBalancer</code> and creating VIPs on BIG-IP without any <code class="language-plaintext highlighter-rouge">VirtualServer</code> CRD involvement. If that’s sufficient for your needs, it’s simpler. ExternalDNS works with that mode natively, since CIS updates <code class="language-plaintext highlighter-rouge">status.loadBalancer.ingress</code> in both cases.</p>

<p>Use the <code class="language-plaintext highlighter-rouge">VirtualServer</code> CRD approach when you need:</p>
<ul>
  <li>Custom iRules or iApps on the VIP</li>
  <li>Advanced persistence profiles</li>
  <li>Fine-grained TLS termination control</li>
  <li>Traffic splitting or A/B routing policies</li>
  <li>Any BIG-IP capability that doesn’t map directly to Kubernetes Service semantics</li>
</ul>

<h3 id="allocateloadbalancernodeports-false--when-it-applies"><code class="language-plaintext highlighter-rouge">allocateLoadBalancerNodePorts: false</code> — When It Applies</h3>

<p>This setting is appropriate when your CIS deployment uses <code class="language-plaintext highlighter-rouge">--pool-member-type=cluster</code>. In cluster mode, BIG-IP sends traffic directly to pod IPs, not through NodePort endpoints. Disabling NodePort allocation:</p>

<ul>
  <li>Prevents back-door access to your application via <code class="language-plaintext highlighter-rouge">&lt;NodeIP&gt;:&lt;NodePort&gt;</code>.</li>
  <li>Reduces iptables rule sprawl on your nodes.</li>
  <li>Aligns with a clean security boundary where BIG-IP is the sole ingress.</li>
</ul>

<p>If your CIS deployment uses <code class="language-plaintext highlighter-rouge">--pool-member-type=nodeport</code>, you should <strong>not</strong> set <code class="language-plaintext highlighter-rouge">allocateLoadBalancerNodePorts: false</code>, as CIS will need those NodePorts to forward traffic.</p>

<h3 id="f5-ipam-controller-integration">F5 IPAM Controller Integration</h3>

<p>The F5 IPAM Controller pairs particularly well with this pattern. Rather than managing VIP IP addresses in your <code class="language-plaintext highlighter-rouge">VirtualServer</code> manifests, IPAM handles allocation from a configured pool. This means:</p>

<ul>
  <li>Platform teams manage IP ranges in the IPAM controller config.</li>
  <li>Application teams simply specify an <code class="language-plaintext highlighter-rouge">ipamLabel</code> in their <code class="language-plaintext highlighter-rouge">VirtualServer</code> manifest.</li>
  <li>CIS picks up the IPAM-assigned IP and writes it to the Service <code class="language-plaintext highlighter-rouge">status</code> automatically.</li>
</ul>

<p>The ExternalDNS chain remains identical regardless of whether the IP comes from IPAM or is statically assigned.</p>

<hr />

<h2 id="frequently-asked-questions">Frequently Asked Questions</h2>

<p><strong>Q: Can I use this pattern with TransportServer CRDs instead of VirtualServer?</strong></p>

<p>Yes. CIS similarly updates the <code class="language-plaintext highlighter-rouge">status</code> of a referenced Service when using <code class="language-plaintext highlighter-rouge">TransportServer</code>. The same approach applies.</p>

<p><strong>Q: What if I want ExternalDNS to also create a CNAME instead of an A record?</strong></p>

<p>Use the <code class="language-plaintext highlighter-rouge">external-dns.alpha.kubernetes.io/target</code> annotation on the Service to override the IP with a hostname, causing ExternalDNS to create a CNAME. Refer to ExternalDNS documentation for specifics.</p>

<p><strong>Q: Can I use multiple hostnames for the same VirtualServer?</strong></p>

<p>Add multiple <code class="language-plaintext highlighter-rouge">external-dns.alpha.kubernetes.io/hostname</code> annotations (comma-separated values are supported by ExternalDNS) or create additional Services pointing to the same pods.</p>

<hr />

<h2 id="conclusion">Conclusion</h2>

<p>Combining F5 CIS <code class="language-plaintext highlighter-rouge">VirtualServer</code> CRDs with the community ExternalDNS project gives you the best of both worlds: rich BIG-IP traffic management via CIS, and flexible, provider-agnostic DNS automation via ExternalDNS.</p>

<p>The core insight is simple — <strong>CIS writes the BIG-IP VIP IP address back into the Kubernetes Service <code class="language-plaintext highlighter-rouge">status</code> field, and ExternalDNS reads from that same field</strong>. By using <code class="language-plaintext highlighter-rouge">loadBalancerClass</code> and <code class="language-plaintext highlighter-rouge">allocateLoadBalancerNodePorts: false</code>, you ensure the Service is a clean “status carrier” that doesn’t accidentally expose your application through unintended paths.</p>

<p>Whether you assign VIP IPs statically in your manifests or use the F5 IPAM Controller for full automation, this pattern integrates naturally into any Kubernetes-native GitOps workflow.</p>

<hr />

<h2 id="additional-resources">Additional Resources</h2>

<ul>
  <li><a href="https://clouddocs.f5.com/containers/latest/">F5 CIS Documentation</a></li>
  <li><a href="https://clouddocs.f5.com/containers/latest/userguide/crd/virtualserver.html">F5 CIS VirtualServer CRD Reference</a></li>
  <li><a href="https://github.com/F5Networks/f5-ipam-controller">F5 IPAM Controller on GitHub</a></li>
  <li><a href="https://github.com/kubernetes-sigs/external-dns">ExternalDNS on GitHub</a></li>
  <li><a href="https://github.com/kubernetes-sigs/external-dns/blob/master/docs/sources/service.md">ExternalDNS: Service Source Documentation</a></li>
  <li><a href="https://kubernetes.io/docs/concepts/services-networking/service/#loadbalancer">Kubernetes: LoadBalancer Service specification</a></li>
</ul>]]></content><author><name>Michael O&apos;Leary</name></author><category term="kubernetes" /><category term="kubernetes" /><category term="f5" /><summary type="html"><![CDATA[Short overview of one way to use ExternalDNS project with F5 CIS]]></summary></entry><entry><title type="html">Remote CR discovery with multi-cluster CIS</title><link href="https://michaeloleary.net/kubernetes/remote-cr-discovery-cis/" rel="alternate" type="text/html" title="Remote CR discovery with multi-cluster CIS" /><published>2026-03-12T00:00:00+00:00</published><updated>2026-03-12T00:00:00+00:00</updated><id>https://michaeloleary.net/kubernetes/remote-cr-discovery-cis</id><content type="html" xml:base="https://michaeloleary.net/kubernetes/remote-cr-discovery-cis/"><![CDATA[<figure>
    <a href="/assets/cis-multicluster/cis-multicluster-header.png"><img src="/assets/cis-multicluster/cis-multicluster-header.png" /></a>
    <figcaption></figcaption>
</figure>

<h3 id="remote-cr-discovery-for-cis-multi-cluster">Remote CR discovery for CIS multi-cluster</h3>

<h4 id="background">Background</h4>
<p>I’ve watched one of my favorite projects at F5, CIS (Container Ingress Services), mature over the years. When I joined F5 in late 2018, it watched the K8s API for the creation of Ingress resources and configured a VirtualServer on the BIG-IP with settings determined by the annotations on the Ingress resource. Then I watched over the years:</p>
<ul>
  <li>it could send AS3 declarations to BIG-IP based on ConfigMap resources</li>
  <li>it supported Custom Resources (CRD’s) like <code class="language-plaintext highlighter-rouge">VirtualServer</code> and <code class="language-plaintext highlighter-rouge">TransportServer</code></li>
  <li>the CRD schema grew and matured to support almost all available BIG-IP settings</li>
  <li>it integrated with IPAM and DNS</li>
  <li>it started supporting pool members using pods from multiple clusters</li>
</ul>

<h4 id="remote-cr-discovery">Remote CR discovery</h4>
<p>What’s the latest improvement? Until now, even when operating in multi-cluster mode, CIS only discovered Custom Resources that were installed <em>on the same cluster on which CIS was running</em>. While pods from remote clusters could become pool members in BIG-IP, the <code class="language-plaintext highlighter-rouge">VirtualServer</code> and <code class="language-plaintext highlighter-rouge">TransportServer</code> resources had to be on the same cluster as CIS.</p>

<p>Why is this a problem?</p>

<p>Imagine you have 4 clusters and they all run different parts of the same overall application. You may have multiple clusters for the sake of:</p>
<ul>
  <li><strong>redundancy</strong> (in case of cluster failure)</li>
  <li><strong>migration</strong> (you’re moving workloads between namespaces and clusters)</li>
  <li><strong>cost reasons</strong> (some workloads on more costly clusters)</li>
  <li>etc</li>
</ul>

<p>You may choose to install CIS on Cluster 1 and have CIS “watch” all 4 clusters for services to expose via BIG-IP. But before now, you had to install CR’s - <code class="language-plaintext highlighter-rouge">VirtualServer</code> and <code class="language-plaintext highlighter-rouge">TransportServer</code> - on Cluster 1 only. That means you have to control where your app teams deploy their resources.</p>

<p>Now, CIS will watch all 4 clusters for services AND Custom Resources. That’s the feature introduced here.</p>

<h4 id="before-remote-cr-discovery">Before remote CR discovery</h4>

<figure>
    <a href="/assets/cis-multicluster/cis-multicluster-diagram1.png"><img src="/assets/cis-multicluster/cis-multicluster-diagram1.png" /></a>
    <figcaption>With multi-cluster, without remote CR discover</figcaption>
</figure>

<h4 id="with-remote-cr-discovery">With remote CR discovery</h4>

<figure>
    <a href="/assets/cis-multicluster/cis-multicluster-diagram2.png"><img src="/assets/cis-multicluster/cis-multicluster-diagram2.png" /></a>
    <figcaption>With multi-cluster, with remote CR discovery</figcaption>
</figure>

<h3 id="how-to-configure-remote-cr-discovery">How to configure remote CR discovery</h3>
<p>As you can see from the diagrams, the difference is quite simple, but the operational impacts are large. Enabling this is equally simple: a single line in the extended spec config file (see line 15 below)</p>

<div class="language-yaml highlighter-rouge"><div class="highlight"><pre class="highlight"><code><table class="rouge-table"><tbody><tr><td class="rouge-gutter gl"><pre class="lineno">1
2
3
4
5
6
7
8
9
10
11
12
13
14
15
</pre></td><td class="rouge-code"><pre><span class="na">kind</span><span class="pi">:</span> <span class="s">ConfigMap</span>
<span class="na">apiVersion</span><span class="pi">:</span> <span class="s">v1</span>
<span class="na">metadata</span><span class="pi">:</span>
  <span class="na">name</span><span class="pi">:</span> <span class="s">extended-spec-config</span>
  <span class="na">namespace</span><span class="pi">:</span> <span class="s">kube-system</span>
  <span class="na">labels</span><span class="pi">:</span>
    <span class="na">f5type</span><span class="pi">:</span> <span class="s">virtual-server</span>
    <span class="na">as3</span><span class="pi">:</span> <span class="s2">"</span><span class="s">true"</span>
<span class="na">data</span><span class="pi">:</span>
  <span class="na">extendedSpec</span><span class="pi">:</span> <span class="pi">|</span>
    <span class="s">mode: default</span>
    <span class="s">externalClustersConfig:</span>
    <span class="s">- clusterName: cluster2</span>
      <span class="s">secret: kube-system/kubeconfig2</span>
      <span class="s">customResourceDiscovery: true #enables this new feature</span>
</pre></td></tr></tbody></table></code></pre></div></div>

<p>For the sake of full repeatability, I am going to share my manifests <a href="https://github.com/mikeoleary/cis-multicluster-remote-cr-discovery">here</a>.</p>

<p>Also, for the sake of thinking about how this would apply to CIS in HA setup, here’s a diagram that depicts our problem with an Active/Standby CIS cluster.</p>

<figure>
    <a href="/assets/cis-multicluster/cis-multicluster-diagram3.png"><img src="/assets/cis-multicluster/cis-multicluster-diagram3.png" /></a>
    <figcaption>With multi-cluster and CIS in HA mode, without remote CR discovery</figcaption>
</figure>

<p>Thanks for reading!</p>]]></content><author><name>Michael O&apos;Leary</name></author><category term="kubernetes" /><category term="kubernetes" /><category term="f5" /><summary type="html"><![CDATA[Short overview of new feature in multi-cluster CIS]]></summary></entry><entry><title type="html">More KillerCoda cool fetures</title><link href="https://michaeloleary.net/kubernetes/cool-killer-coda-features/" rel="alternate" type="text/html" title="More KillerCoda cool fetures" /><published>2026-01-30T00:00:00+00:00</published><updated>2026-01-30T00:00:00+00:00</updated><id>https://michaeloleary.net/kubernetes/cool-killer-coda-features</id><content type="html" xml:base="https://michaeloleary.net/kubernetes/cool-killer-coda-features/"><![CDATA[<figure>
    <a href="/assets/practice-exams/practice-exam-header-image2.png"><img src="/assets/practice-exams/practice-exam-header-image2.png" /></a>
    <figcaption>More tips for practice exams</figcaption>
</figure>

<h3 id="how-ive-updated-my-killercoda-labs-to-use-more-features">How I’ve updated my KillerCoda labs to use more features</h3>
<p>Most of this can be found in the short <a href="https://killercoda.com/creators">doc for creators</a> but I’ll share what I’ve done here:</p>

<h4 id="environments">Environments</h4>
<p>Right now I’m still using the <code class="language-plaintext highlighter-rouge">kubernetes-kubeadm-1node</code> image but I do plan to have a good reason to use <code class="language-plaintext highlighter-rouge">ubuntu</code> or <code class="language-plaintext highlighter-rouge">kubernetes-kubeadm-2nodes</code></p>

<h4 id="custom-code-markdown-actions">Custom Code Markdown Actions</h4>
<ul>
  <li>The <code class="language-plaintext highlighter-rouge">{{copy}}</code> and <code class="language-plaintext highlighter-rouge">{{exec}}</code>  shortcuts that turn code blocks into easily copied or run text is handy. I’m using that now.</li>
  <li>The <code class="language-plaintext highlighter-rouge">{{TRAFFIC_HOST1_80}}</code>  is a nice way to display a URL easily, I’m using that too.</li>
</ul>

<h4 id="scripts">Scripts</h4>
<ul>
  <li>There is now a validation step in some of my scenarios. I have made scripts to check basic things like <em>“are there 2x running pods in the nginx-ingress namespace?”</em></li>
  <li>I’m using a background script to do things like create YAML files when the scenario loads</li>
  <li>I’m using a foreground script to show a small “loading” alert in the command window while the background script runs</li>
</ul>

<h4 id="formatting">Formatting</h4>
<p>I’m using html <code class="language-plaintext highlighter-rouge">&lt;details&gt;</code> and <code class="language-plaintext highlighter-rouge">&lt;summary&gt;</code> tags to have hints. Here’s an example:</p>

<figure>
    <a href="/assets/practice-exams/hint.gif"><img src="/assets/practice-exams/hint.gif" /></a>
    <figcaption>My first gif in Jekyll</figcaption>
</figure>

<p>This is done with formatting like this:</p>

<div class="language-plaintext highlighter-rouge"><div class="highlight"><pre class="highlight"><code><table class="rouge-table"><tbody><tr><td class="rouge-gutter gl"><pre class="lineno">1
2
3
4
5
</pre></td><td class="rouge-code"><pre>&lt;details&gt;
  &lt;summary&gt;Hint 1&lt;/summary&gt;
  
  **Hint:** You will need to edit the `replicas` and `image` values in `nginx-ingress.yaml`, and add an argument for the container image.
&lt;/details&gt;
</pre></td></tr></tbody></table></code></pre></div></div>

<h3 id="the-result">The result</h3>
<p>Check them out for yourself:</p>

<figure>
    <a href="/assets/practice-exams/killer-coda-screenshot2.png"><img src="/assets/practice-exams/killer-coda-screenshot2.png" /></a>
    <figcaption>Check them out!</figcaption>
</figure>]]></content><author><name>Michael O&apos;Leary</name></author><category term="kubernetes" /><category term="kubernetes" /><summary type="html"><![CDATA[Cool features I've added over the past few days.]]></summary></entry></feed>