Inference security using Open WebUI
| AI inference networking | |
|---|---|
| Part 1 | Open WebUI as front door for ChatGPT |
| Part 2 | Inference security using Open WebUI |
| Part 3 | Layering NGINX for more Inference security |
| Part 4 | F5 AI Guardrails out-of-band |

How to add guardrails using Open WebUI
In the previous post we covered 3 easy reasons to use Open WebUI:
- chat history kept on-prem
- settings kept on-prem
- drastically cheaper with pay-as-you-go API usage
Now we will explore more extensibility with Open WebUI functions. In this article we will show how to add a 3rd party prompt scanner (F5 AI Guardrails). We could use Functions for other things, like
- adding mTLS verification of clients
- directing some users’ prompts to one LLM, and others’ to another LLM
- chaining together multiple LLM’s
- etc
Perhaps in future. For now, here’s how I added F5 AI Guardrails to my Open WebUI config
Pre-requisites
- A tenant in CalypsoAI SaaS environment with a Project configured and at least 1 active scanner for testing blocked prompts.
- A project API token from CalypsoAI.
Instructions
- Deploy Open WebUI. I use K8s, so follow the previous post.
- In addition, this time create a secret in K8s to hold our API key for F5 AI Guardrails. Since this was called CalypsoAI before F5 acquired the tech, we’ll call the secret calypso-api-key:
1
kubectl create secret generic calypso-api-key --from-literal=CALYPSO_API_KEY=your_real_api_key --namespace open-webui
- We’ll use this as an env var, so add this to your YAML file for the Open WebUI deployment:
1
2
3
4
5
6
7
8
9
10
# ...
     env: # existing line
     - name: OLLAMA_BASE_URL  # existing line
       value: "http://ollama-service.open-webui.svc.cluster.local:11434"  # existing line
     - name: CALYPSO_API_KEY
       valueFrom:
         secretKeyRef:
           name: calypso-api-key
           key: CALYPSO_API_KEY
# ...
- Now deploy Open WebUI with K8s, expose it, and log in. Don’t add your API token for OpenAI in OpenWebUI (we’ll add it to F5 AI Guardrails which is in-line)
- Copy the function below into Open WebUI.
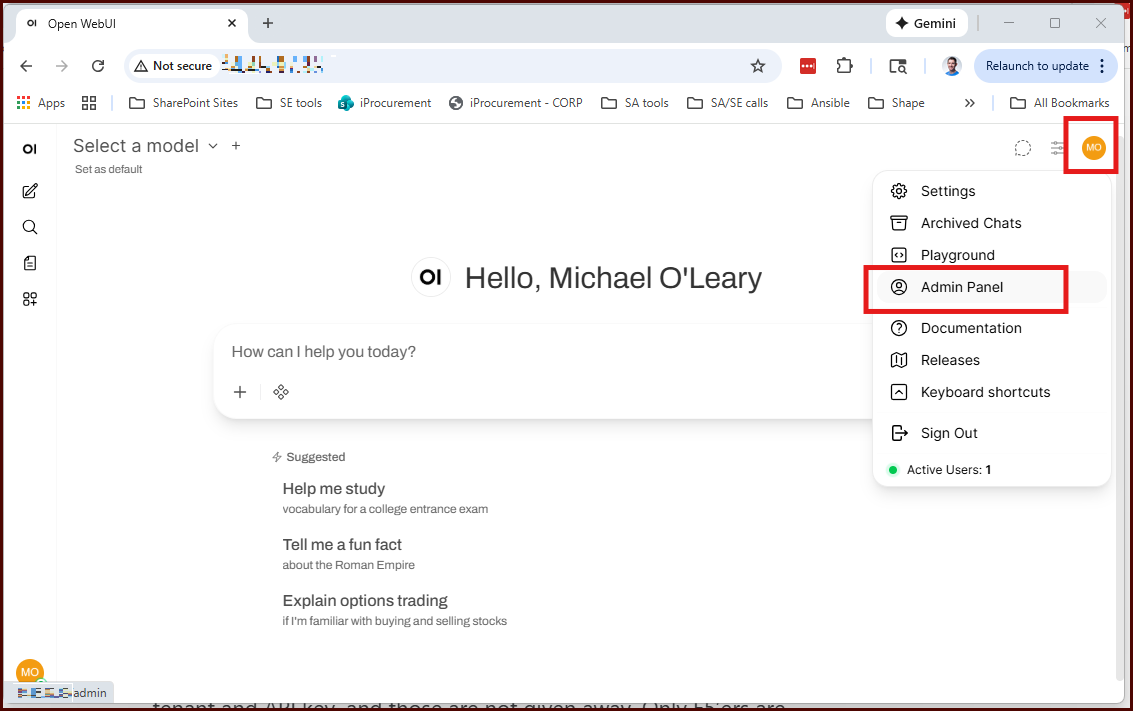
Under 'Admin Panel' you will find Functions 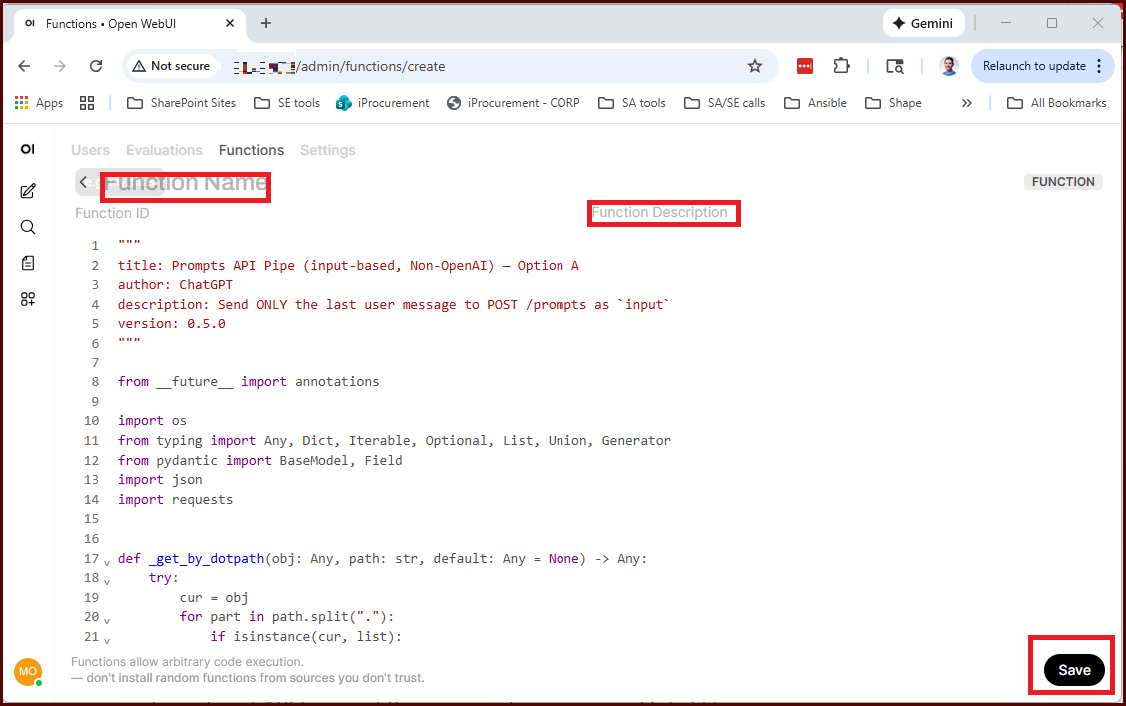
Copy the function below, give it a name and description. 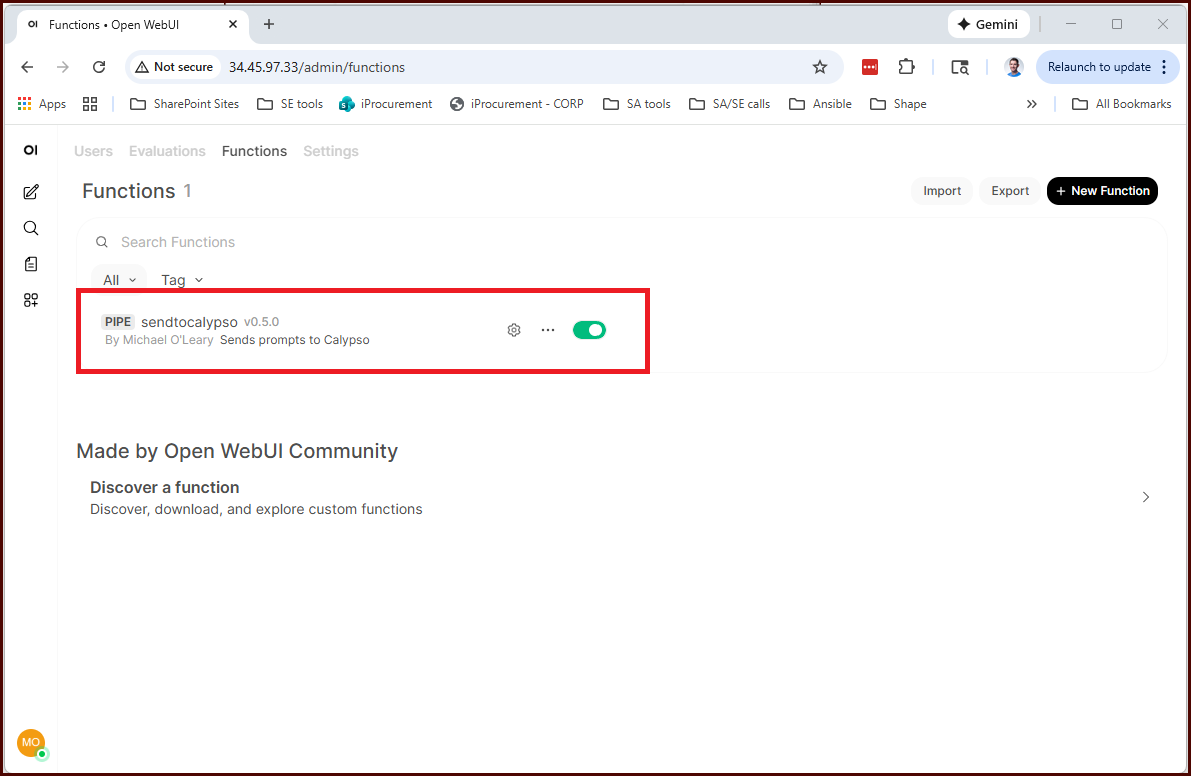
Don't forget to enable the function - Notice a few things:
- we do not hardcode our Calypso API key. This variable can be added as a “valve” (like a variable), or the default will be the env var we created earlier.
- we have hardcoded a few other variables, like
Model Name,Base Url, and a few others. Feel free to edit these variables.
-
Now you should be able to return to the chat interface and send a prompt to CalypsoAI (F5 AI Guardrails).
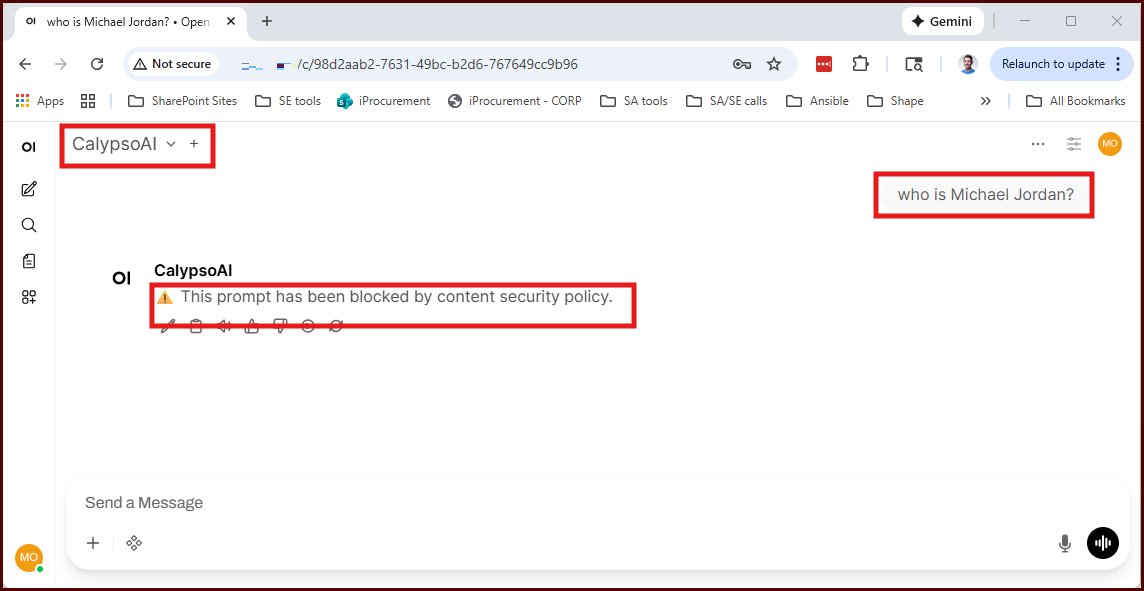
Function is sending our prompt to Calypso. A policy disallowing any discussion of basketball is blocking our prompt. - Notice that if your prompt is blocked by Calypso, you can see the name of the scanner that blocked it. This level of detail must be enabled with a valve.
I know this is short and sweet. You need a CalypsoAI tenant and API key, and those are not given away. Only F5’ers are likely to use this post, so please reach out if you want help.