Open WebUI as front door for ChatGPT
| AI inference networking | |
|---|---|
| Part 1 | Open WebUI as front door for ChatGPT |
| Part 2 | Inference security using Open WebUI |
| Part 3 | Layering NGINX for more Inference security |
| Part 4 | F5 AI Guardrails out-of-band |

Overview
Want to host your own web interface for ChatGPT or other models? Here’s a basic how-to, and why. We’ll use Open WebUI, we’ll run it on K8s, and we’ll connect to OpenAI using an API token.
This post will guide you through setting up Open WebUI on a k8s cluster using GKE as an example. We’ll configure it to use your OpenAI API key so that you can use ChatGPT (or other models) cheaply and securely.
Why Self-Host Open WebUI on Kubernetes?
Before we dive into the technicalities, let’s explore some reasons you might do this:
-
Cost Control & Efficiency:
Many folks pay $20/mth for ChatGPT or other services, with businesses and teams paying much more. Did you know that if you access these models via API calls using an API token, you can pay only for the tokens you use? For a personal user this can save a lot of money. -
Enhanced Privacy and Inference Security:
By running Open WebUI on your own k8s cluster, you have greater control over where some data resides. Your conversation history, custom prompts, and settings are stored within your own infrastructure, reducing reliance on third-party cloud services for data persistence. This can be crucial for projects involving sensitive information or where data governance is a primary concern. While your prompts are still sent to OpenAI’s API, the local storage aspect offers a significant privacy uplift compared to entirely cloud-managed solutions. -
Model Agnostic Flexibility:
One of Open WebUI’s greatest strengths is its ability to act as a unified interface for multiple AI models. Whether you want to interact with OpenAI’s GPT series, Google’s Gemini (via API), Anthropic’s Claude, or even local open-source models (like those run via Ollama), Open WebUI provides a consistent user experience. -
Operational Agility with Kubernetes:
Deploying Open WebUI on GKE offers typical K8s benefits. You gain:- Rapid Deployment & Destruction: Deploy Open WebUI with simple
kubectlcommands. I spin up/down clusters and apps often. I hate deploying things on my laptop and prefer ephemeral environments. - Scalability: a typical k8s benefit: you can scale Open WebUI instances if needed
- High Availability: another typical k8s benefit, HA.
- Declarative Configuration: yet another typical k8s benefit: define your deployment with YAML, enable version control, reproducibility, easy modification or upgrades, etc.
- Rapid Deployment & Destruction: Deploy Open WebUI with simple
This setup provides a robust, flexible, and private foundation for all your AI interactions.
Setting Up Open WebUI on Kubernetes (GKE Example)
Let’s walk through the steps to get Open WebUI running on a k8s cluster and connected to OpenAI.
Prerequisites
Before you start, ensure you have:
- An OpenAI API key. You can generate one from the OpenAI Platform. I think I paid $5 for something like 2 million tokens.
- A Google Cloud Platform (GCP) account with billing enabled.
- The
gcloudCLI installed and configured. kubectlinstalled and configured to connect to your GCP project.- A Kubernetes cluster (e.g., a GKE cluster) up and running. If you don’t have one, you can create a basic GKE cluster using:
1
2
3
4
5
6
  REGION='us-central1'
  PROJECTNAME='your-project-name'
  CLUSTERNAME='openwebui-cluster'

  gcloud container clusters create $CLUSTERNAME --region $REGION --project $PROJECTNAME --num-nodes=1
  gcloud container clusters get-credentials $CLUSTERNAME --region $REGION --project $PROJECTNAME
Step 1: Deploy Open WebUI on GKE and expose to Internet:
1
2
3
4
5
6
git clone https://github.com/open-webui/open-webui.git
cd open-webui
kubectl apply -f ./kubernetes/manifest/base

# Expose Open Web UI via Google Public LB
kubectl expose deployment open-webui-deployment --type=LoadBalancer --name=openwebui-external-service --port=80 --target-port=8080 -n open-webui
Step 2: Configure Open WebUI
Get the public IP of your Open WebUI instance:
1
kubectl get service openwebui-external-service --namespace open-webui
Now access the IP address with a browser. Create an account immediately and log in.
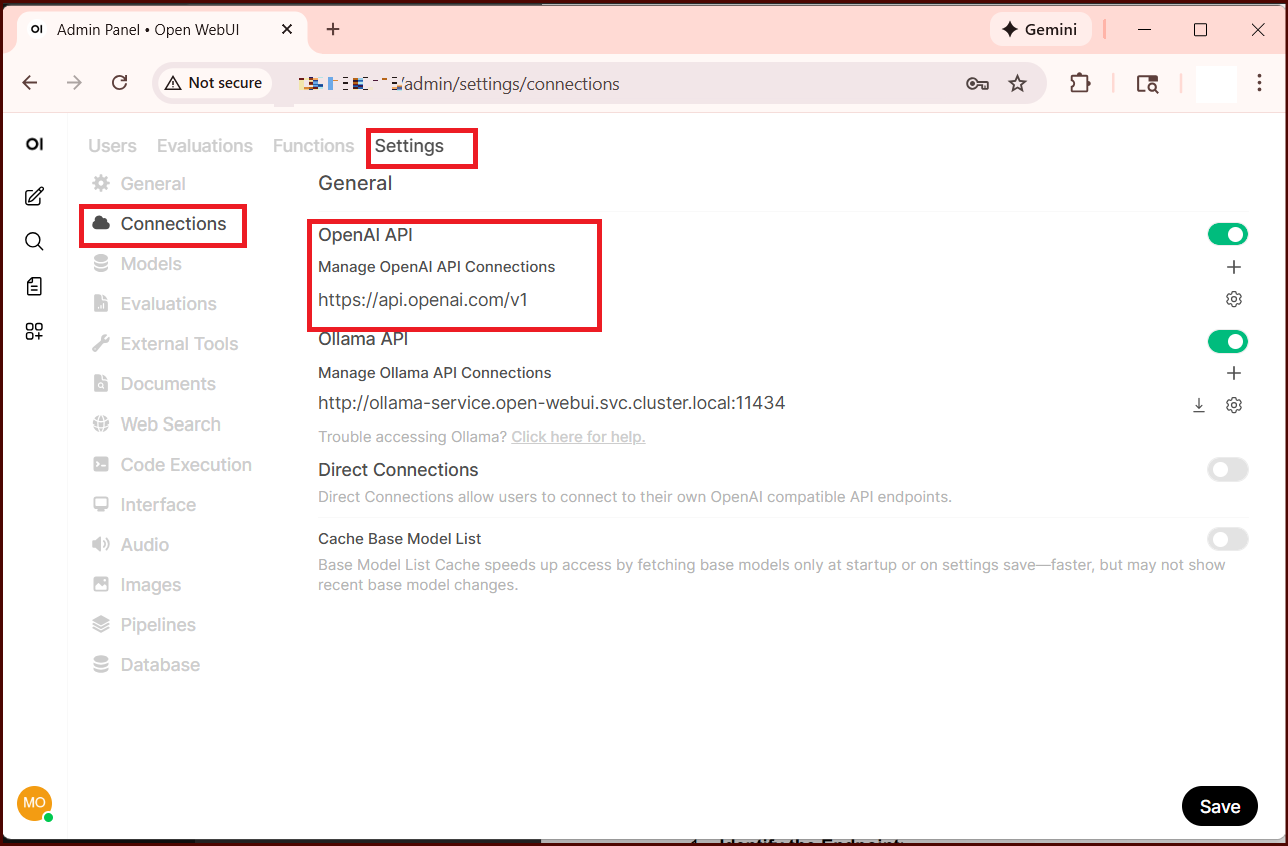
Now we’re just going to follow the instructions to add an API Connection in Open WebUI.
- Go to the ⚙️ Admin Settings.
- Navigate to Connections > OpenAI > Manage (look for the wrench icon).
- Click ➕ Add New Connection.
- Fill in the following:
- API URL: https://api.openai.com/v1 (or the URL of your specific provider)
- API Key: Paste your key here
- Click Save ✅.
After doing this, you should see that a full list of OpenAI models is listed in your chat interface.
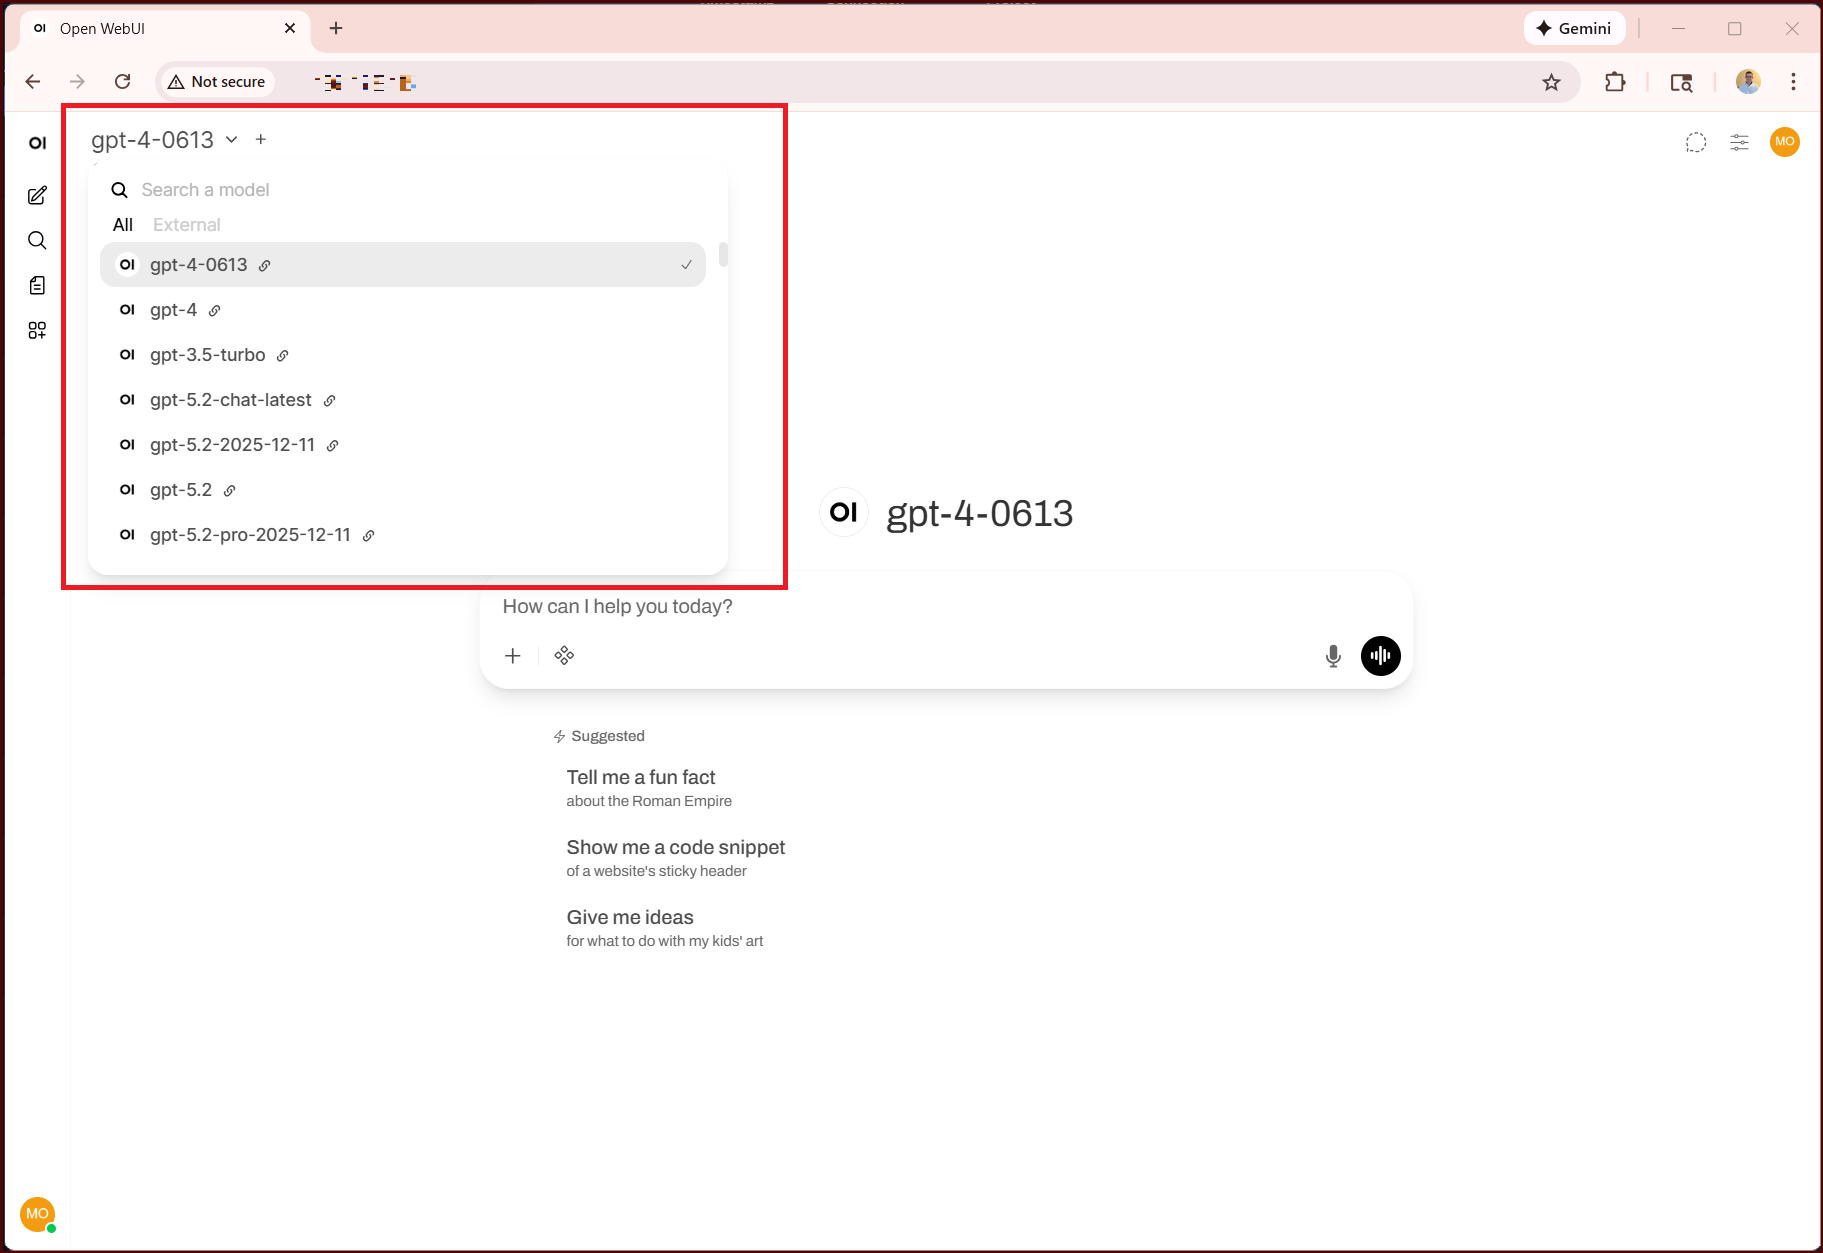
Step 3: Chat with OpenAI models
You can now use OpenAI models via your local instance of Open WebUI. Notice a few things.
- You still have conversation history in your user interface, but this is stored locally on your K8s cluster, not in OpenAI.
- Go to https://platform.openai.com/ and notice that you see API usage.
- You can edit settings within Open WebUI. I’m no expert on advanced prompt engineering (yet!) so I’ll leave that for now.
- You could add other models, like Anthropic’s models or a local model like Ollama.
- You can extend Open WebUI to use additional security tools (should be my next blog post!)
Step 4: Advanced considerations
Of course this was a basic demo. You should add SSL (maybe use an Ingress controller if you’re in K8s). You can probably find a way to store your API key as a K8s secret and reference it. You should not expose your web interface to the public Internet unless you want to, so you could add network rules for this. I think this basic demo uses a basic PVC in GKE to persist data, but you may want to revisit that if you intend to keep this running.
Thanks for reading and next post should build on this.