Vault with Azure Key Vault backing

Summary
Vault was installed in the last post. Now let’s make it KMS-backed.
Why KMS-backed Vault?
When Vault is KMS-backed, it uses a cloud provider’s Key Management Service to:
- Automatically unseal itself at startup (no need to enter Shamir key shares)
- Secure the Vault master key envelope (used to decrypt the data encryption key)
- Let you keep control of root encryption keys in your cloud account
Auto-unsealing Vault with a cloud KMS gives you:
🔐 Better operational security (no human key share handling)
🔁 Easier restarts/reboots/recovery
💥 Cleaner automation for production Vault clusters
Why Azure Key Vault?
I’ll use Azure Key Vault as my KMS only because I have some other very cheap, long-lived resources in the same Resource Group in Azure. I use a delete lock to make sure these don’t get cleaned up accidentally.
How-to
Azure set up
- Create a Key Vault in Azure.
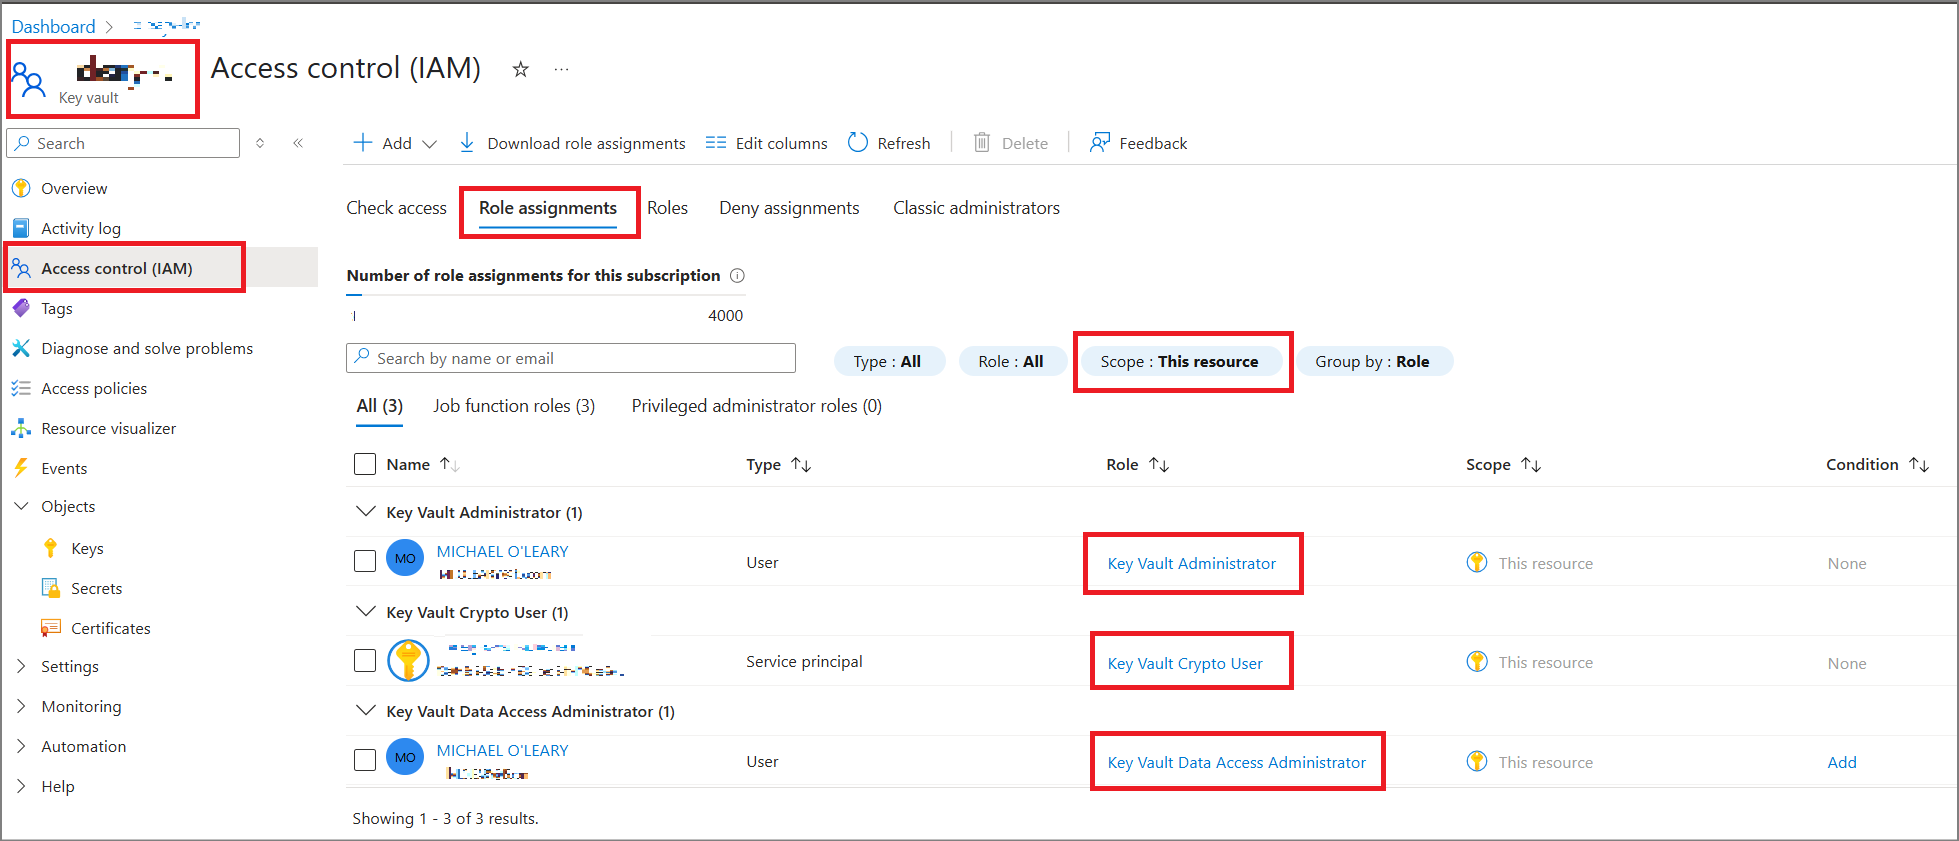
- After creation, I used the IAM tab to give myself two roles. I believe I need the first in order to give myself the second, in order to create keys in the vault.
- “Key Vault Data Access Administrator”
- “Key Vault Administrator”
- Create a key in the vault called “vault-unseal-key”
- Create an App Registration called “oleary-kv-vault-auto-unseal”
- In Azure Key Vault, give this app registration the role of “Key Vault Crypto User”
Vault set up
- Install Vault
- Create the following file at
/etc/vault.d/vault.hcl
user_lockout "approle" {
 lockout_threshold = "25"
 lockout_duration = "1m"
 #disable_lockout = "true"
}

storage "file" {
  path = "/opt/vault/data"
}

seal "azurekeyvault" {
  tenant_id      = "YOUR_TENANT_ID"
  client_id      = "YOUR_CLIENT_ID"
  client_secret  = "YOUR_CLIENT_SECRET"
  vault_name     = "YOUR_AZURE_KEY_VAULT_NAME"
  key_name       = "vault-unseal-key"
}

# HTTP listener
#listener "tcp" {
#  address = "127.0.0.1:8200"
#  tls_disable = 1
#}

# HTTPS listener
listener "tcp" {
  address       = "0.0.0.0:8200"
  tls_cert_file = "/opt/vault/tls/tls.crt"
  tls_key_file  = "/opt/vault/tls/tls.key"
}


ui = true
Now ensure that we can start and unseal Vault automatically. Create a systemd unit file at /etc/systemd/system/vault.service:
[Unit]
Description=Vault
Requires=network-online.target
After=network-online.target

[Service]
User=vault
Group=vault
ExecStart=/usr/bin/vault server -config=/etc/vault.d/vault.hcl
ExecReload=/bin/kill --signal HUP \$MAINPID
Restart=on-failure
LimitNOFILE=65536

[Install]
WantedBy=multi-user.target
EOF
Also make sure you create the Vault user and directory:
1
2
3
sudo useradd --system --home /etc/vault.d --shell /bin/false vault
sudo mkdir -p /opt/vault/data
sudo chown -R vault:vault /opt/vault /etc/vault.d
Now, start and initialize Vault:
1
2
3
4
5
6
sudo systemctl daemon-reexec
sudo systemctl enable vault
sudo systemctl start vault

export VAULT_ADDR='https://127.0.0.1:8200'
vault operator init -tls-skip-verify
Initial configuration
For the sake of completeness, I’ll make notes of my initial set up commands.
After the vault operator init command above, the CLI outputs a success message with an initial root token. I have used the vault CLI to login:
1
vault login <root token>
I also want to enable the AppRole auth method, and I have created an AppRole called f5ast-role so that I can access Vault from my AST container:
1
2
3
4
5
6
7
8
9
10
11
12
13
14
15
16
17
18
19
#enable the AppRole auth method
vault auth enable approle

#create a policy that allows reading of secrets
vault policy write secret_read_policy - <<EOF
path "secret/data/*" {
       capabilities = ["read"]
     }
EOF

#create an AppRole that includes this policy
vault write auth/approle/role/f5ast-role \
  token_ttl=60m \
  token_max_ttl=120m \
  policies="secret_read_policy"

#Let's get the role id and a secret id for this role, which will be used in our sidecar agent.
vault read -field=role_id auth/approle/role/f5ast-role/role-id > ./role_id
vault write -f -field=secret_id auth/approle/role/f5ast-role/secret-id > ./secret_id
Vault doesn’t come with any secrets engines enabled by default (except in dev mode), so you’ll need to manually enable the KV engine before you can store anything:
1
vault secrets enable -path=secret -version=2 kv
Explanation:
-path=secret: mounts the secrets engine at secret/-version=2: uses KV v2 (versioned secrets)kv: enables the Key/Value secrets engine
Don’t forget to actually create a secret:
1
vault kv put /secret/bigip_password_1/config username=admin password='Sup3rS3cr3tPassw0rd'
Notes on HTTPS, UI, and preferences
- Notice I have the Vault server listening on HTTPS, with HTTP commented out. Because I’m using the default self-signed certs, I have also used
-tls-skip-verifyin my vault cli command, and/or I could set an environment variable withexport VAULT_SKIP_VERIFY=1. - Another env var to run local vault cli commands:
export VAULT_ADDR="https://127.0.0.1:8200" - An env var you may consider setting while testing only:
VAULT_SKIP_VERIFY=true- this is a setting used by the vault cli or client, not the server
- Note, there is also a UI available at
https://[vault-server-ip]:8200 - I can run
vault statusto verify that Vault is running. vault -autocomplete-installand reloading the bash shell allows CLI autocomplete.- By default, Vault will lock out users who fail authentication several times in quick succession1. This can make troubleshooting difficult, so I’ve set a lockout time of only 1 min after 25 failed auth attempts for authentications via the approle auth method. This is generous to allow troubleshooting, but still enforces some kind of user lockout.
Testing and validating the secret and AppRole
Log in with the Vault CLI using the new AppRole, and retrieve the secret value:
1
2
3
4
#Log into Vault CLI with AppRole
vault write auth/approle/login role_id=xxx secret_id=xxx
#Read secret
vault kv get /secret/bigip_password_1/config
Conclusion
We now have Vault set up on Ubuntu, and on start up it will automatically unseal using the key from Azure Key Vault. We have initialized Vault, saved our root token, logged into Vault from the local CLI, enabled AppRole auth method and created an AppRole.
-
https://developer.hashicorp.com/vault/docs/configuration/user-lockout ↩