Lessons learned building my own workbench
Background
This is 3-part blog post:
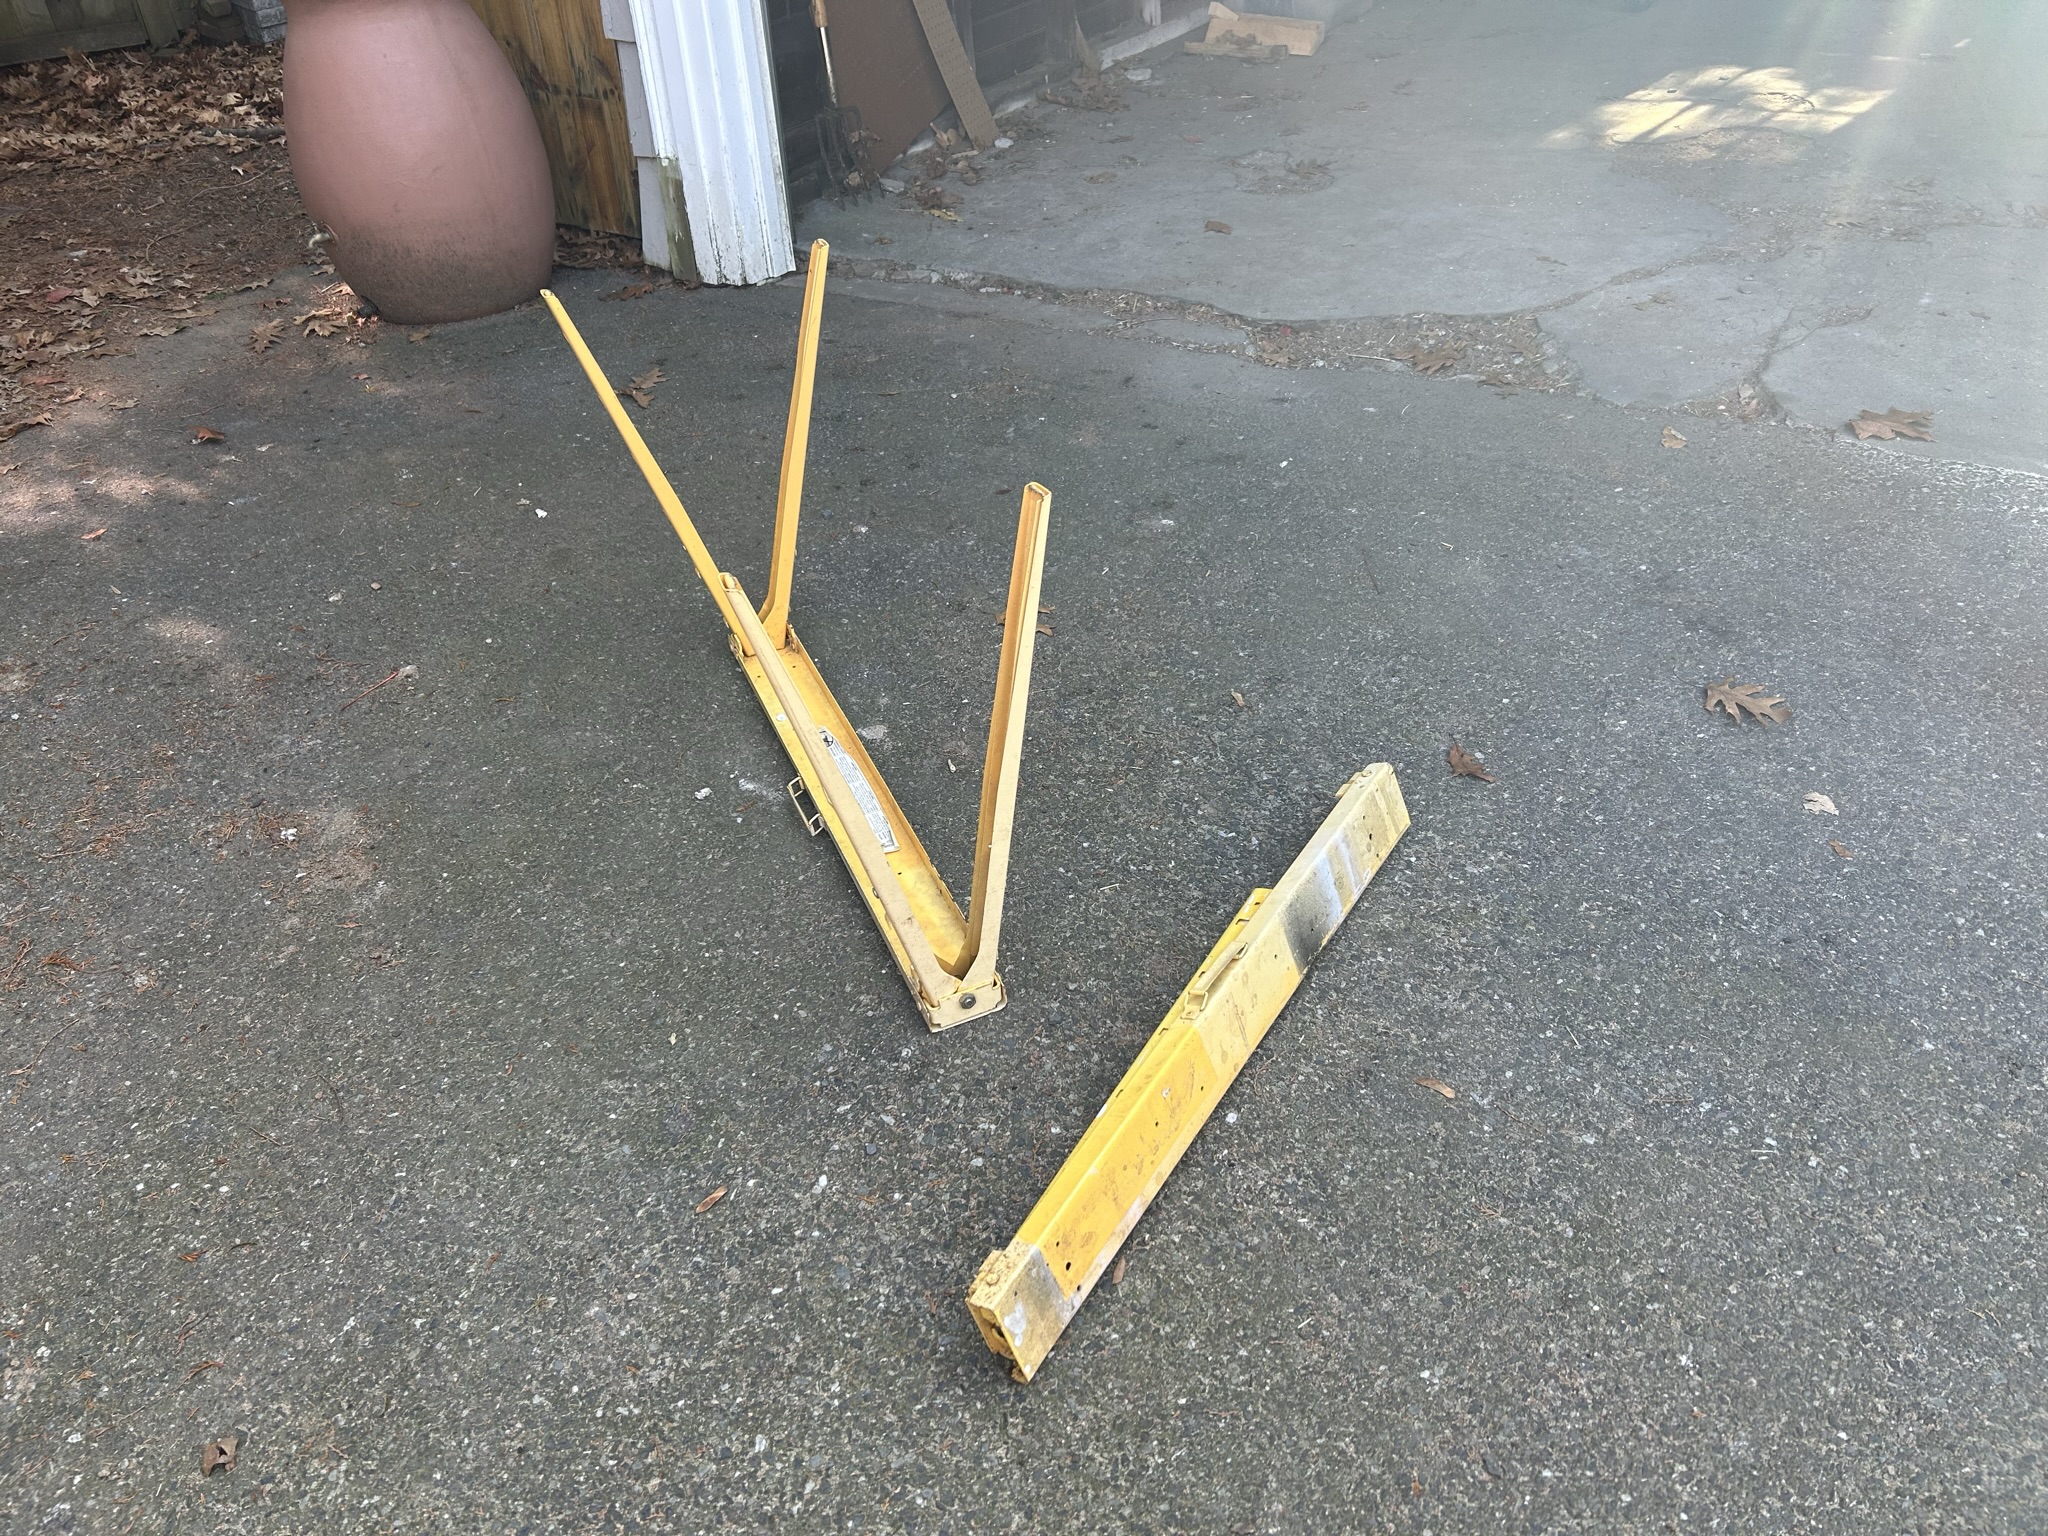
I’ve recently built a workbench because I got tired of my previous solution, which was an old piece of plywood screwed onto some old A-frame sawhorse legs, pictured below.
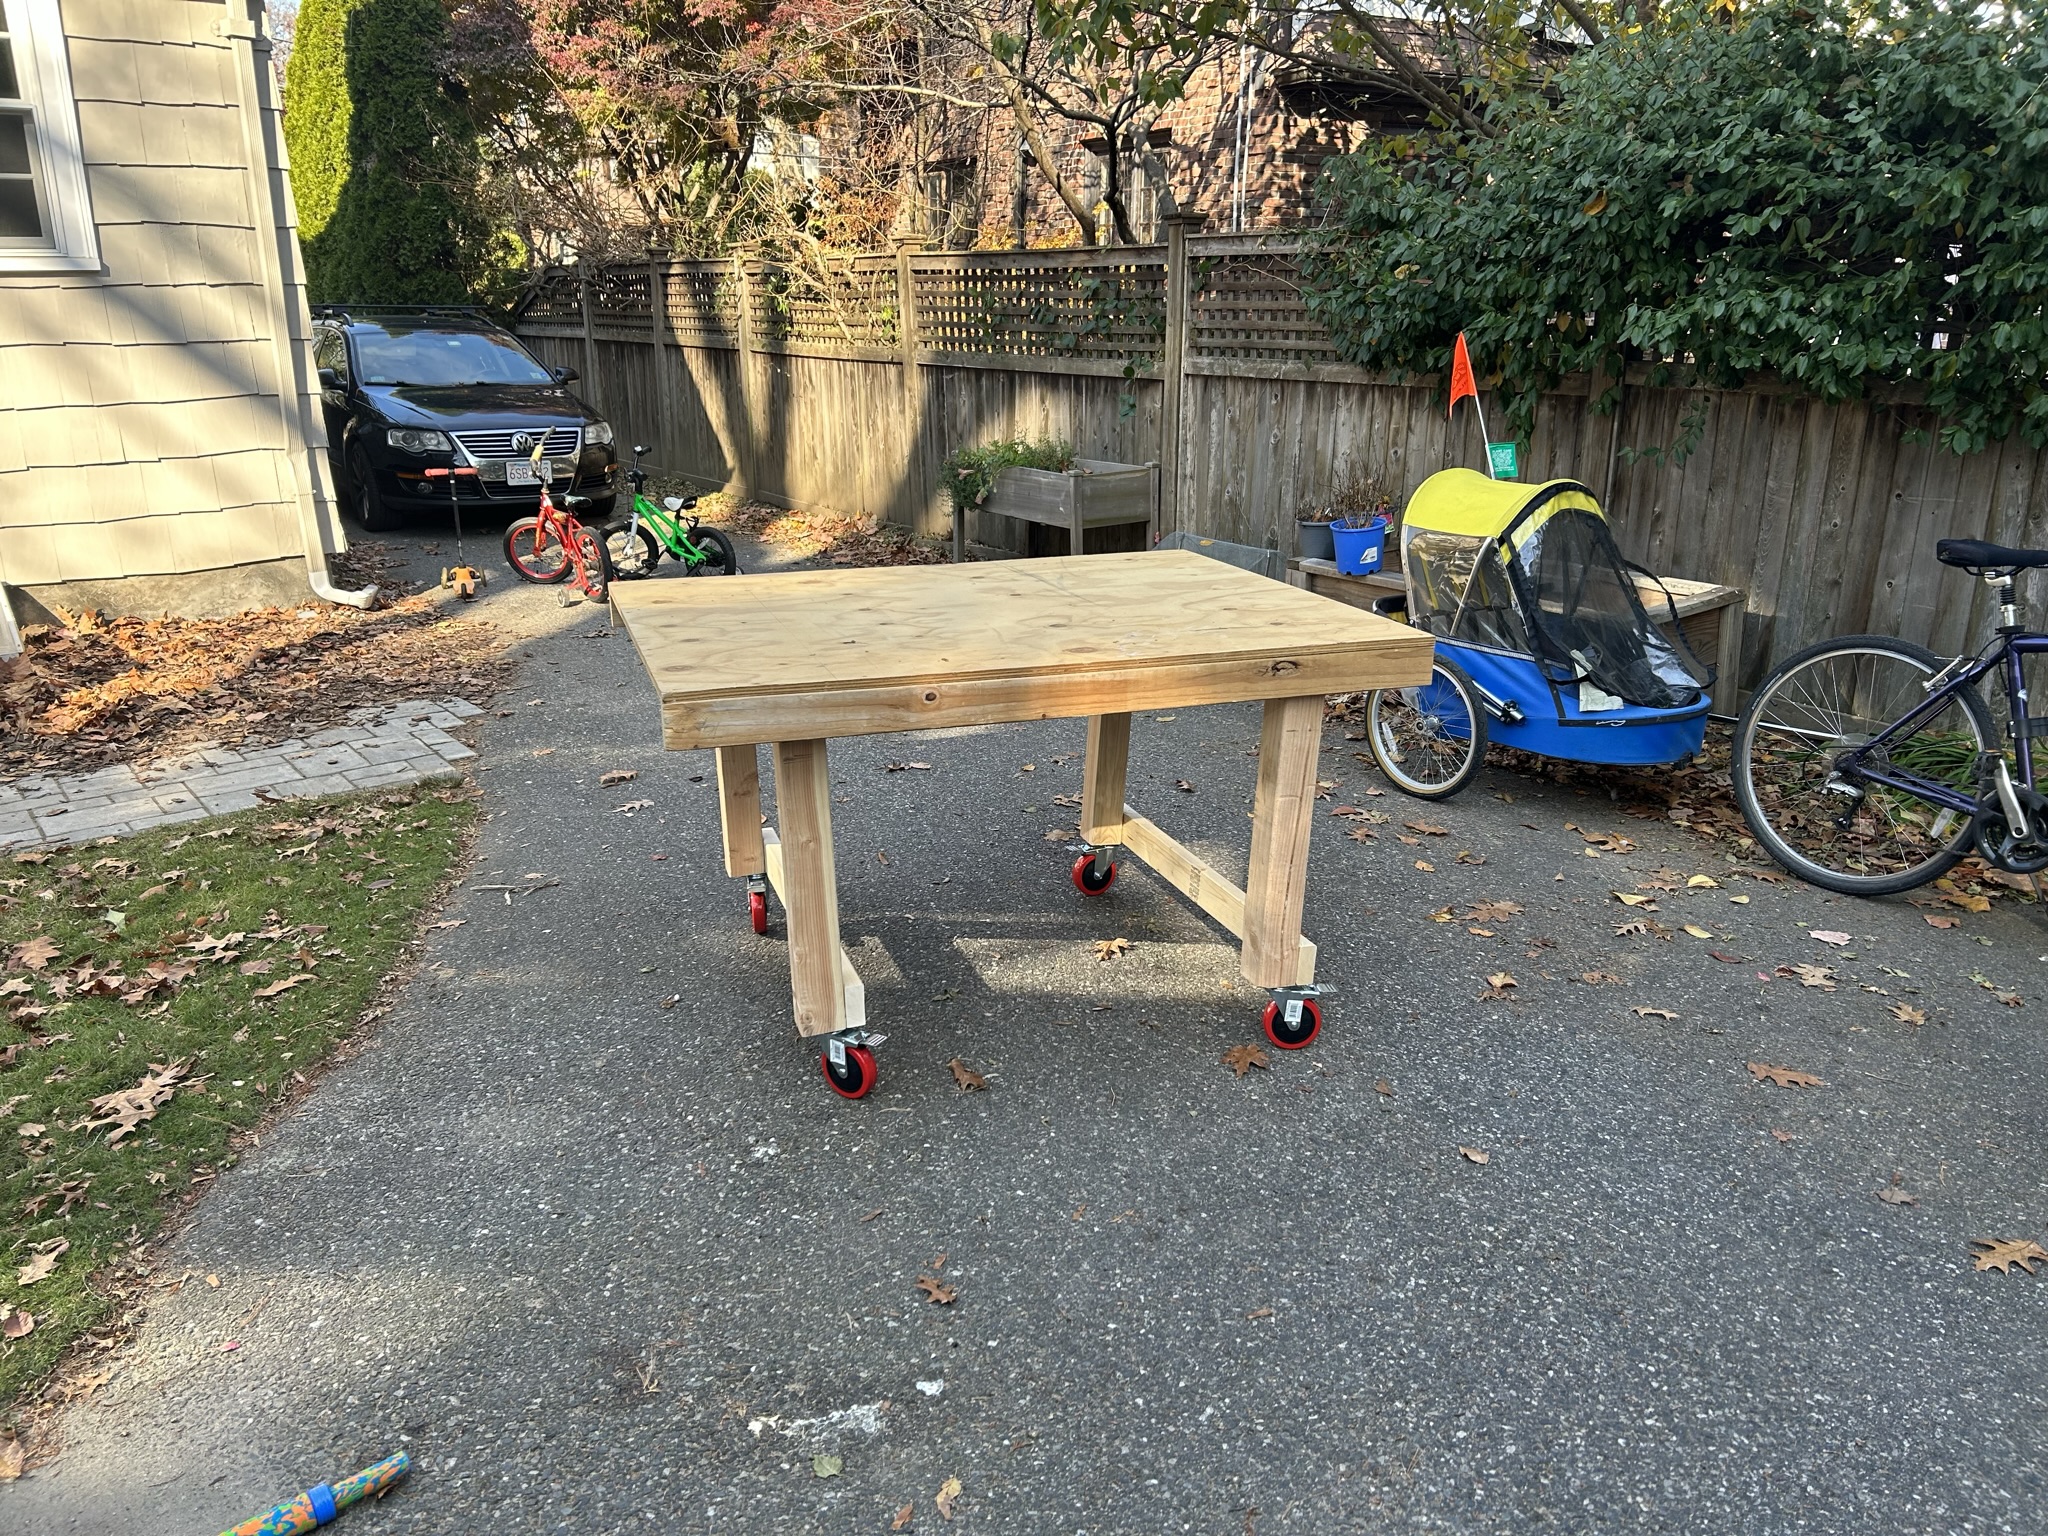
Now, I have an old piece of plywood screwed onto some 4x4’s via a locking hinge! I think I’ve finished this mini-project but I learned a few lessons, so why not jot them down and git commit them?
My goals for the workbench
To summarize, I wanted a workbench that met this criteria in this order
- was strong enough to safely support a table saw or mitre saw (as strong as my old sawhorse solution)
- was foldable/collapsible for the most efficient storage
- was made out of almost entirely free/recycled materials
- had wheels for easy moving
- was the same height as the Ikea butcher block that I keep in the garage
- ideally, not too heavy
My design and build process
Unfortunately I think I was born without a natural gift for 3-dimensional design and planning. Maybe I’m just not handy. But hey, mistakes are how we learn, right?
I got a free piece of plywood from my local BuyNothing group that had a ‘collar’ on 3 sides made from 2x4’s. It was 4 feet x 5 and a half feet or so, but the side without the collar was not cut squarely at a right angle. So I made this exactly 4x5 feet and square. I decided to buy three 2x4’s (at only $5 or so each, it was just so much faster than looking for recycled ones) and I cut a 4 foot length to finish that collar.
I then decided instead to remove the existing 4 ft piece of the collar, and use both matching 4 foot lengths of 2x4 as a ‘frame’ to support my table legs. Ie, if my table legs were two pairs of sawhorses, these 4 foot lengths would be the part that made up the horizontal lengths.
I bought two 8 foot lengths of 4x4 which were also very cheap. Perhaps $12 each or so. I cut them into 4 lengths of 27 inches each, which would become my table legs.
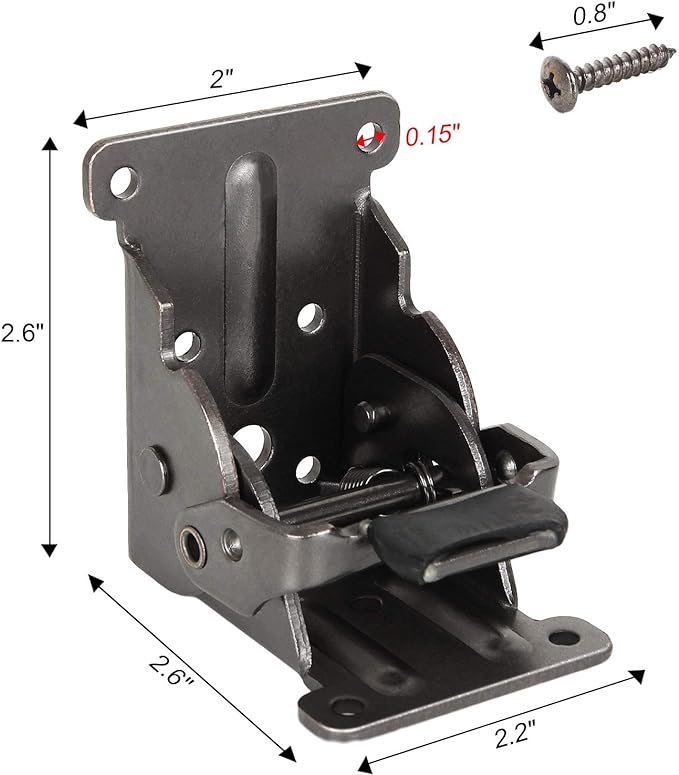
Now I wanted table legs that could fold. I found these locking hinges on Amazon after not finding them on Home Depot’s website or anywhere else reputable. Let’s hope they last a long time. I can’t vouch for them yet because I’ve only just installed them, but they look okay.
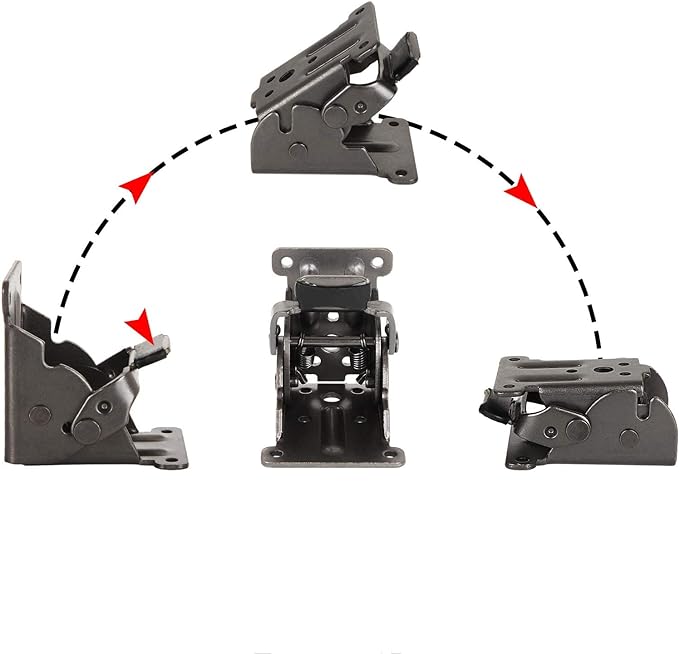
I realized that I couldn’t fold the table legs inward without them hitting eachother, since the table legs are longer than half of the table’s length, if that makes sense. Anyway, my “poor man’s solution” to this was just to offset the table legs so that while they do not make a perfect square, they do fold inward without hitting eachother.
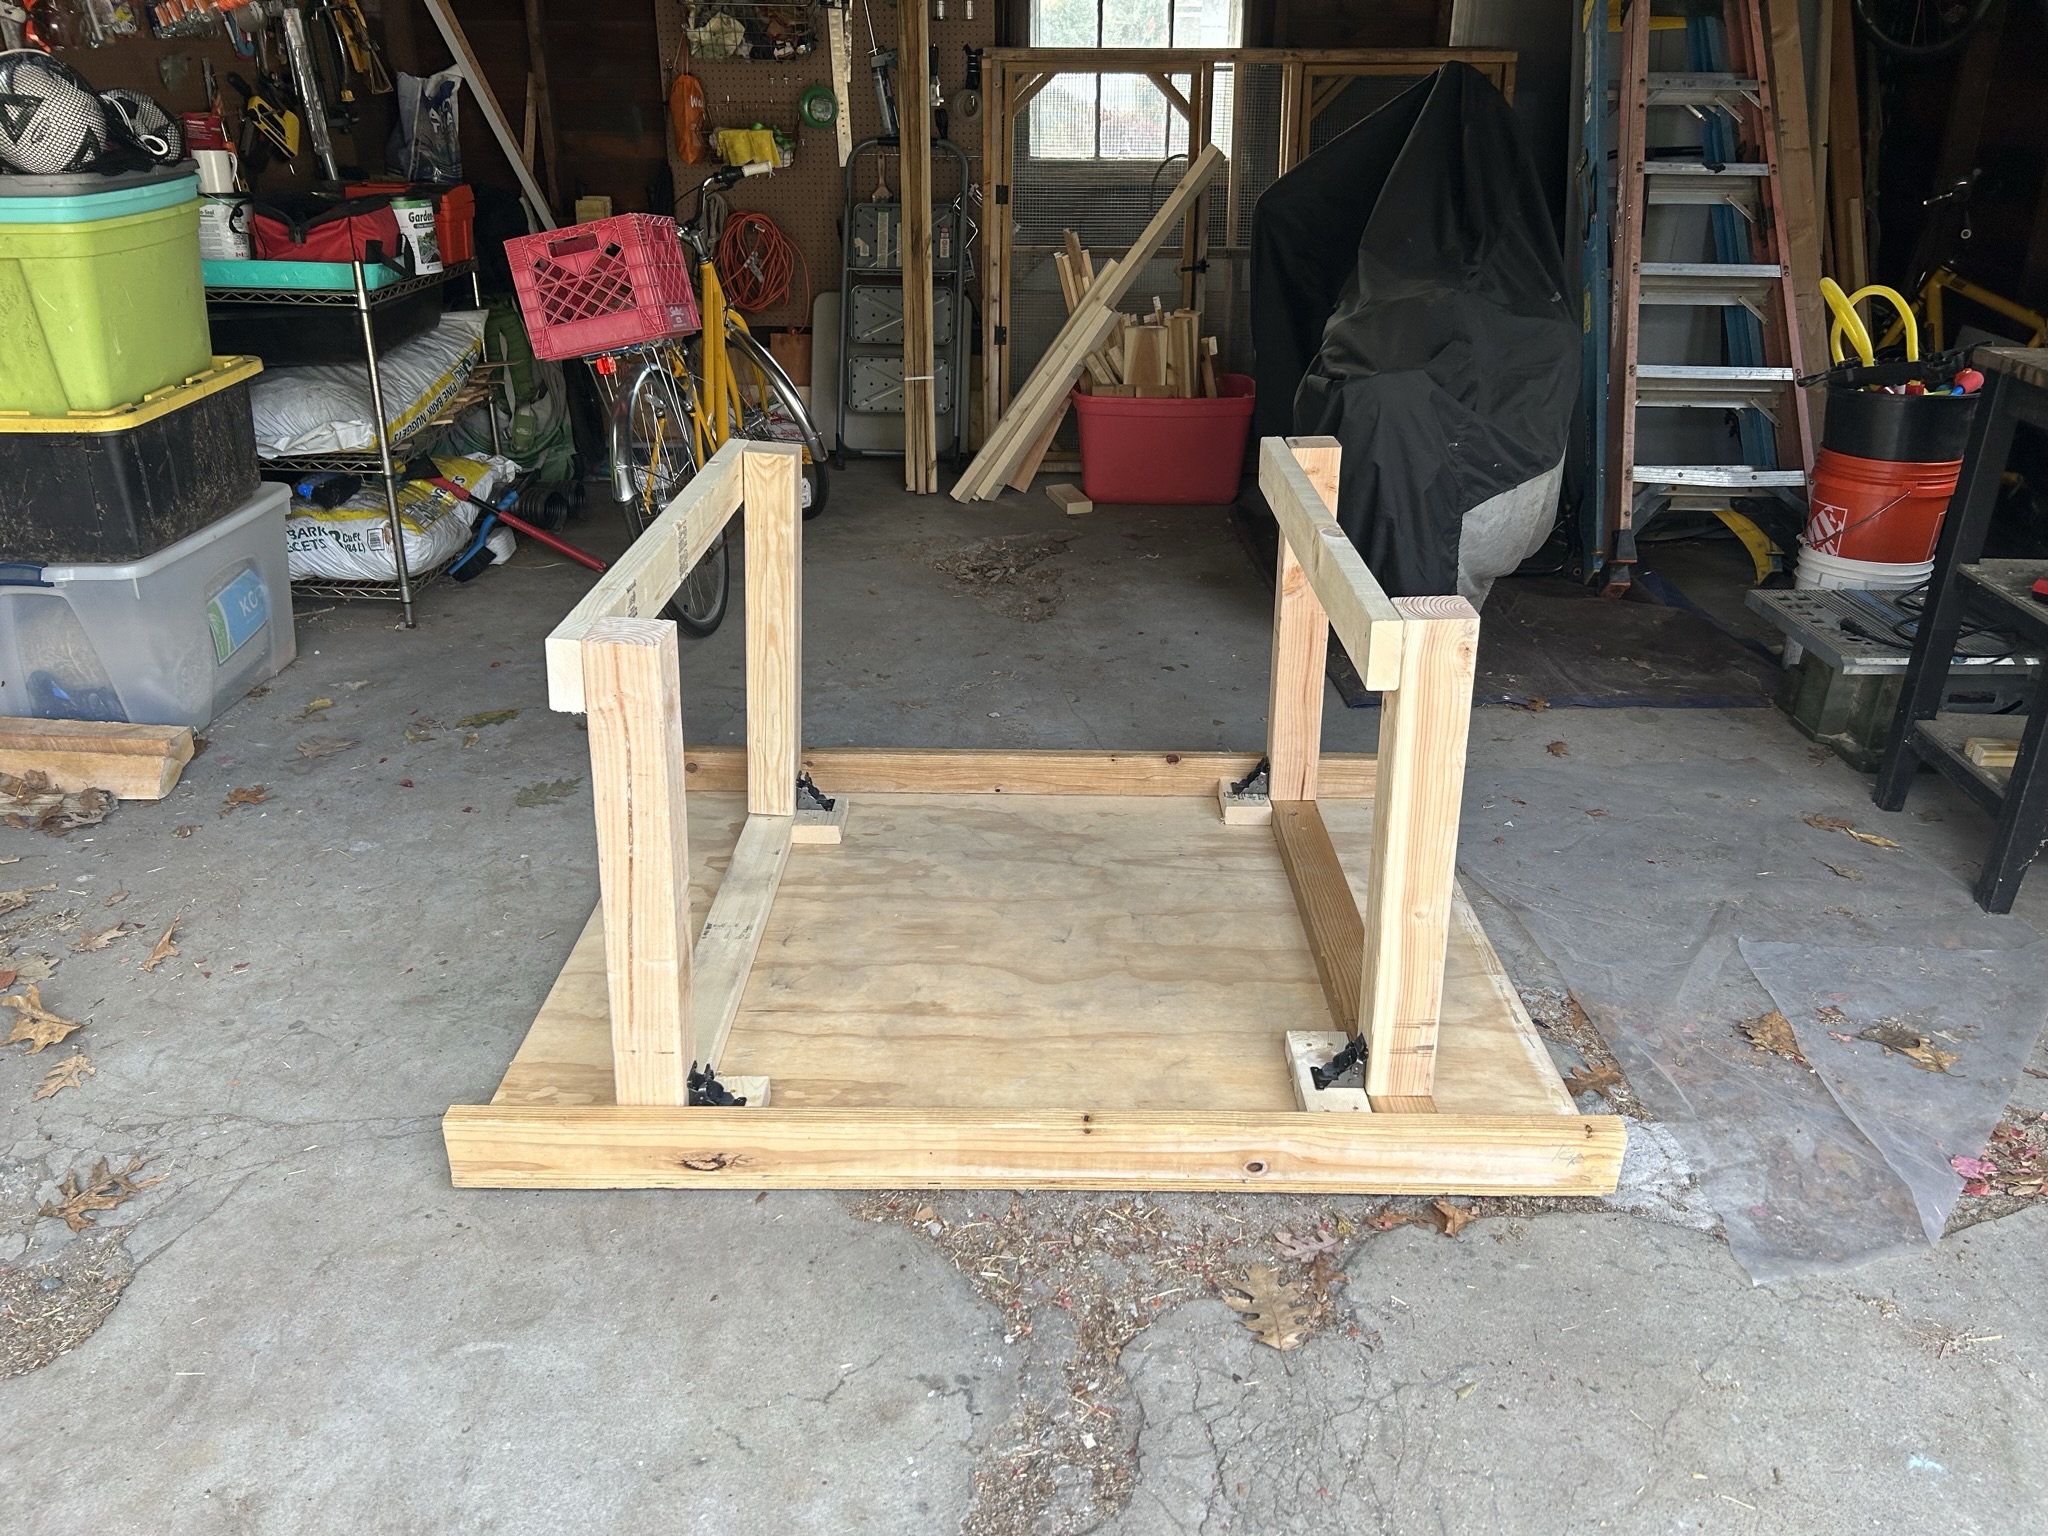
Each pair of legs is joined by a 2x4 on the short side of the table, so that the legs fold in as a pair from both ends of the table. One 2x4 is on the “outside” of the legs on one end of the table, and one is on the “inside” of the legs on the other end. You will notice this in the pictures if you look carefully. This allows the first pair of legs to fold inward, and then the next pair of legs to fold over them, and they can both fit pretty neatly folded, almost within the ‘collar’ made by the 2x4’s on the long ends of the table.
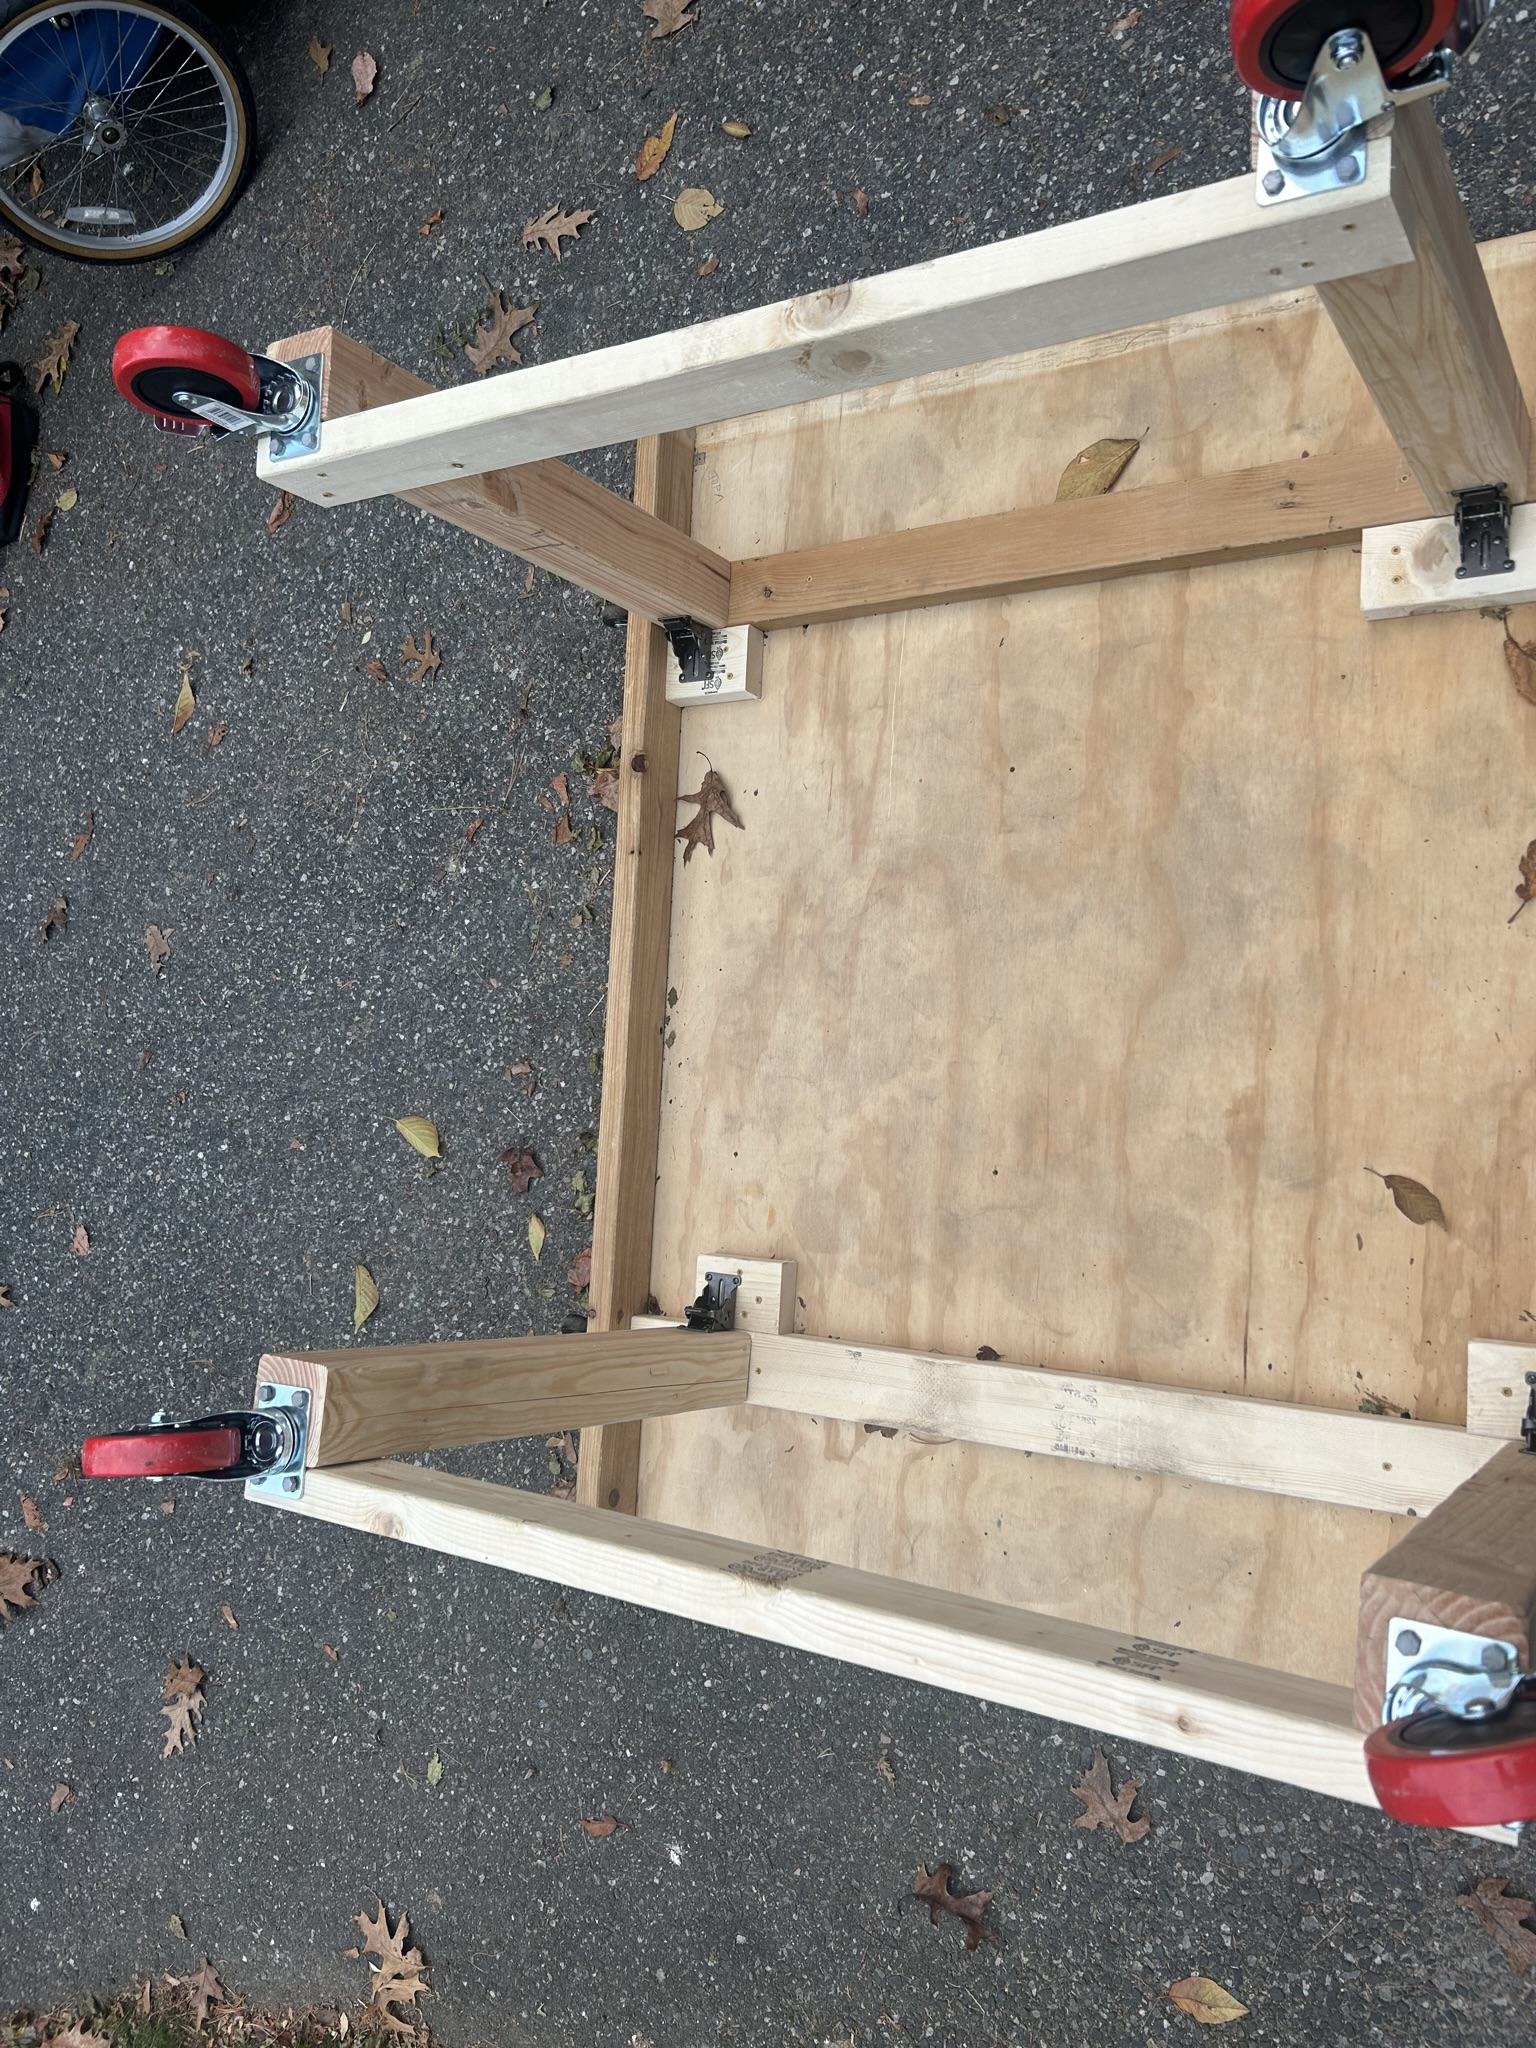
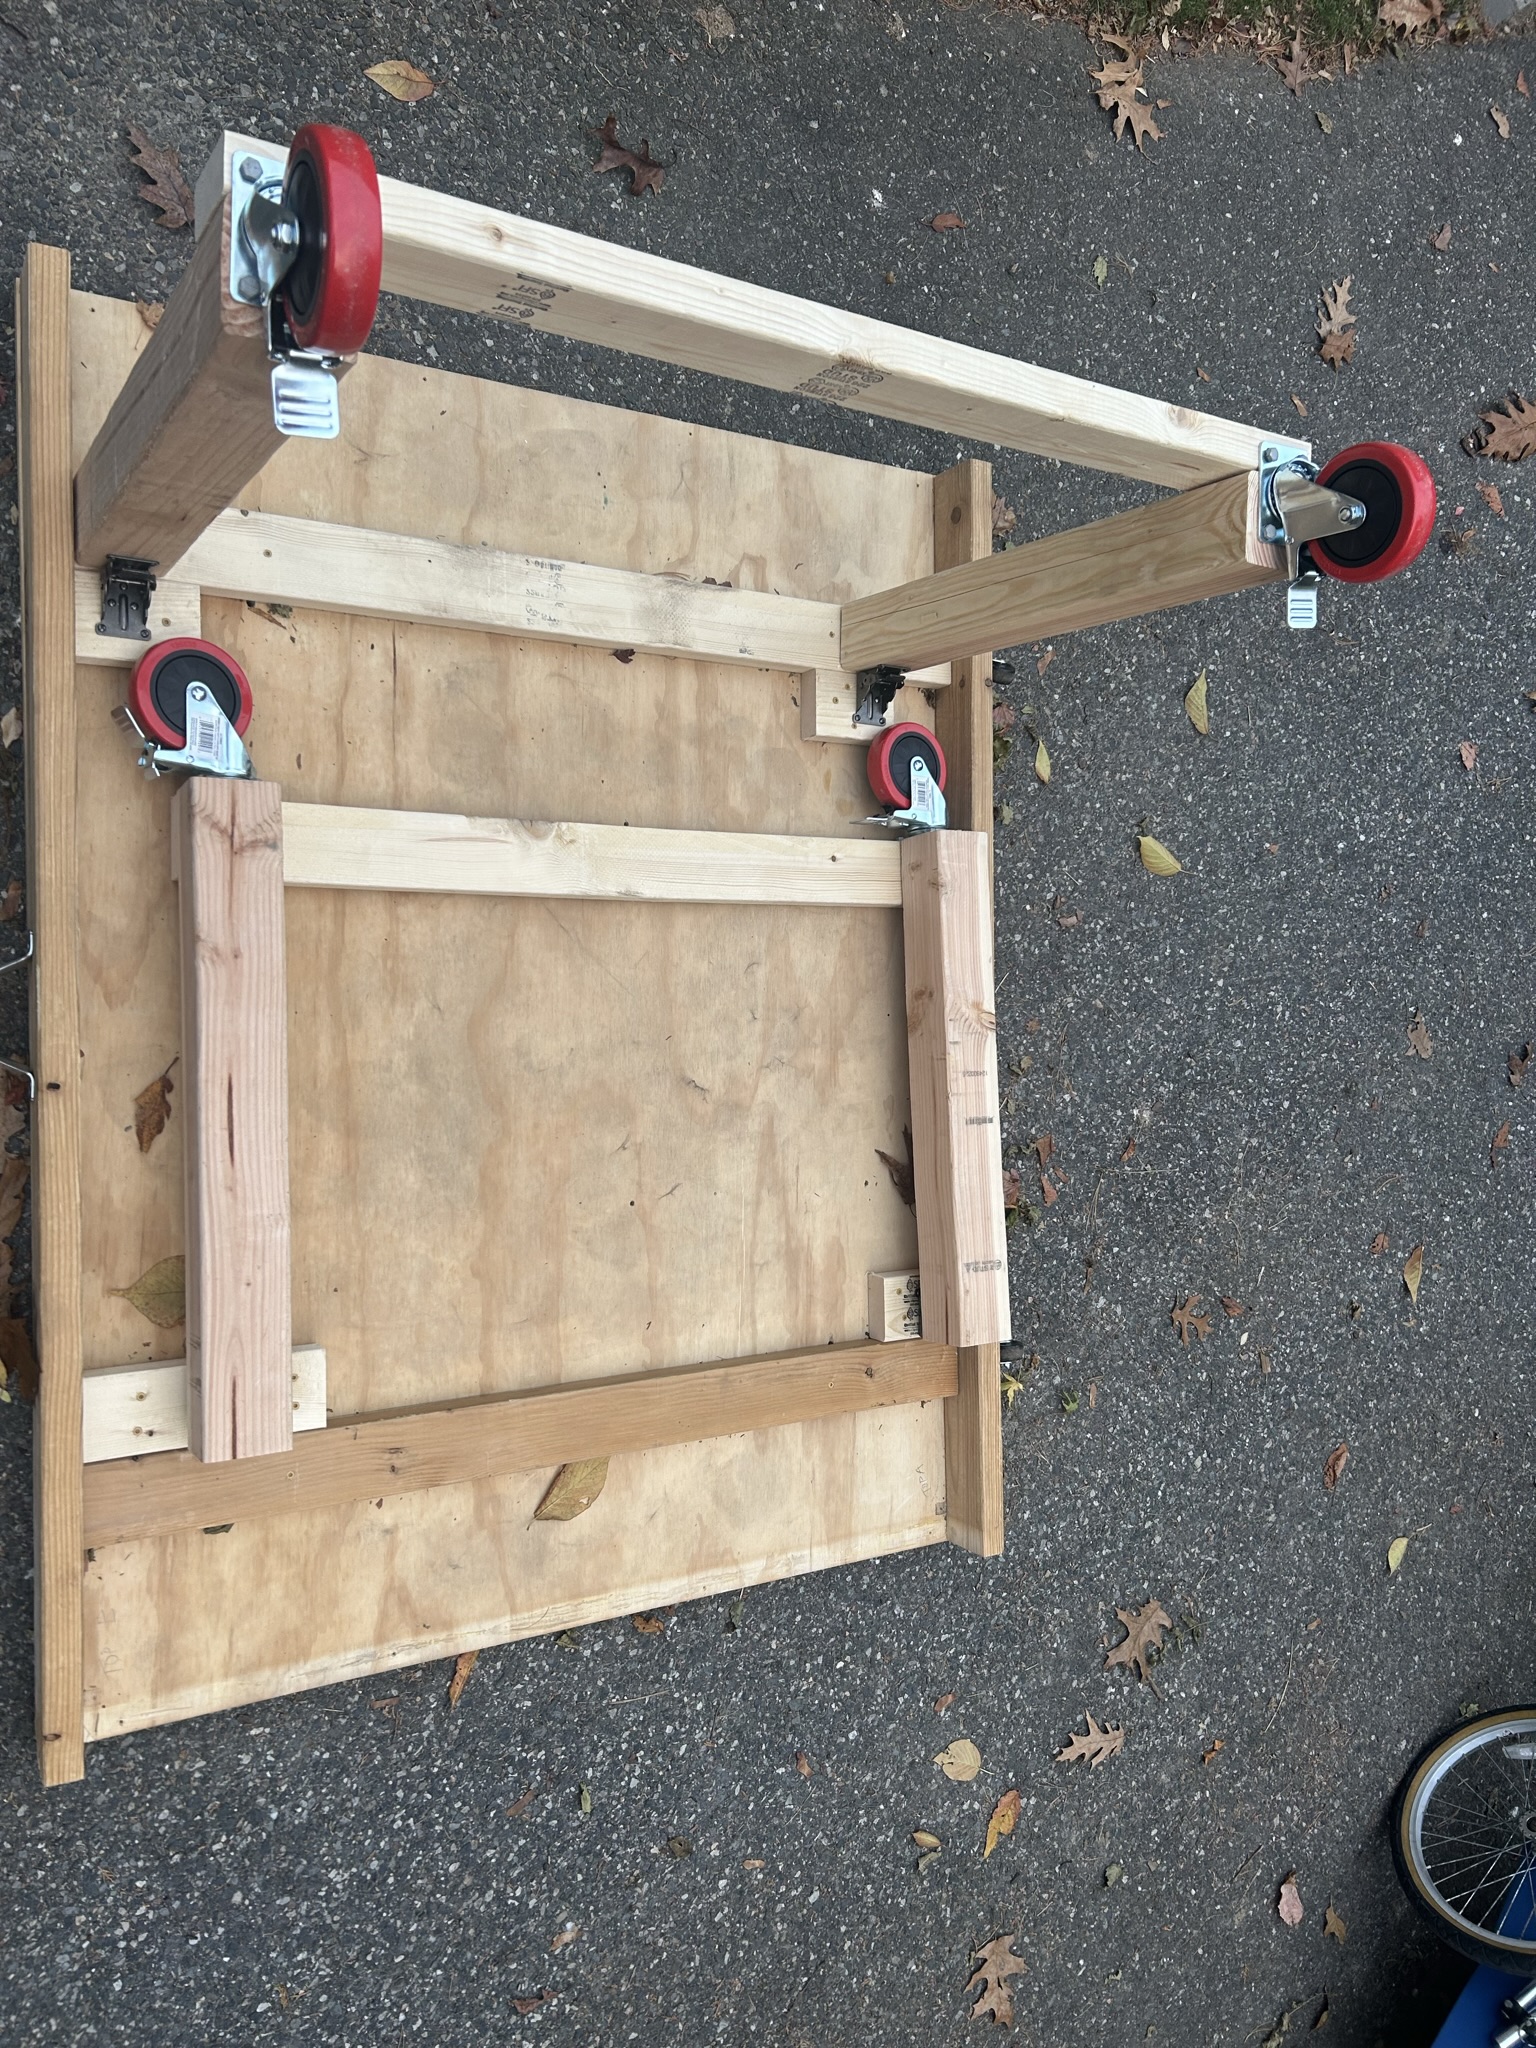
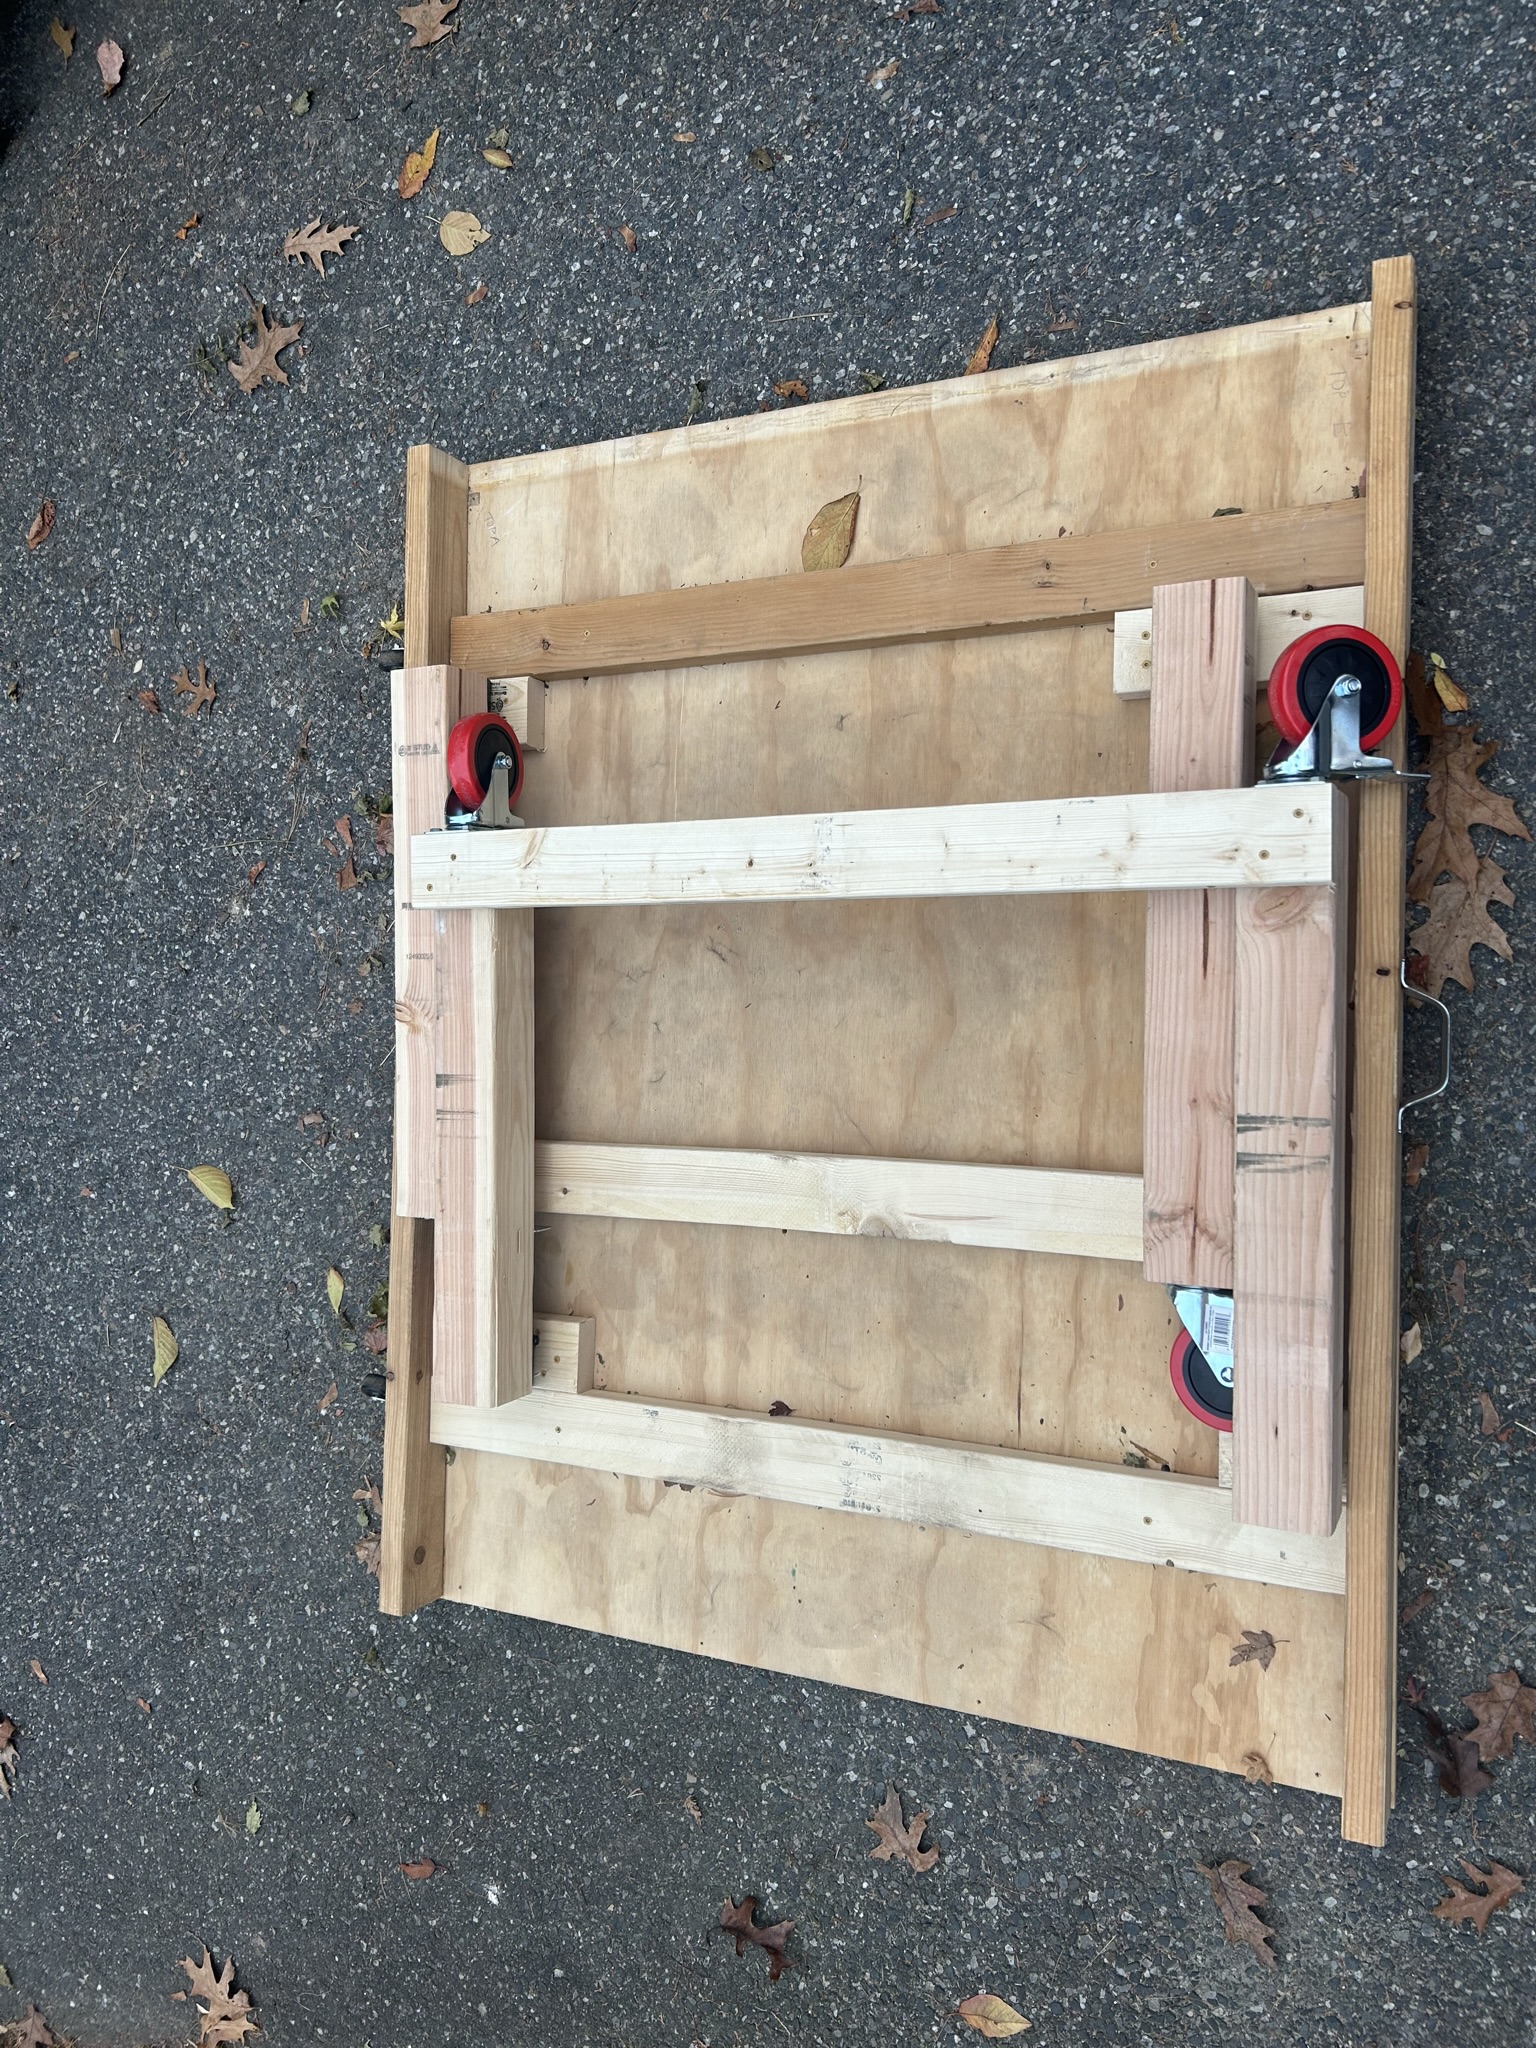
My finished product
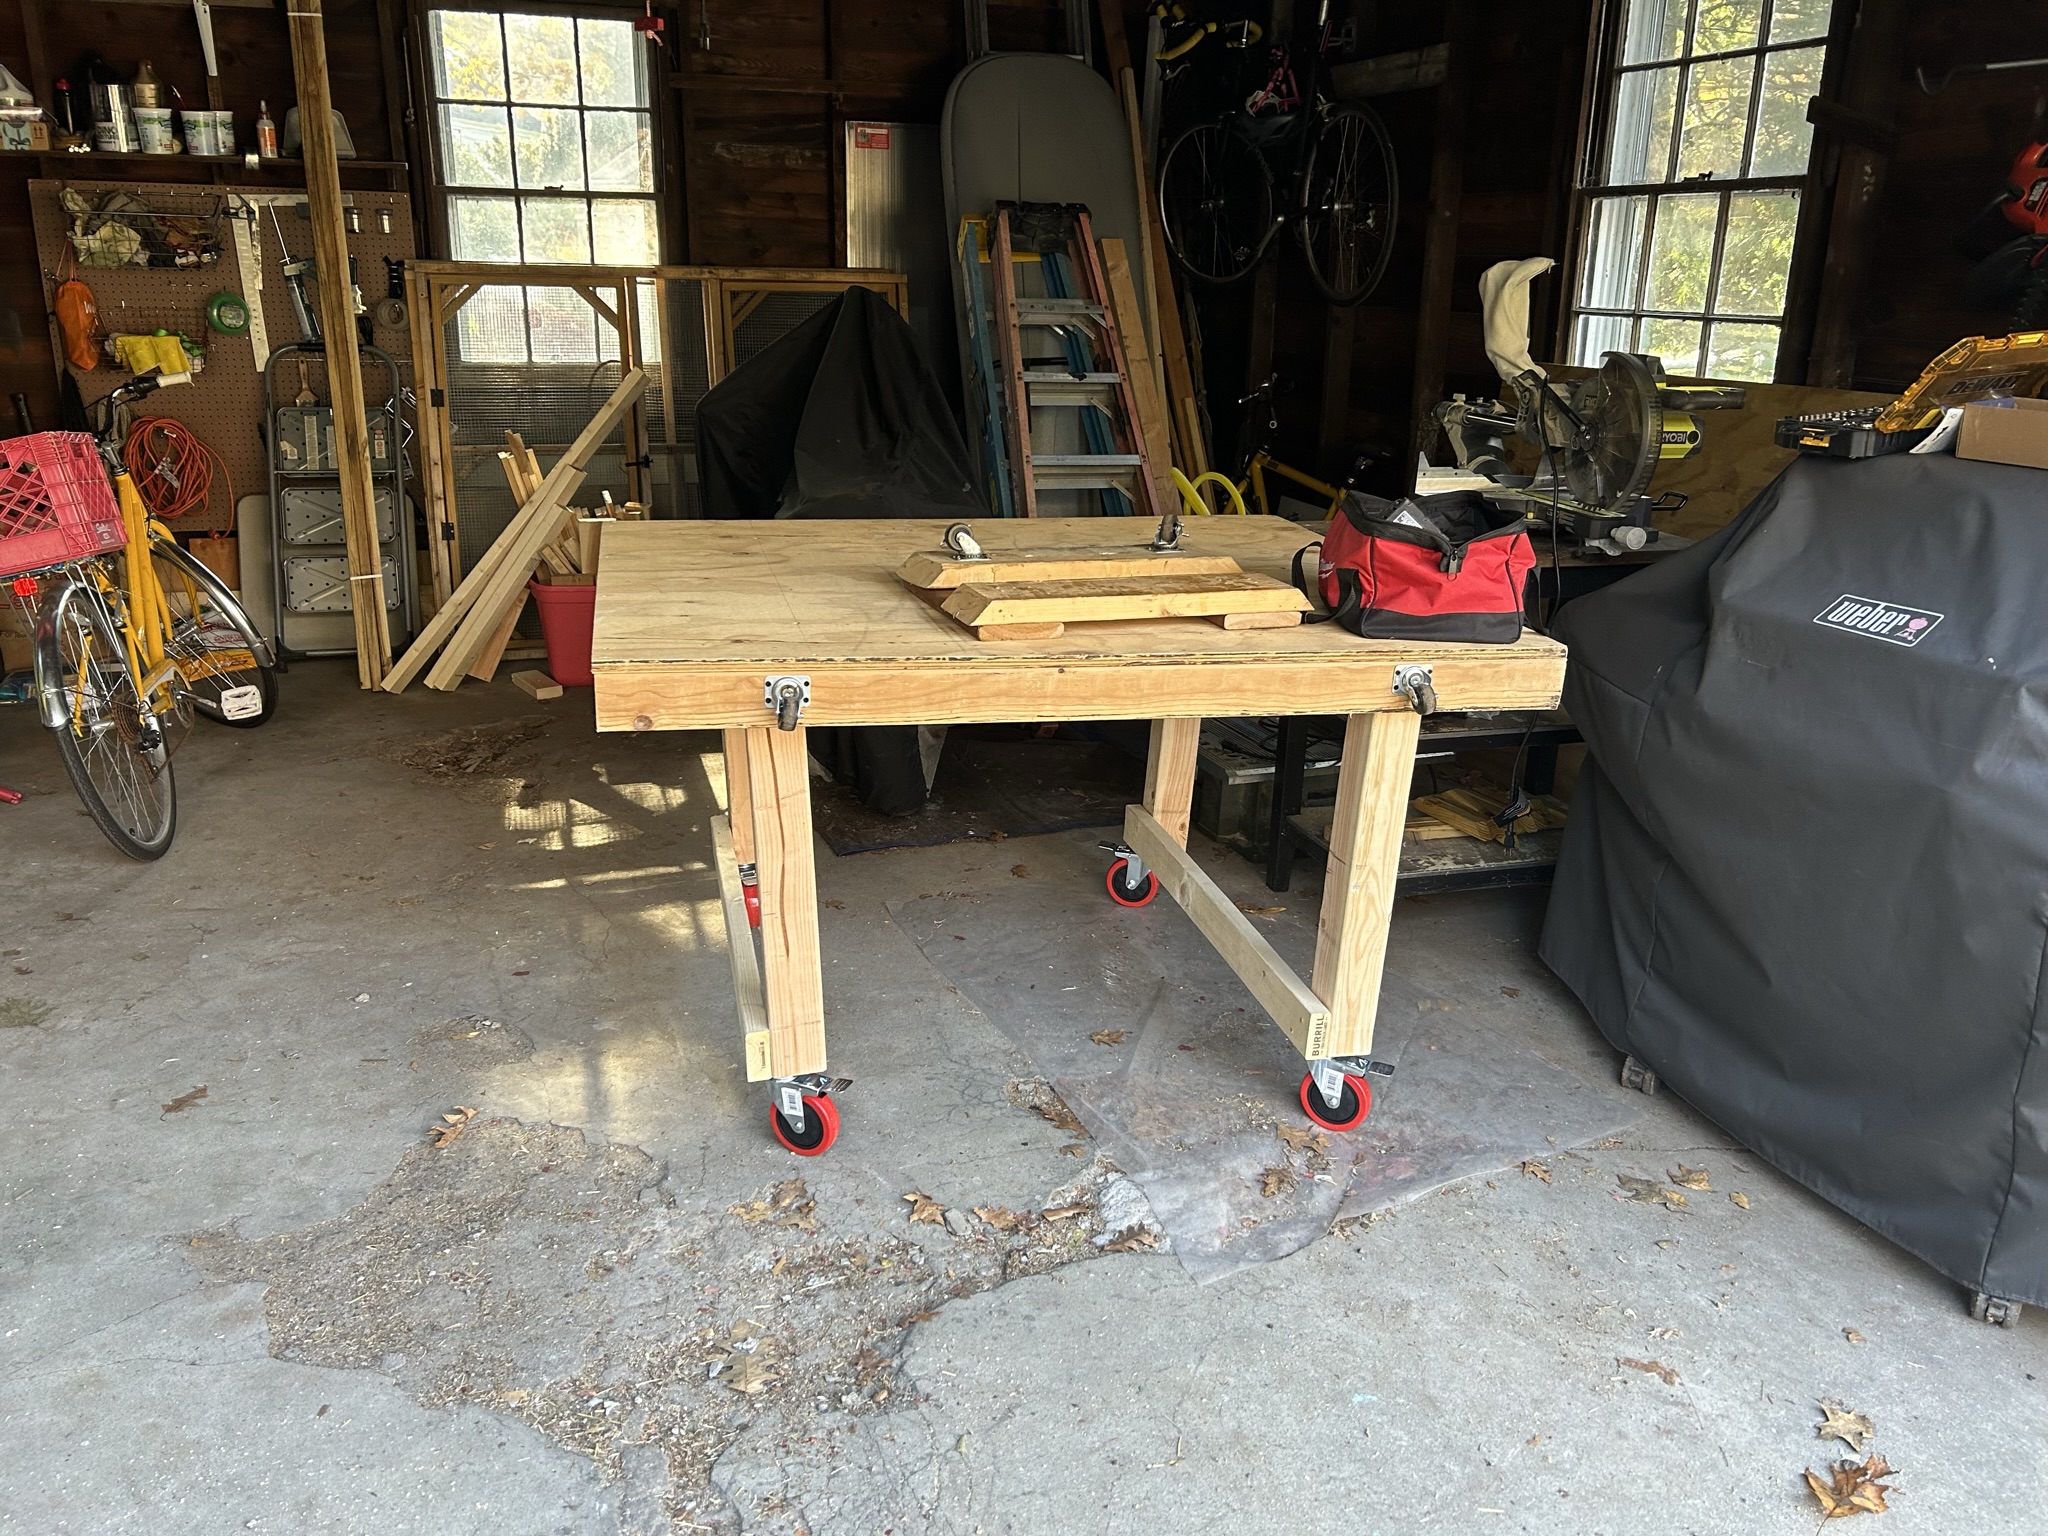
Frame / legs
I think this is strong enough, with solid legs made from 4x4. What I am calling the “frame” is simply two 2x4’s which connect to the legs. This is because I didn’t want the plywood top to just sit on the top of 4 legs, because it could bend or snap if I placed a lot of weight in the middle of the table. With this “frame” I at least have support a little closer to the center of the table and am spreading the load wider.
Wheels
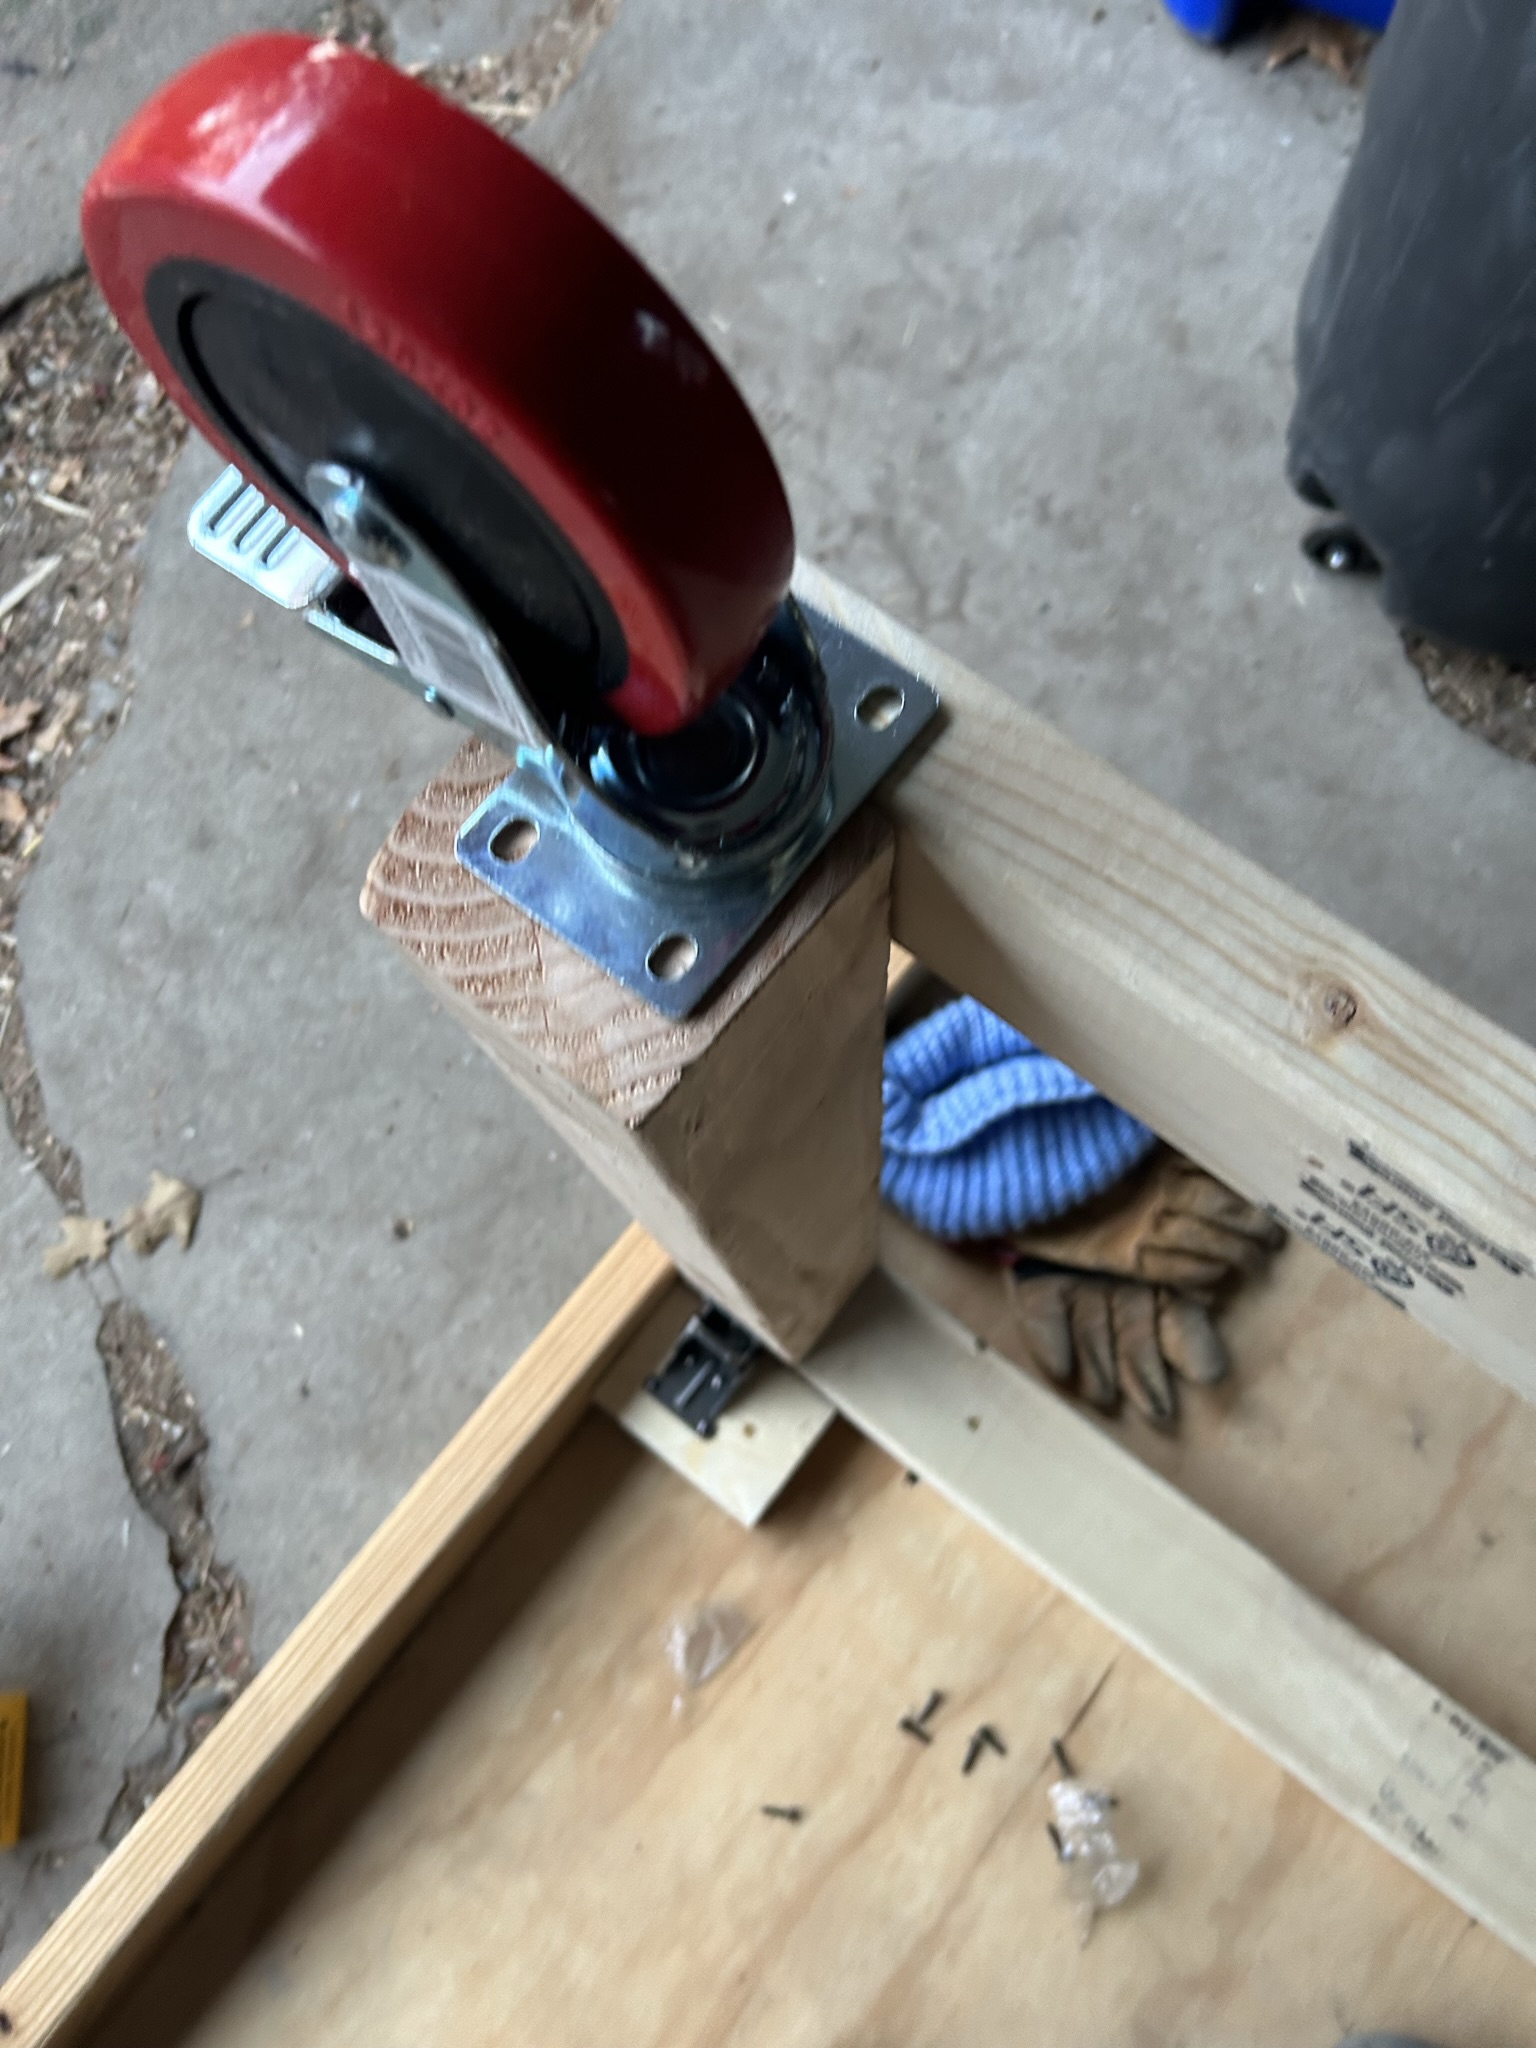
I have 4x caster wheels from Home Depot. They are 5 inches in diameter and, importantly, they can lock in place. Unfortunately the base of the wheel is a little too large to comfortably screw into the end of a 4x4 (the screw holes would be a little close to the edges) so I needed to put 2 screws into the 2x4’s that hold each pair of legs together.
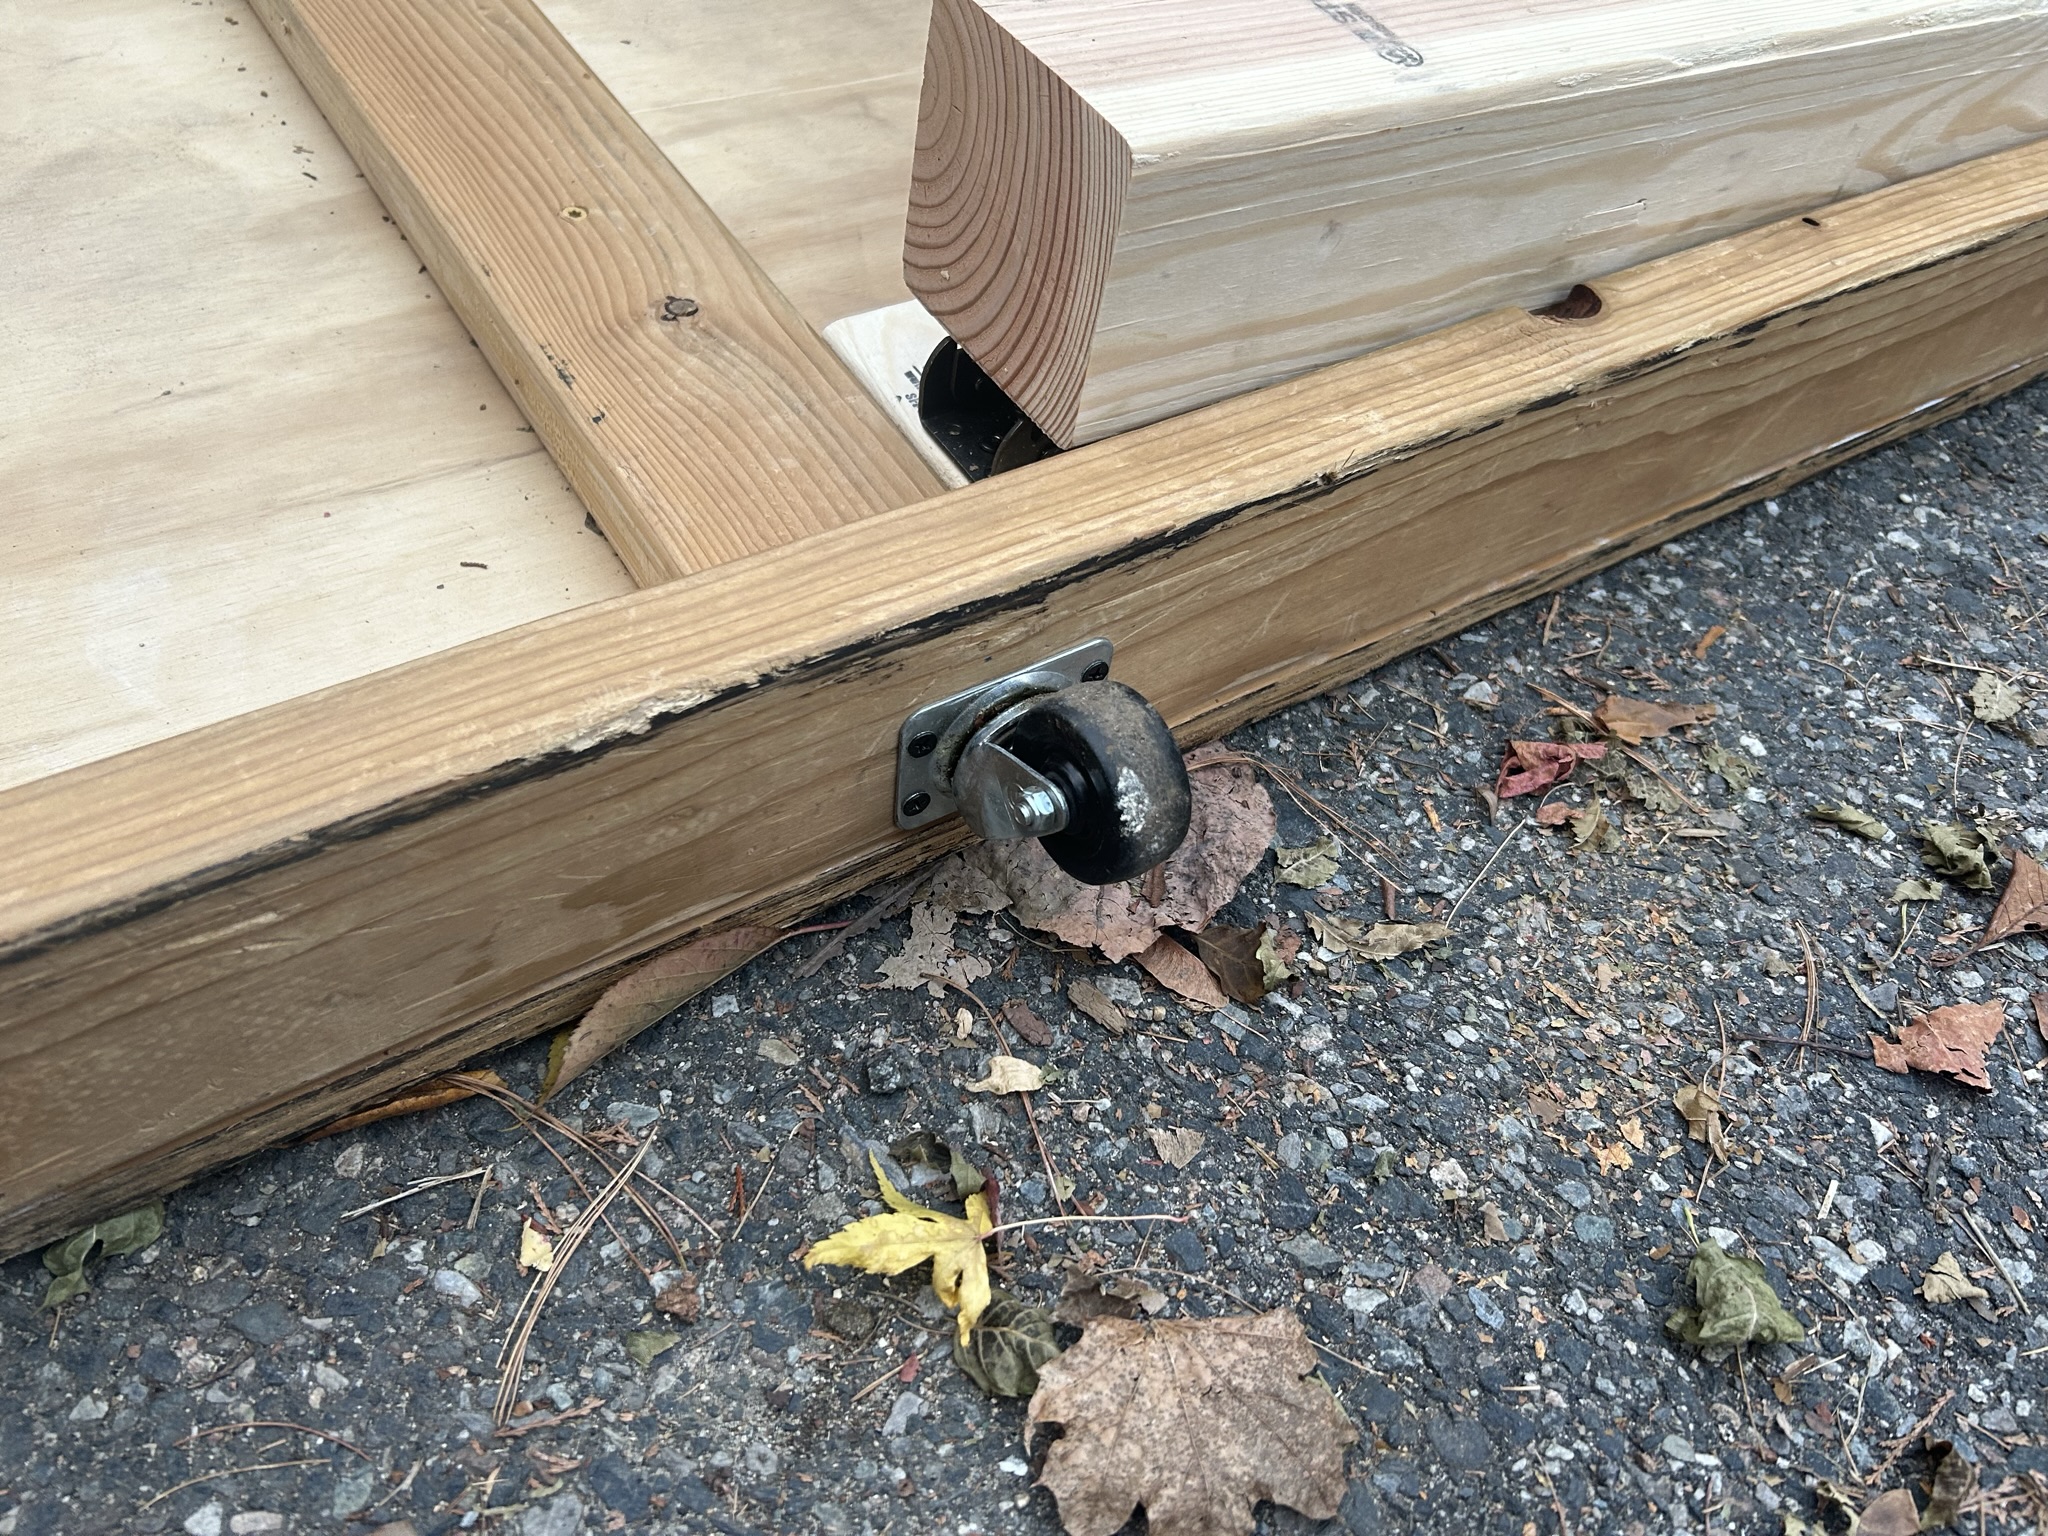
I also have 2 small caster wheels that I took off a furniture dolly, and I put these on one of the long ends of the collar. This simply allows me to wheel the whole thing around easily when it’s folded up.
Handle
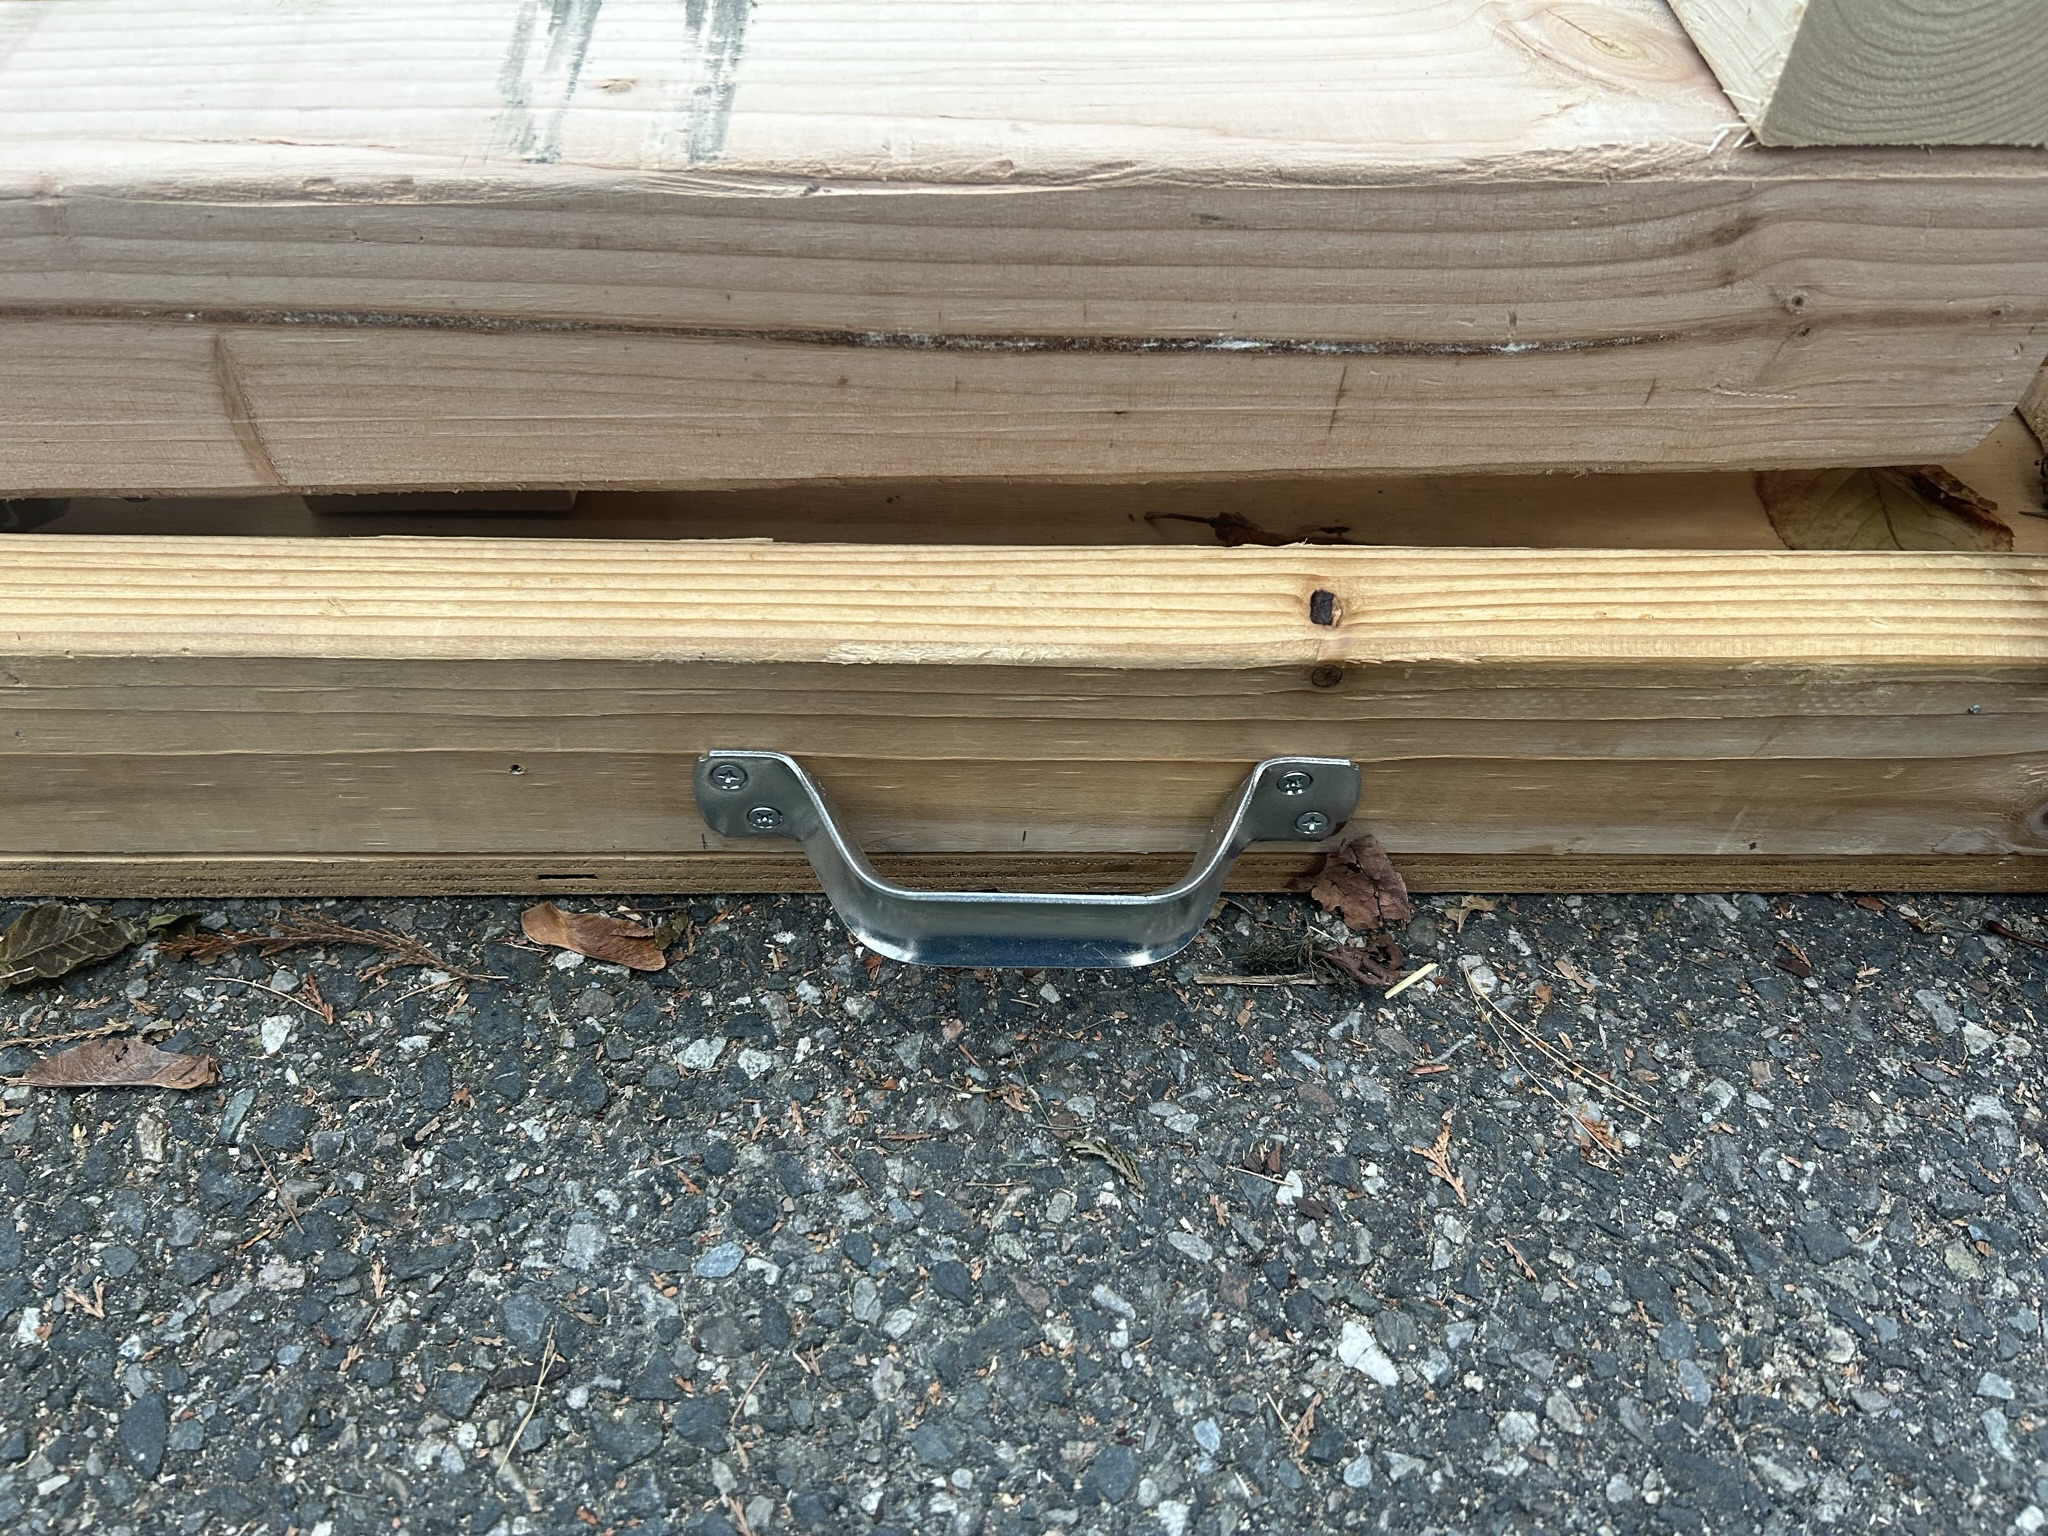
This simple $5 handle is simply so that I can easily wheel this around when it’s folded up.
Height
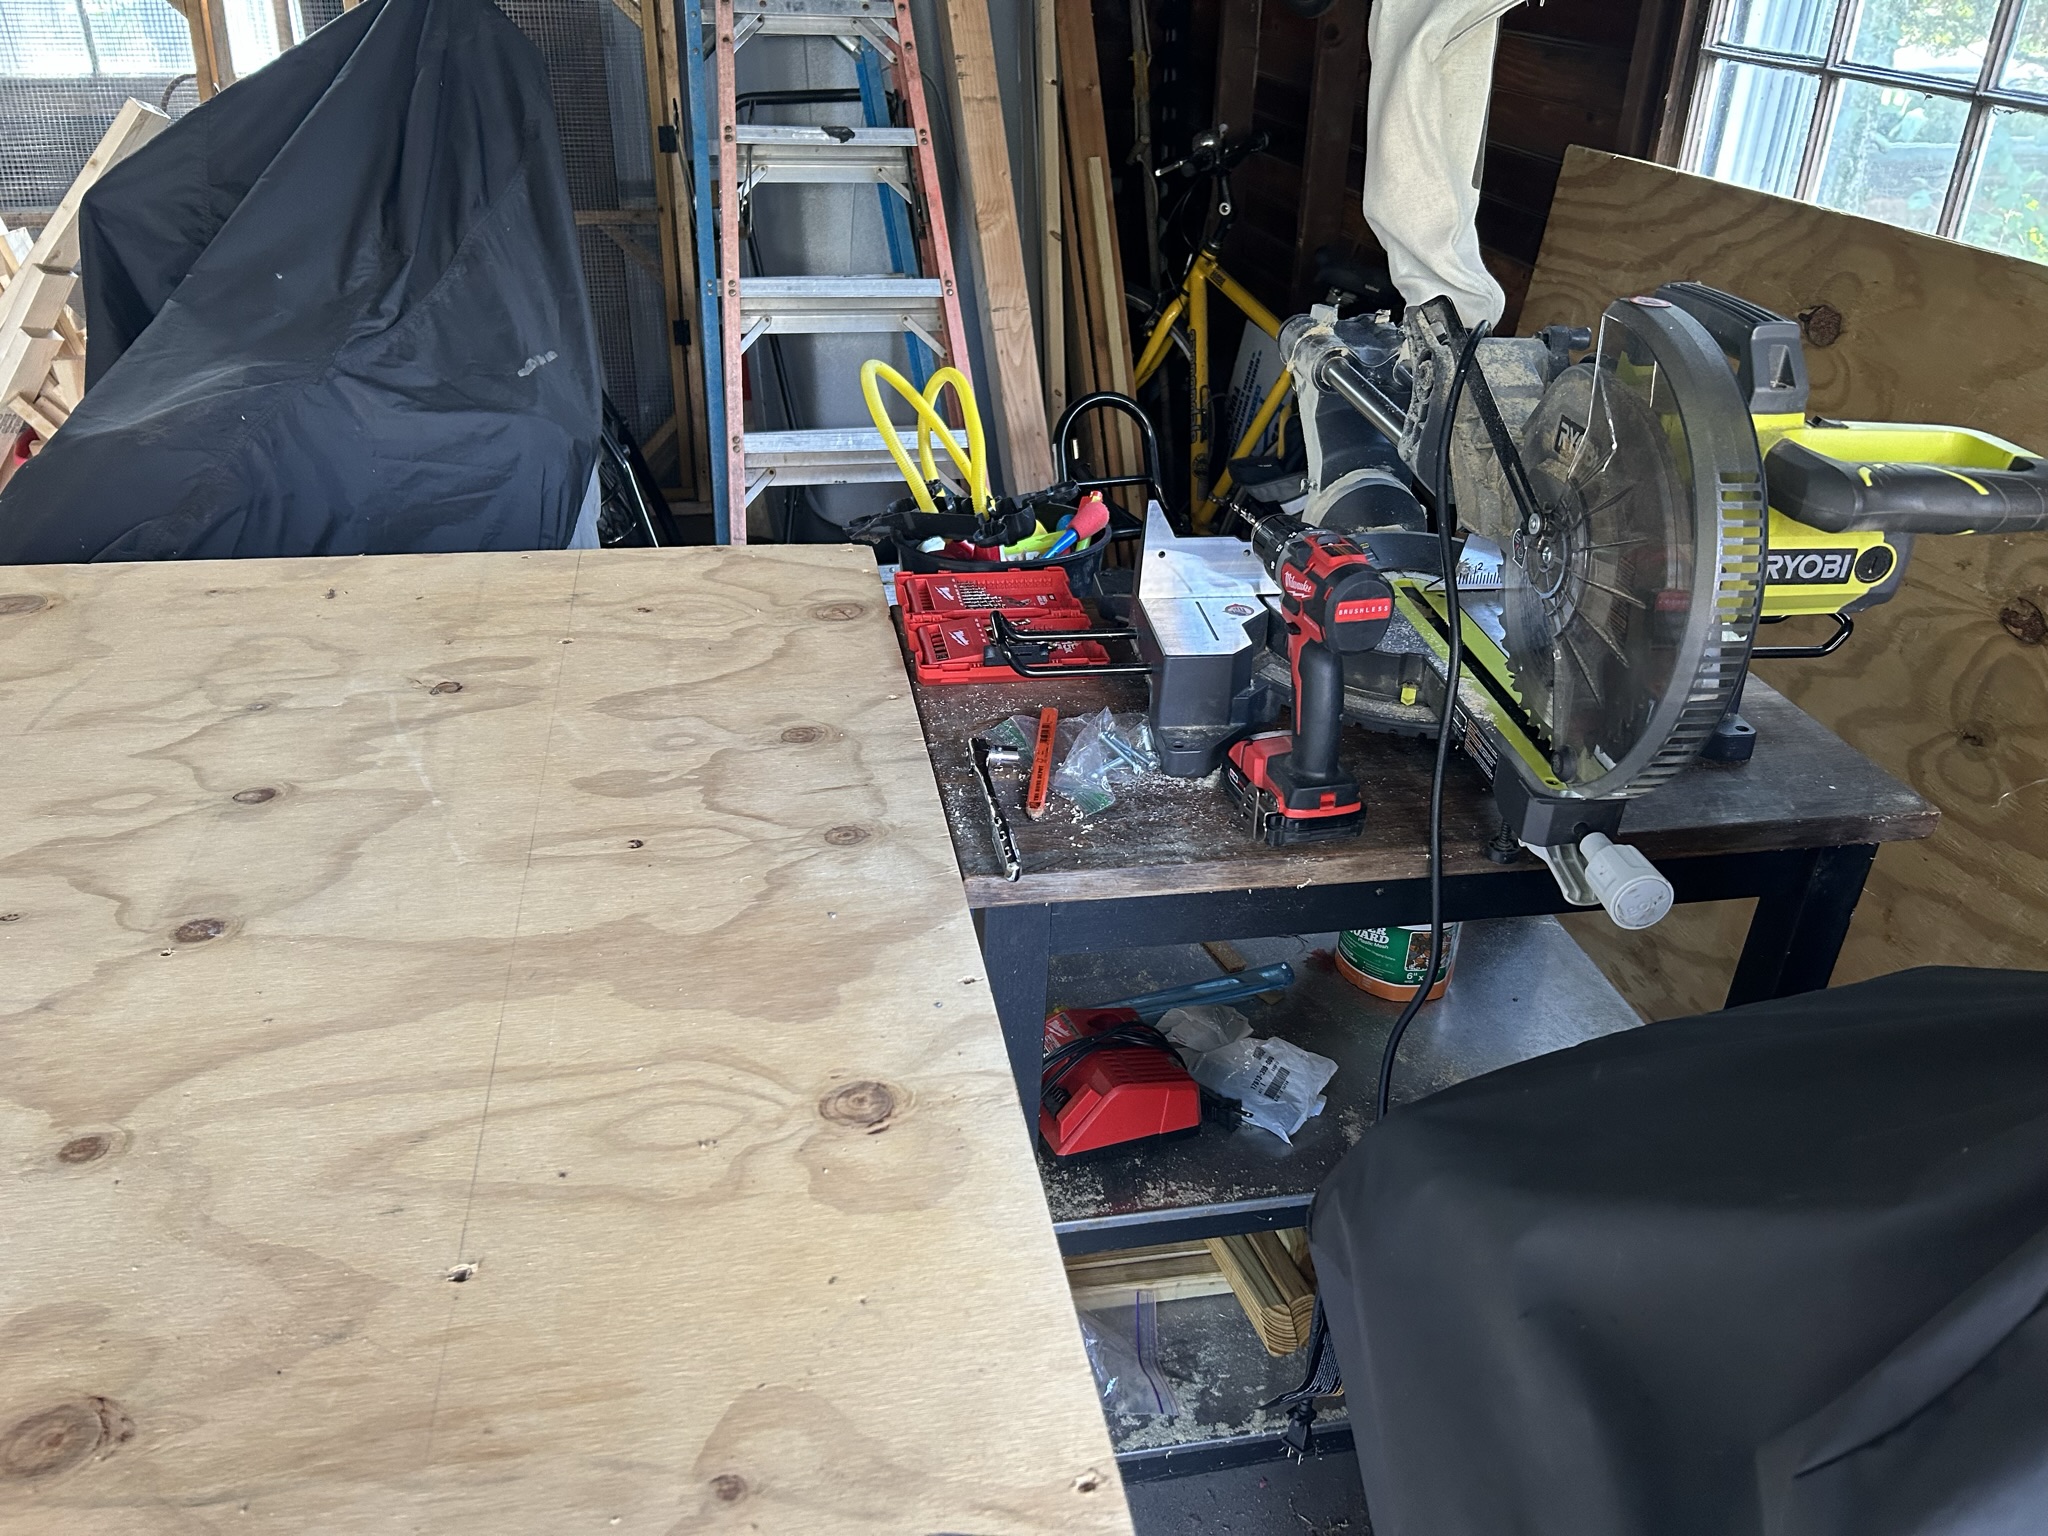
Notice the height of my workbench and my existing butcher block in the picture (with the mitre saw on it). They are the same height, at a smidgen over 35 inches. This means I can wheel out the butcher block as a supporting second work table when I have long pieces of wood to cut. I admit, luck was probably a factor in getting this height exactly perfect.
- Height of the existing Ikea butcher block: 35 inches and a smidgen over.
- Height of my workbench: 3/4 inch plywood + 1.5 inch 2x4 frame + 6 inch caster wheel height + 27 inch legs.
What I would do differently next time
I made plenty of mistakes. If I was to do this again:
- I would start by not using a collar made from 2x4. It adds a lot of weight and I don’t think it adds much to structural strength. It does look good, I think, and I left it because it was there when I got the plywood for free. A collar from 2x2 would achieve the same thing and be half as heavy
- I would have the frame fold in, and the hinges screwed right into the bottom of the plywood. The legs would still sit directly under the frame (for full strenth and support) but the frame itself would be what folded in. Actually, maybe I can retro-fit this improvement?
- I might search for caster wheels with a smaller base that would fit on the bottom end of a 4x4.
Things I am happy with
Let’s end on a positive note
- Total cost was a little over $100. Call it $120. The caster wheels were about $20 each but they are high quality. So that’s $80 in wheels, and then say $40 in wood for legs and a couple 2x4’s and some screws and the handle and the locking hinges
- I recycled a lot of things: the plywood top, some small caster wheels, the collar. I re-used the high quality decking screws that I could take out of the part of the collar I removed. That’s it, I guess.
- This project forced me to be creative in thinking of a solution for the folding legs, the rolling wheels, the handle, etc. Even blogging about it forces me to think about image sizing and placement and CSS and jekyll, my git commit history, which will be updated now!
git add .
git commit -m "my first workbench post"
git push -u origin main