Building a Kids Closet Built-In: Shelving, Drawers, and Lessons Learned
Background
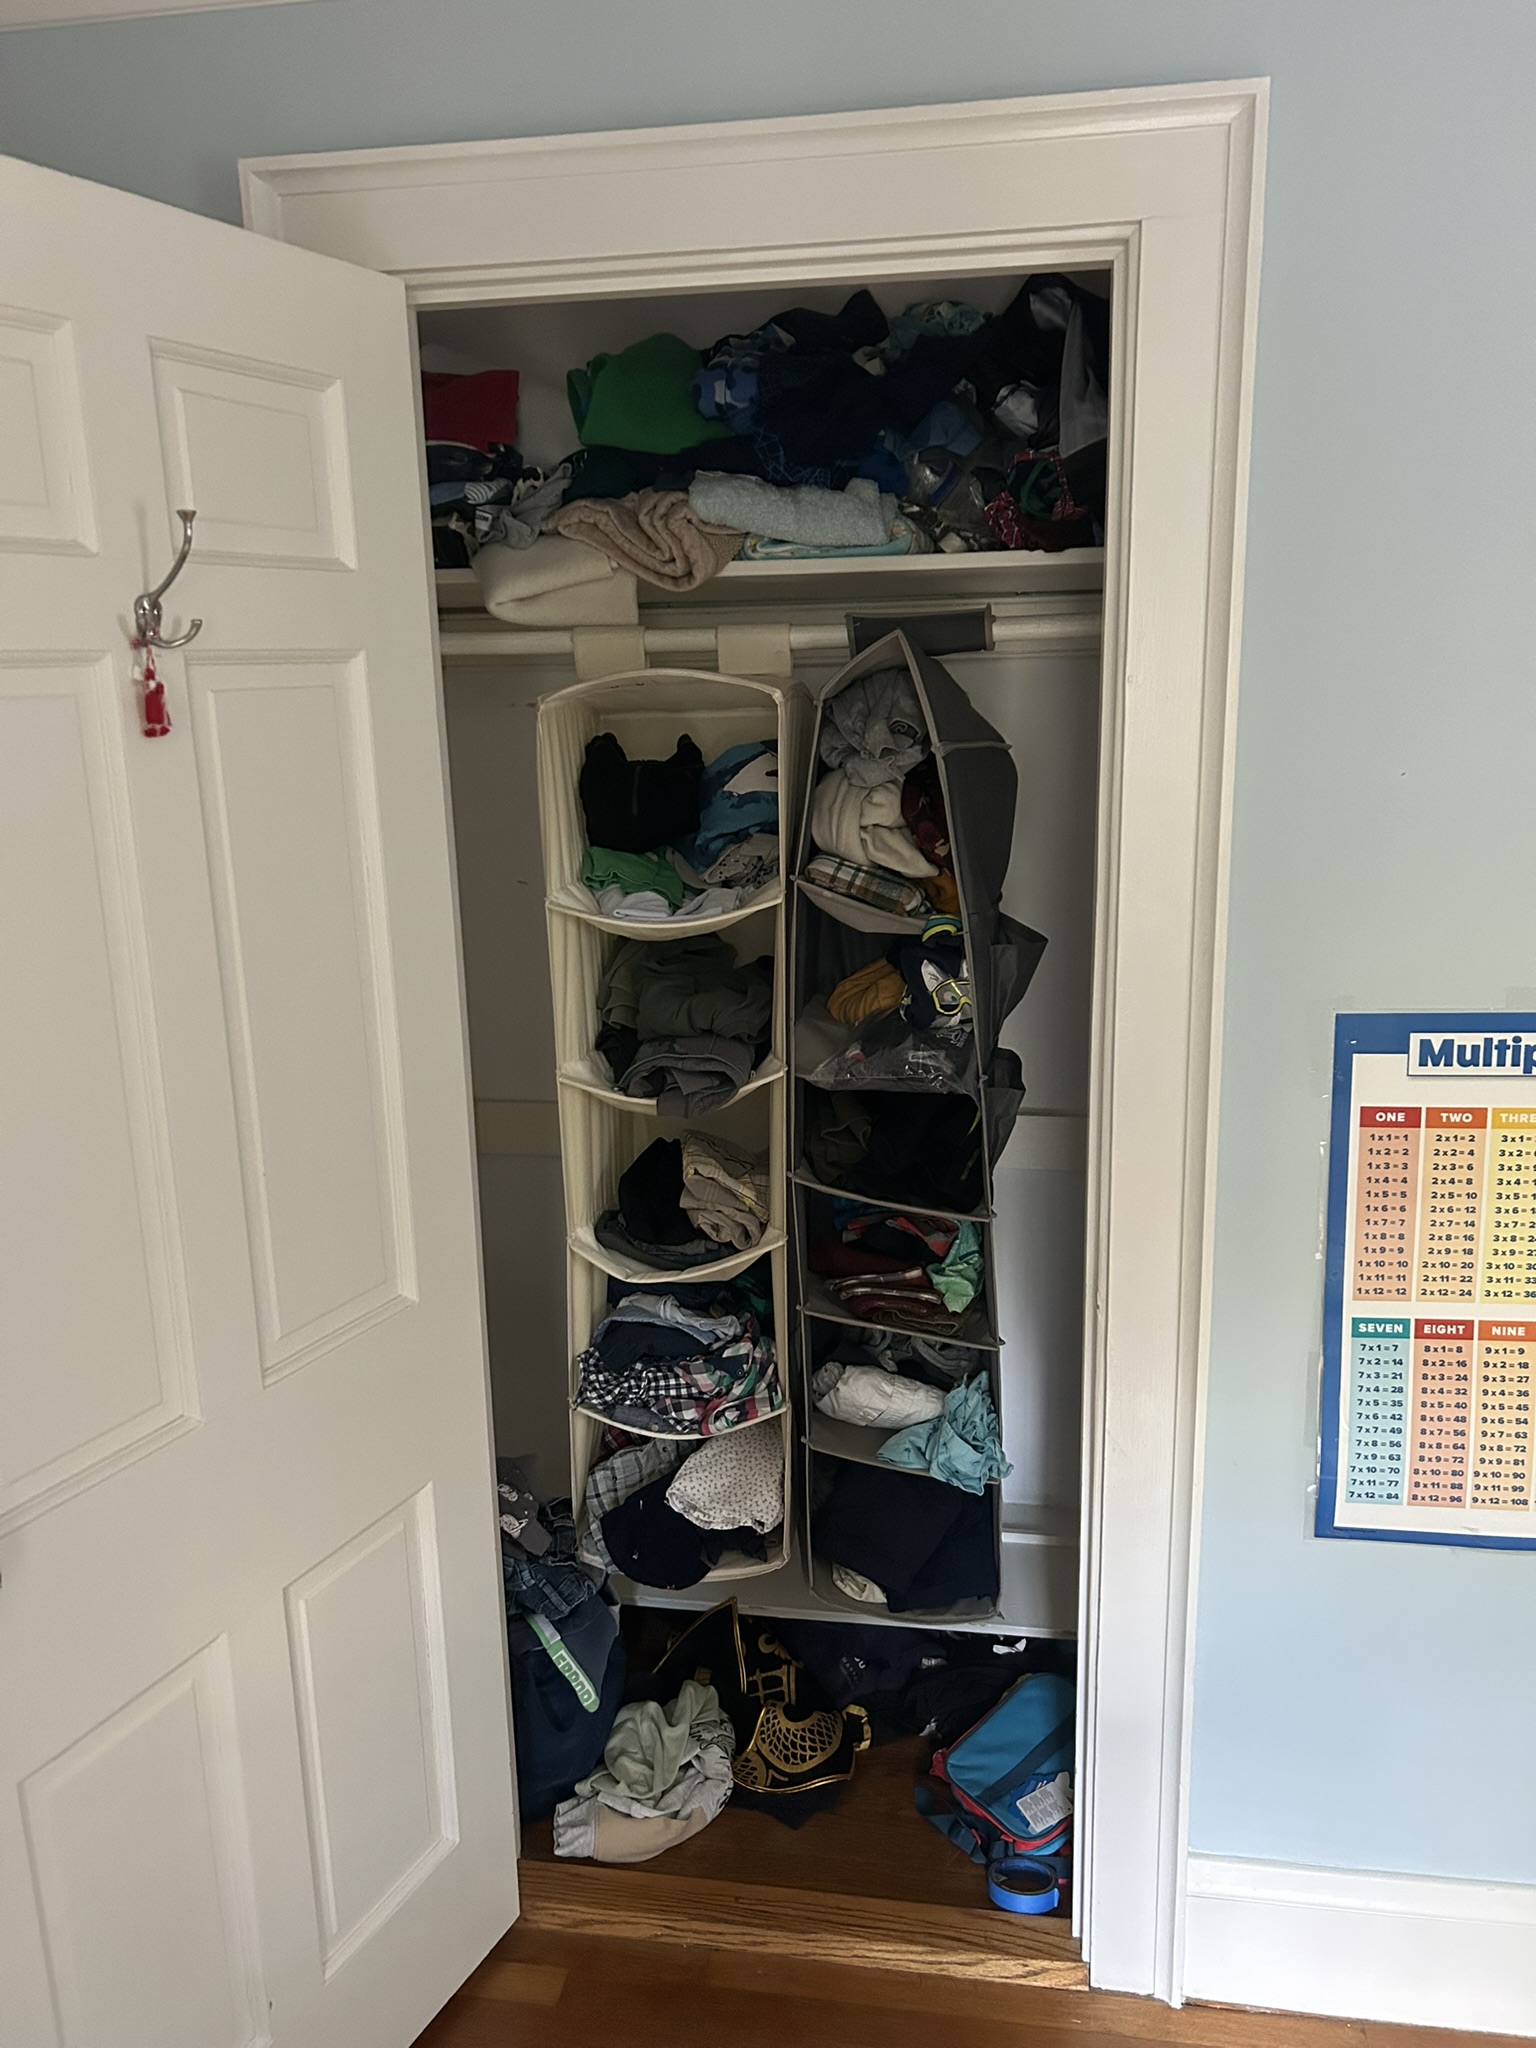
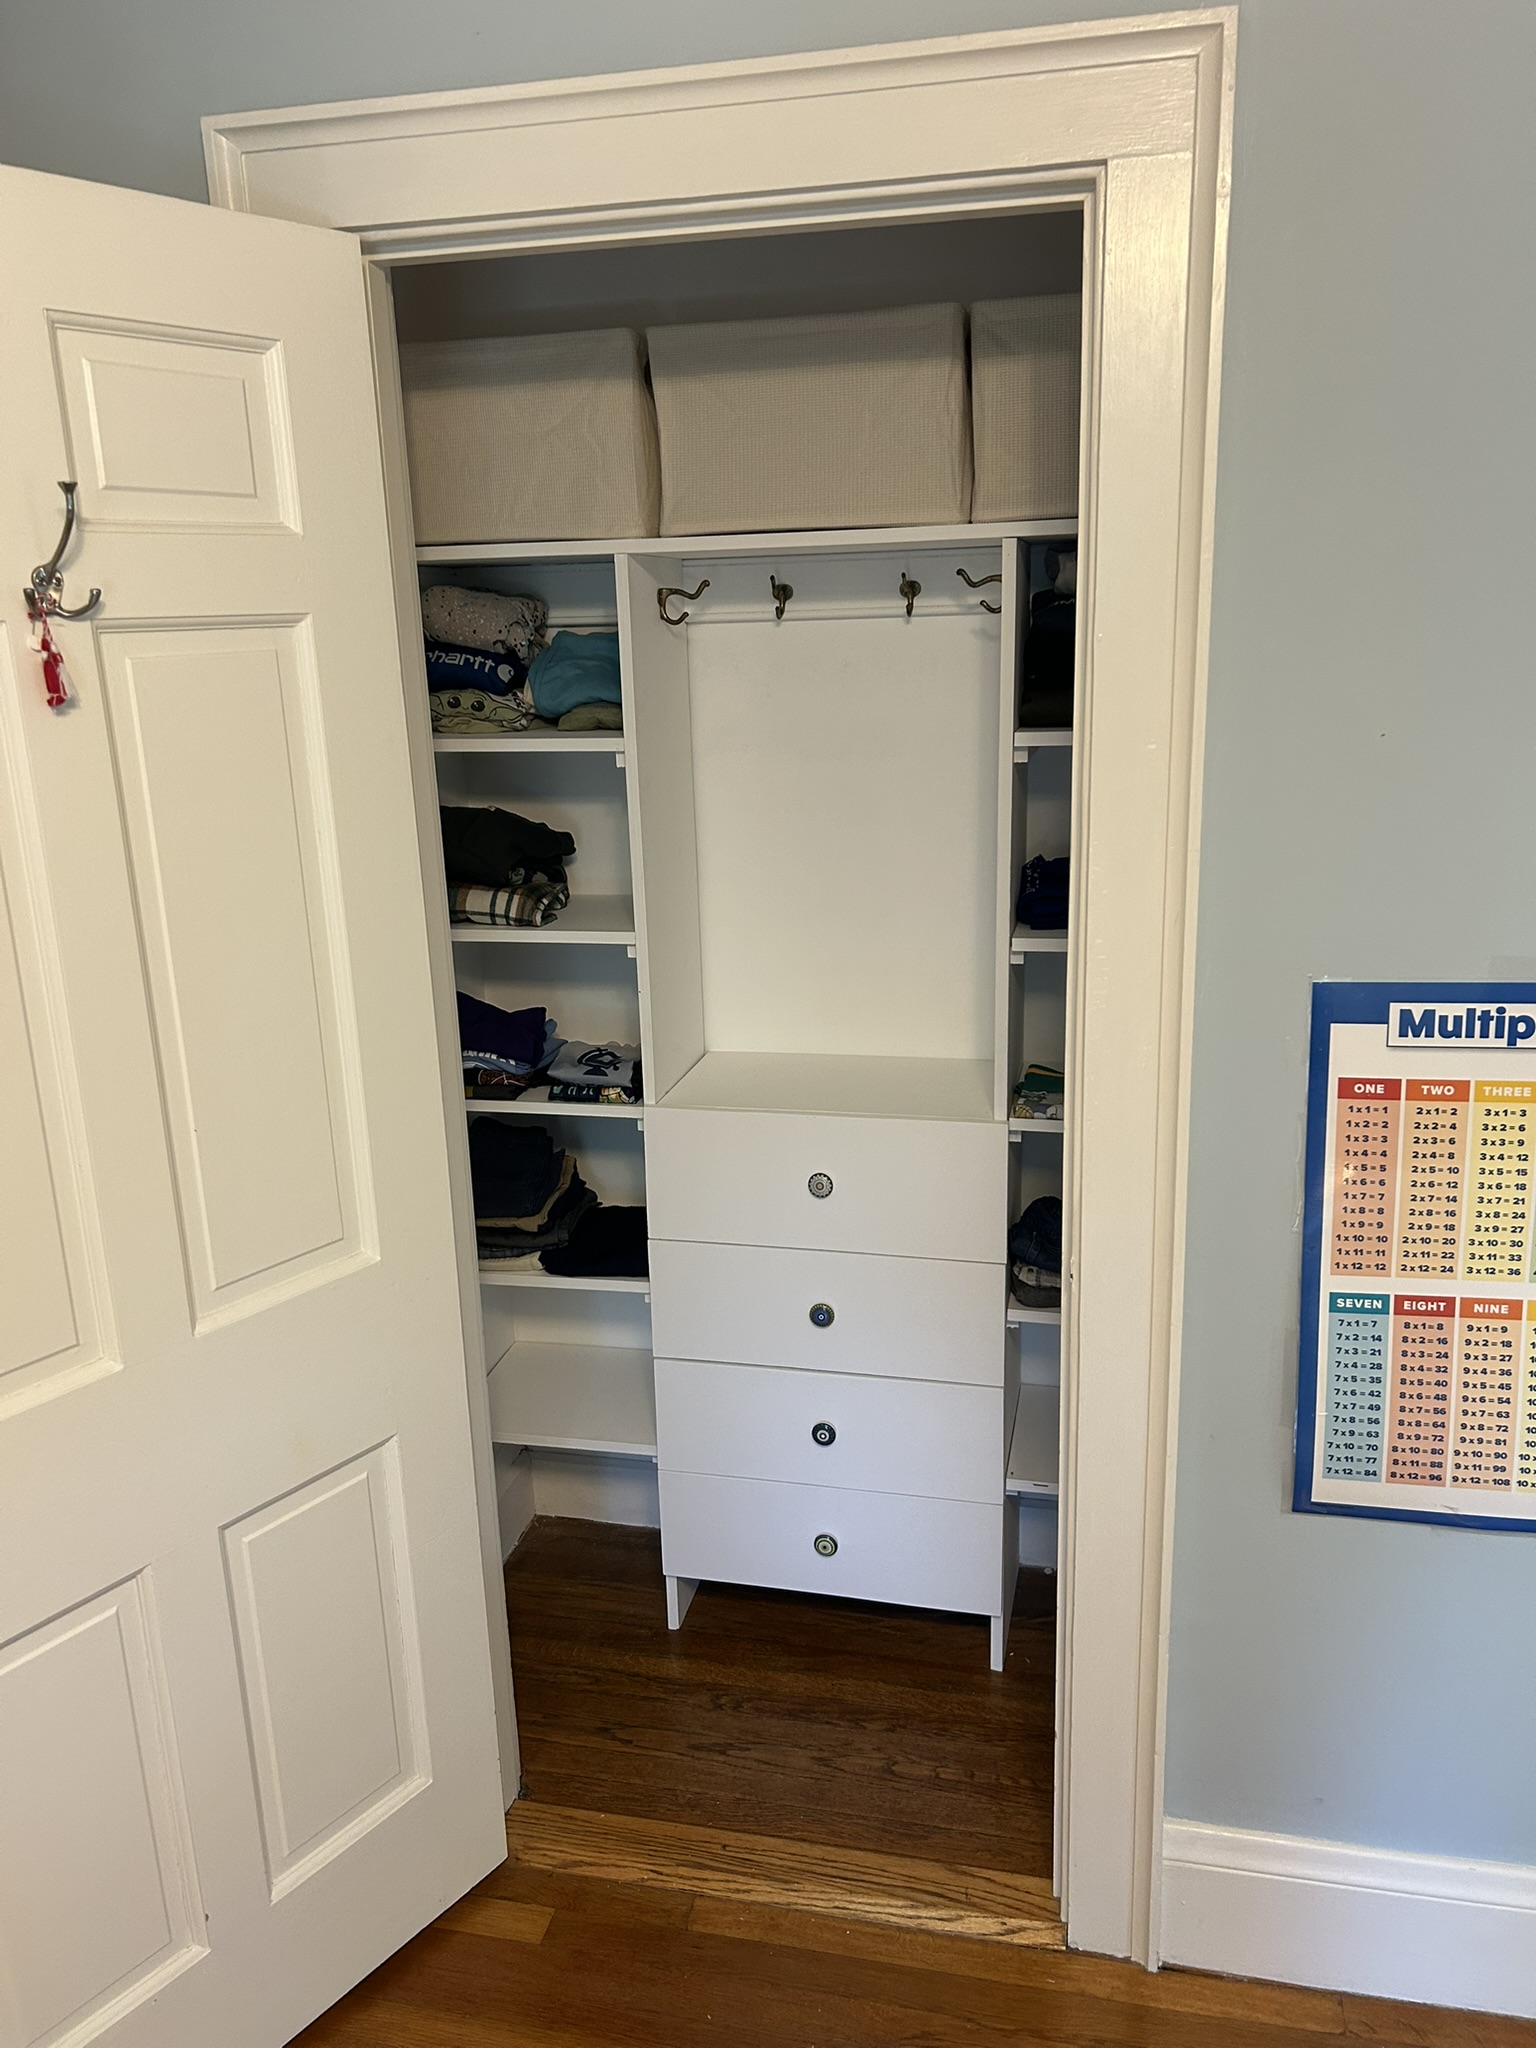
My kid’s closet was a disaster. Two fabric hanging organizers crammed with clothes, shoes piled on the floor, and absolutely no system. The standard single rod and one high shelf weren’t cutting it.
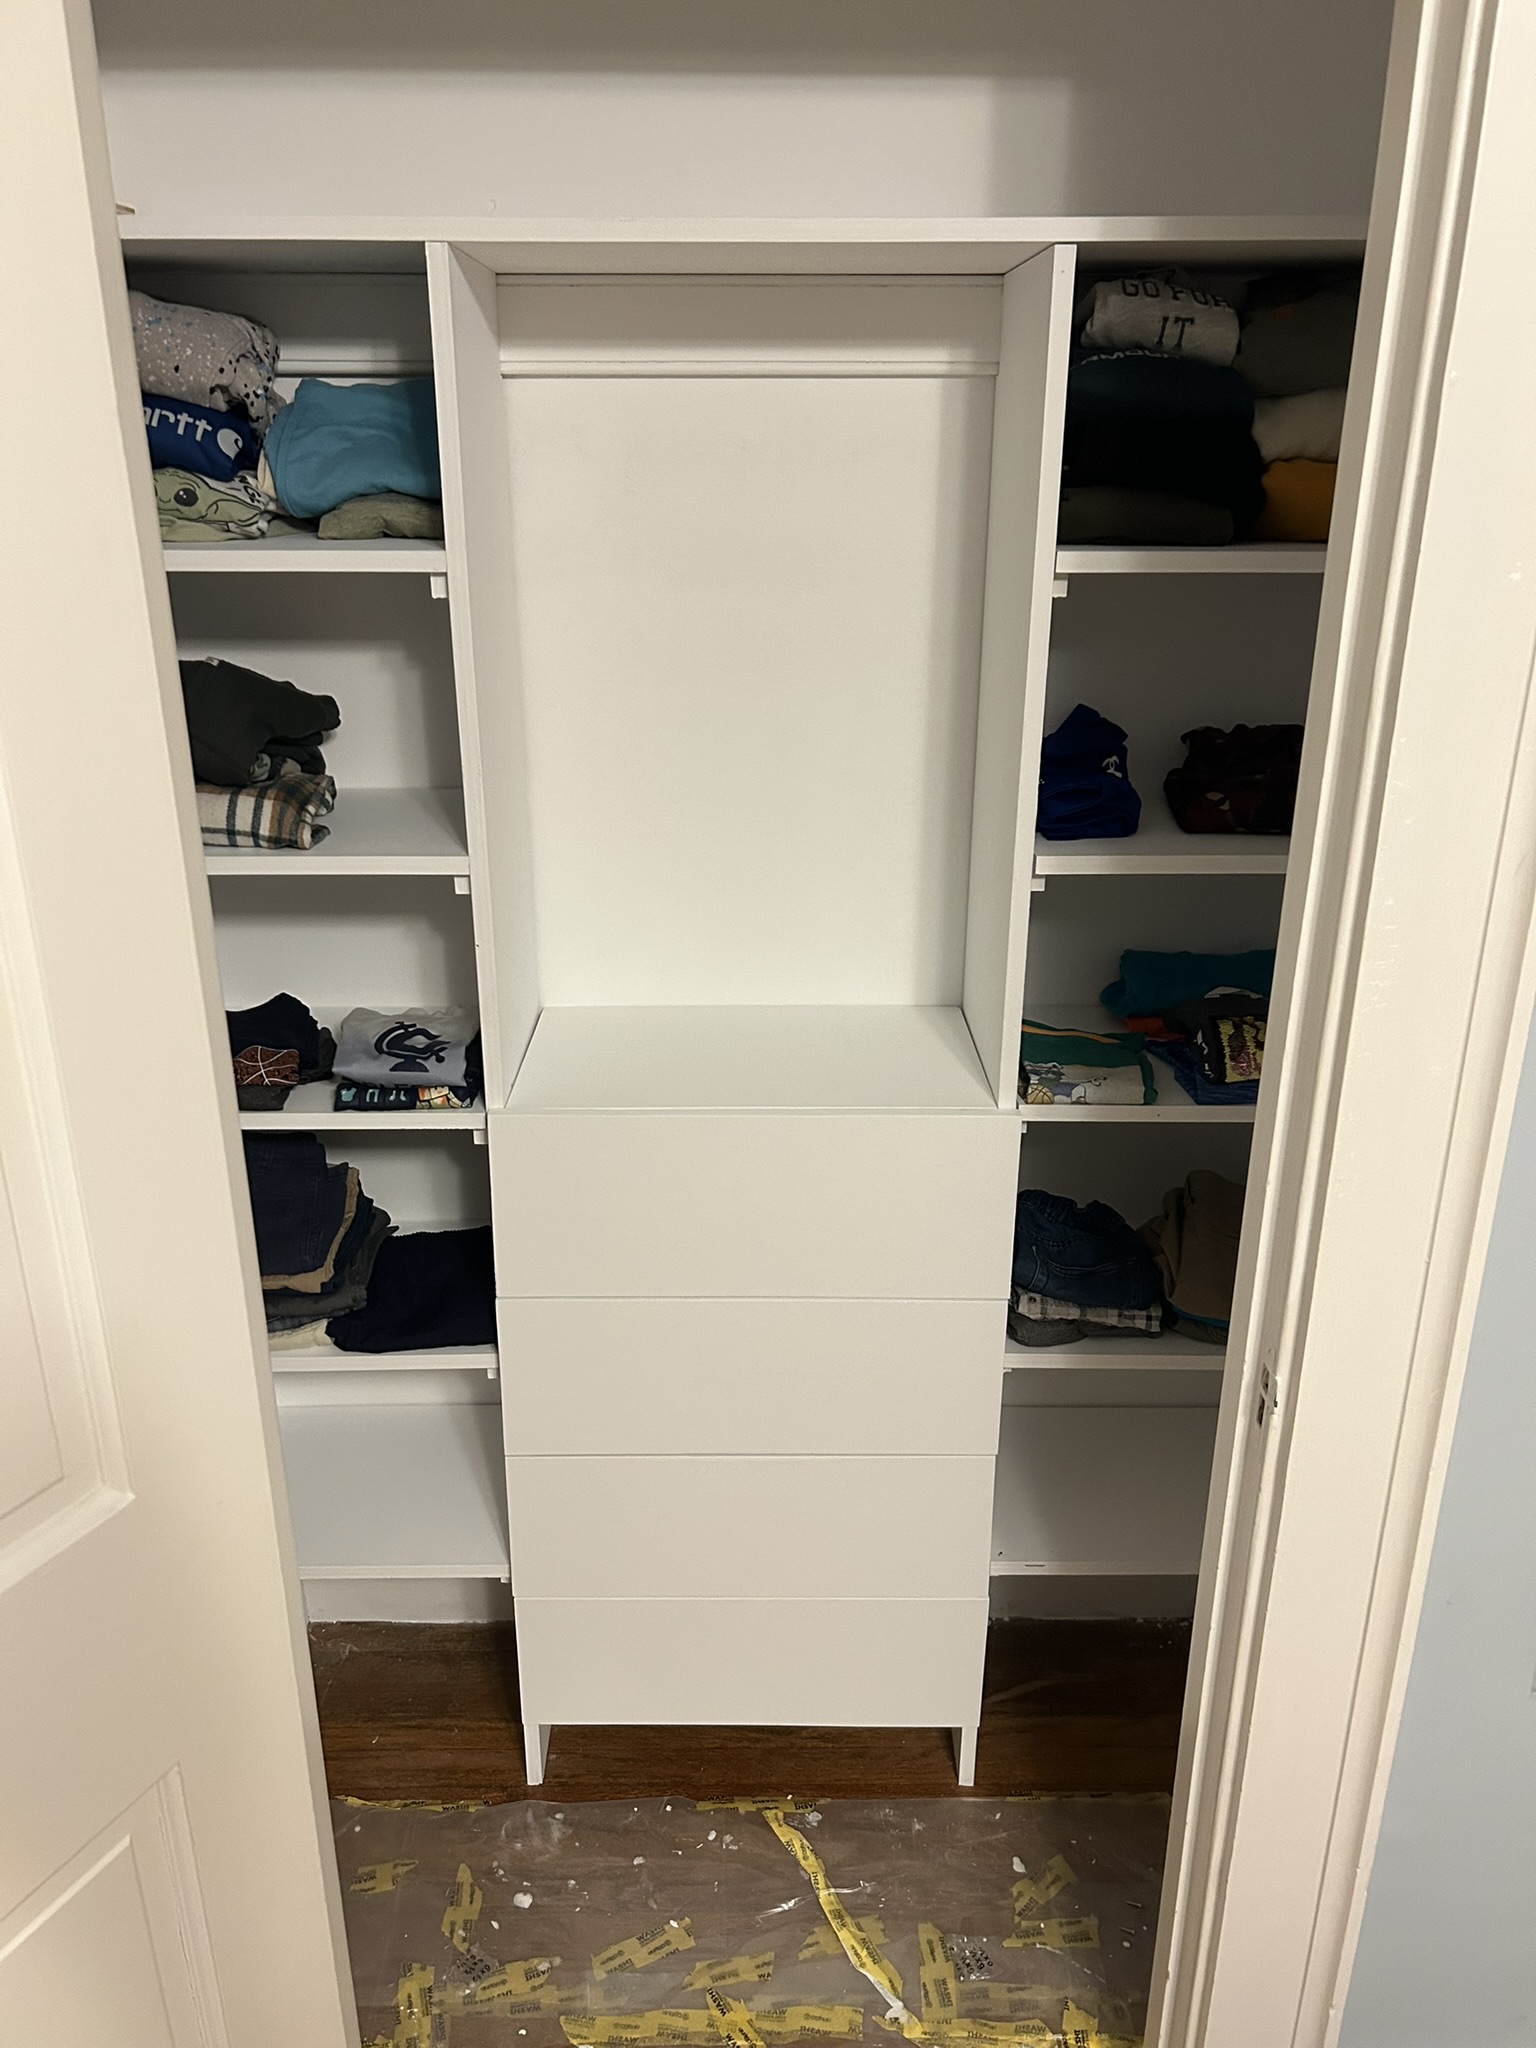
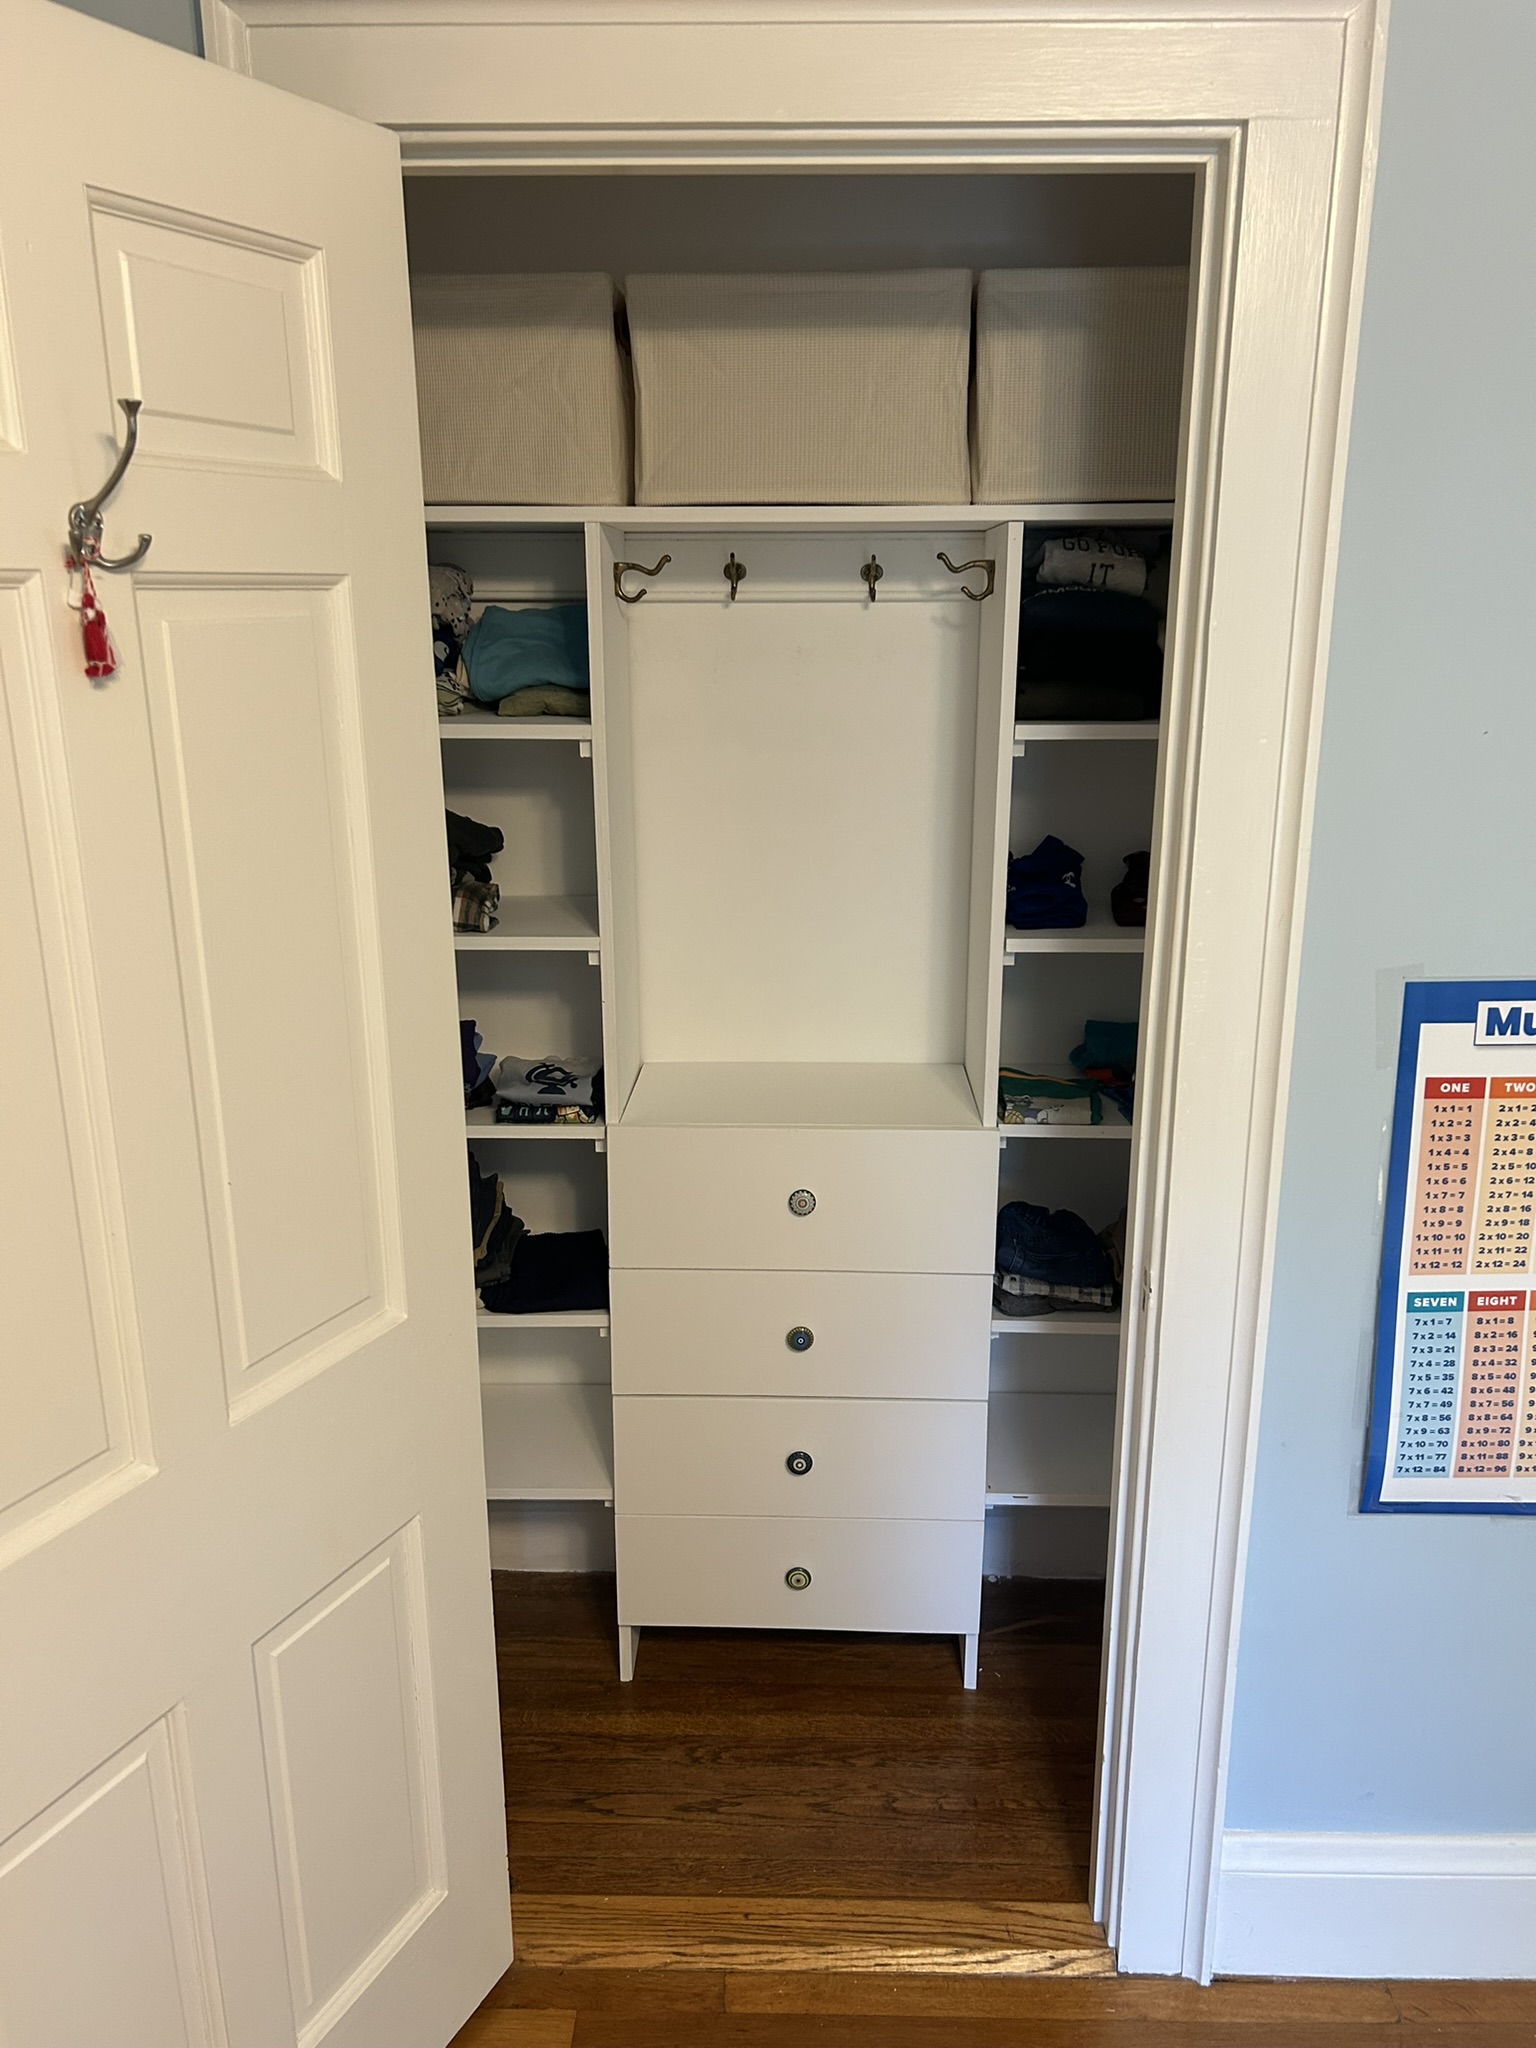
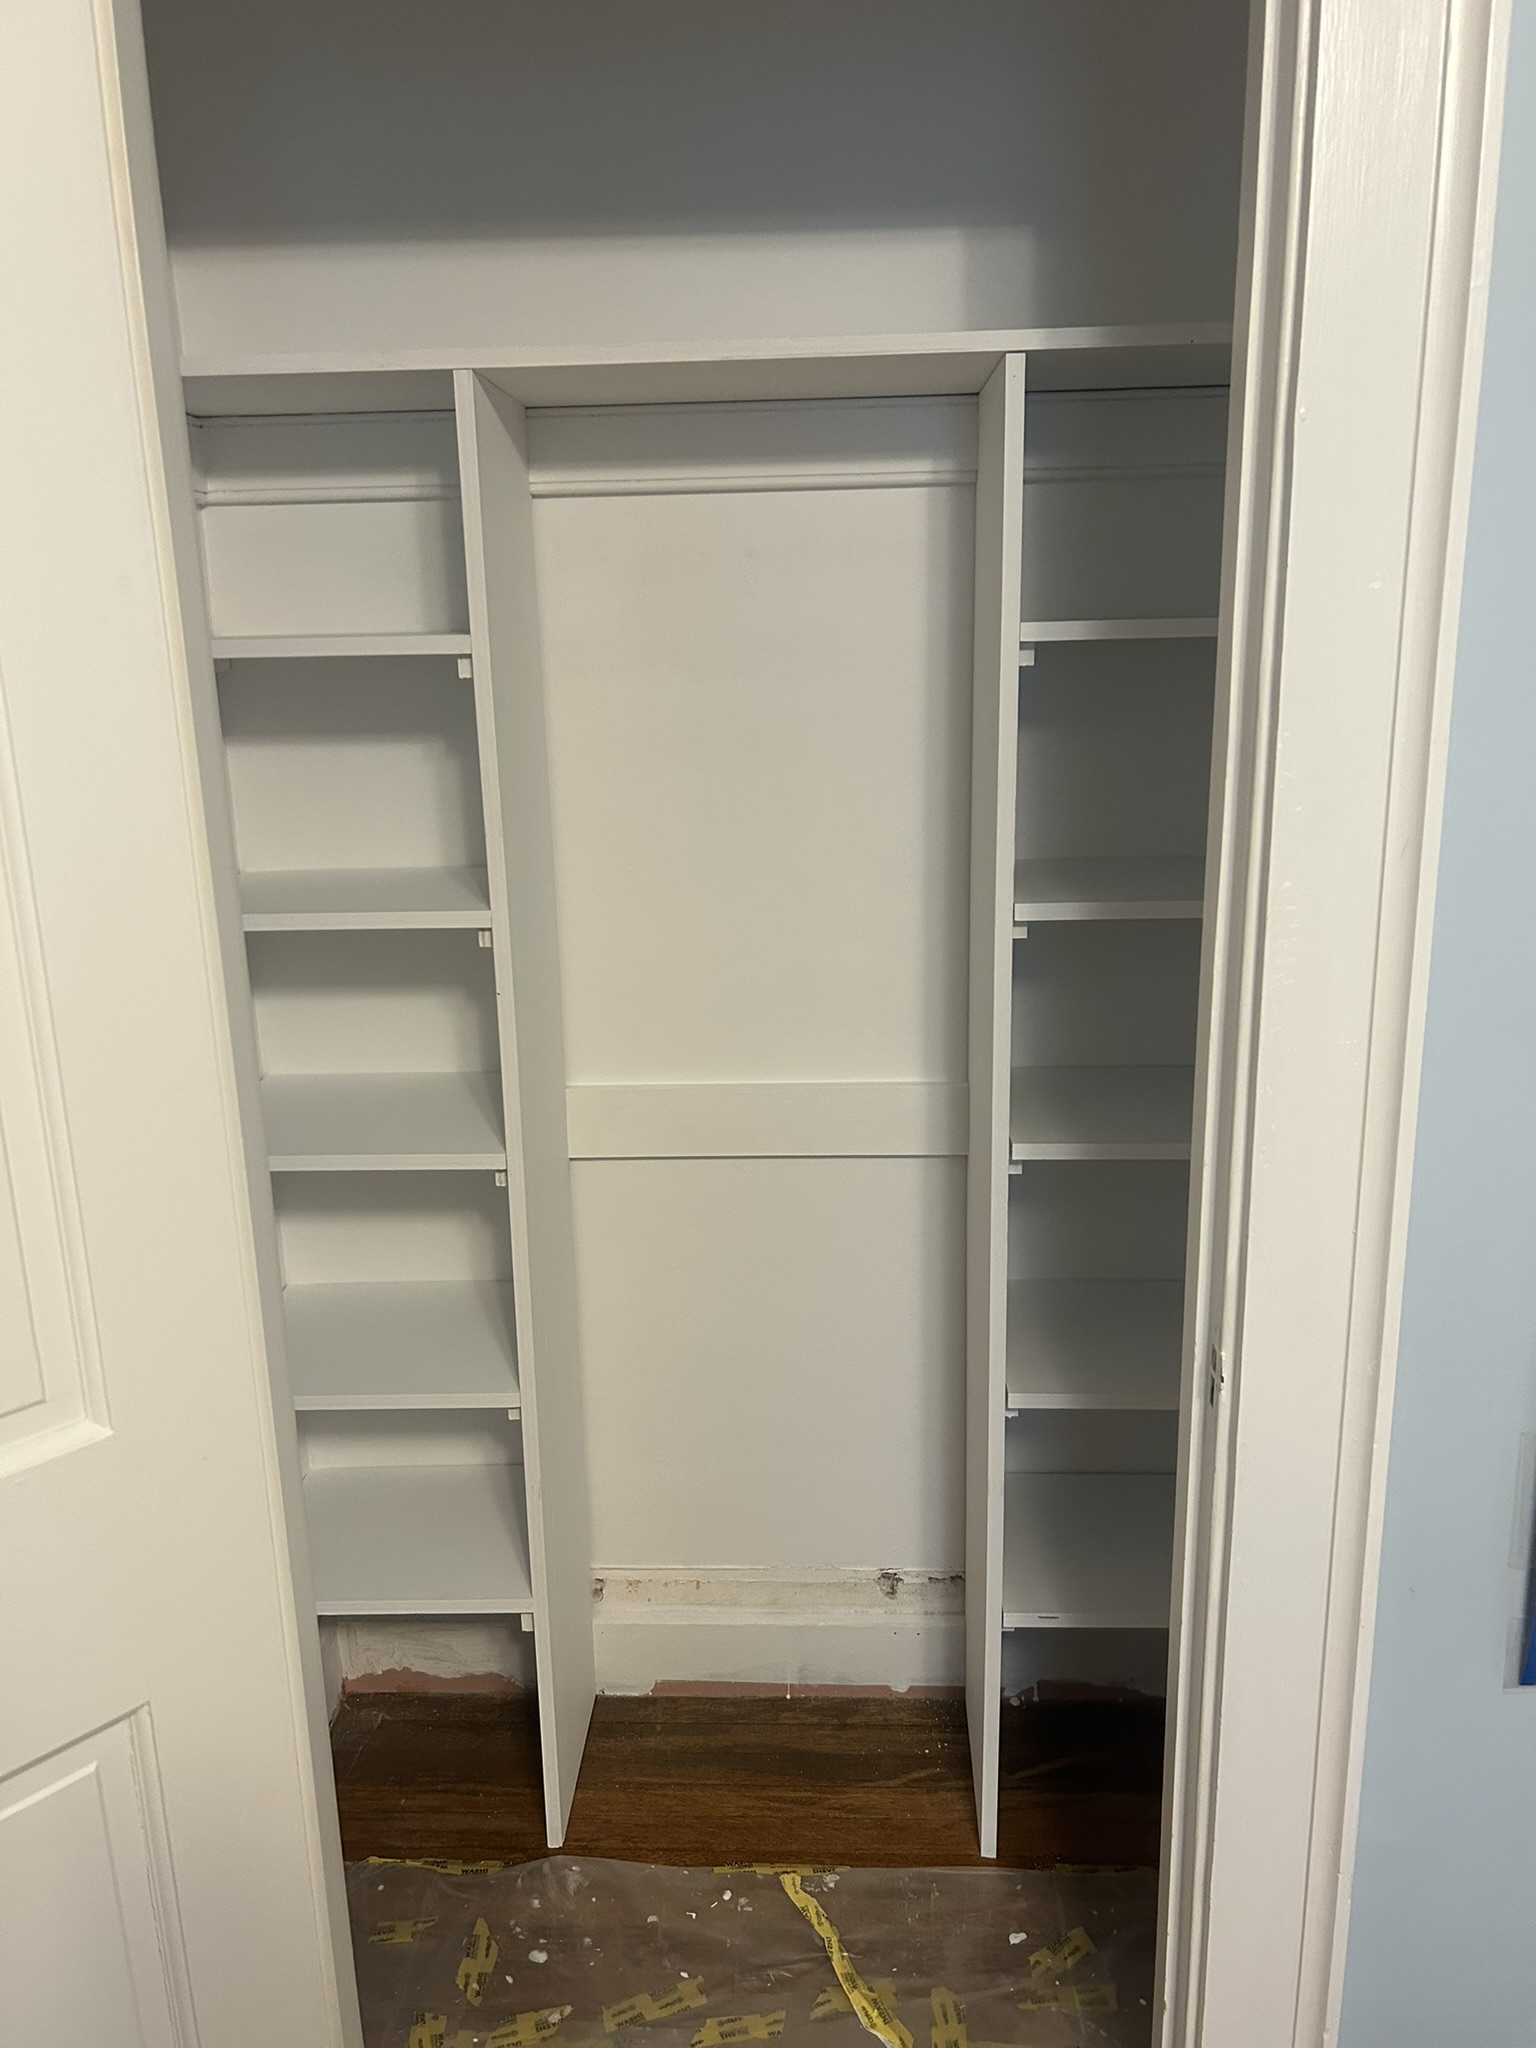
I decided to build a custom built-in: two flanking shelving towers, a center hanging zone, and four shallow drawers below the hang area. Total interior width was 50.5 inches. I wanted everything white, clean, and furniture-quality.
This is a record of what I did, what I learned, and what I’d do differently.
Design decisions
The closet is 50.5 inches wide with a 30-inch door opening and 10-inch recesses on each side behind the door frame. The depth is 26 inches total, but with clearance for reaching in, the shelving depth is 12 inches.
Key constraints:
- An existing top shelf support at 67 inches height (kept it — no reason to remove it)
- An existing mid-height wall support at 34.5 inches (used it as a natural shelf rest)
- Baseboard 0.75 inches thick and 5 inches tall, running along all three walls
- No reliable stud locations (old house, unreliable stud finder)
The final layout:
- Two inner divider panels — 12 inches deep, 67 inches tall, notched at the back to clear the baseboard, mid support, and top support
- Left and right shelving towers — 14.5 inches interior width each, 5 shelves per tower at 12.5”, 23.5”, 34.5”, 45.5”, and 56.5” from the floor
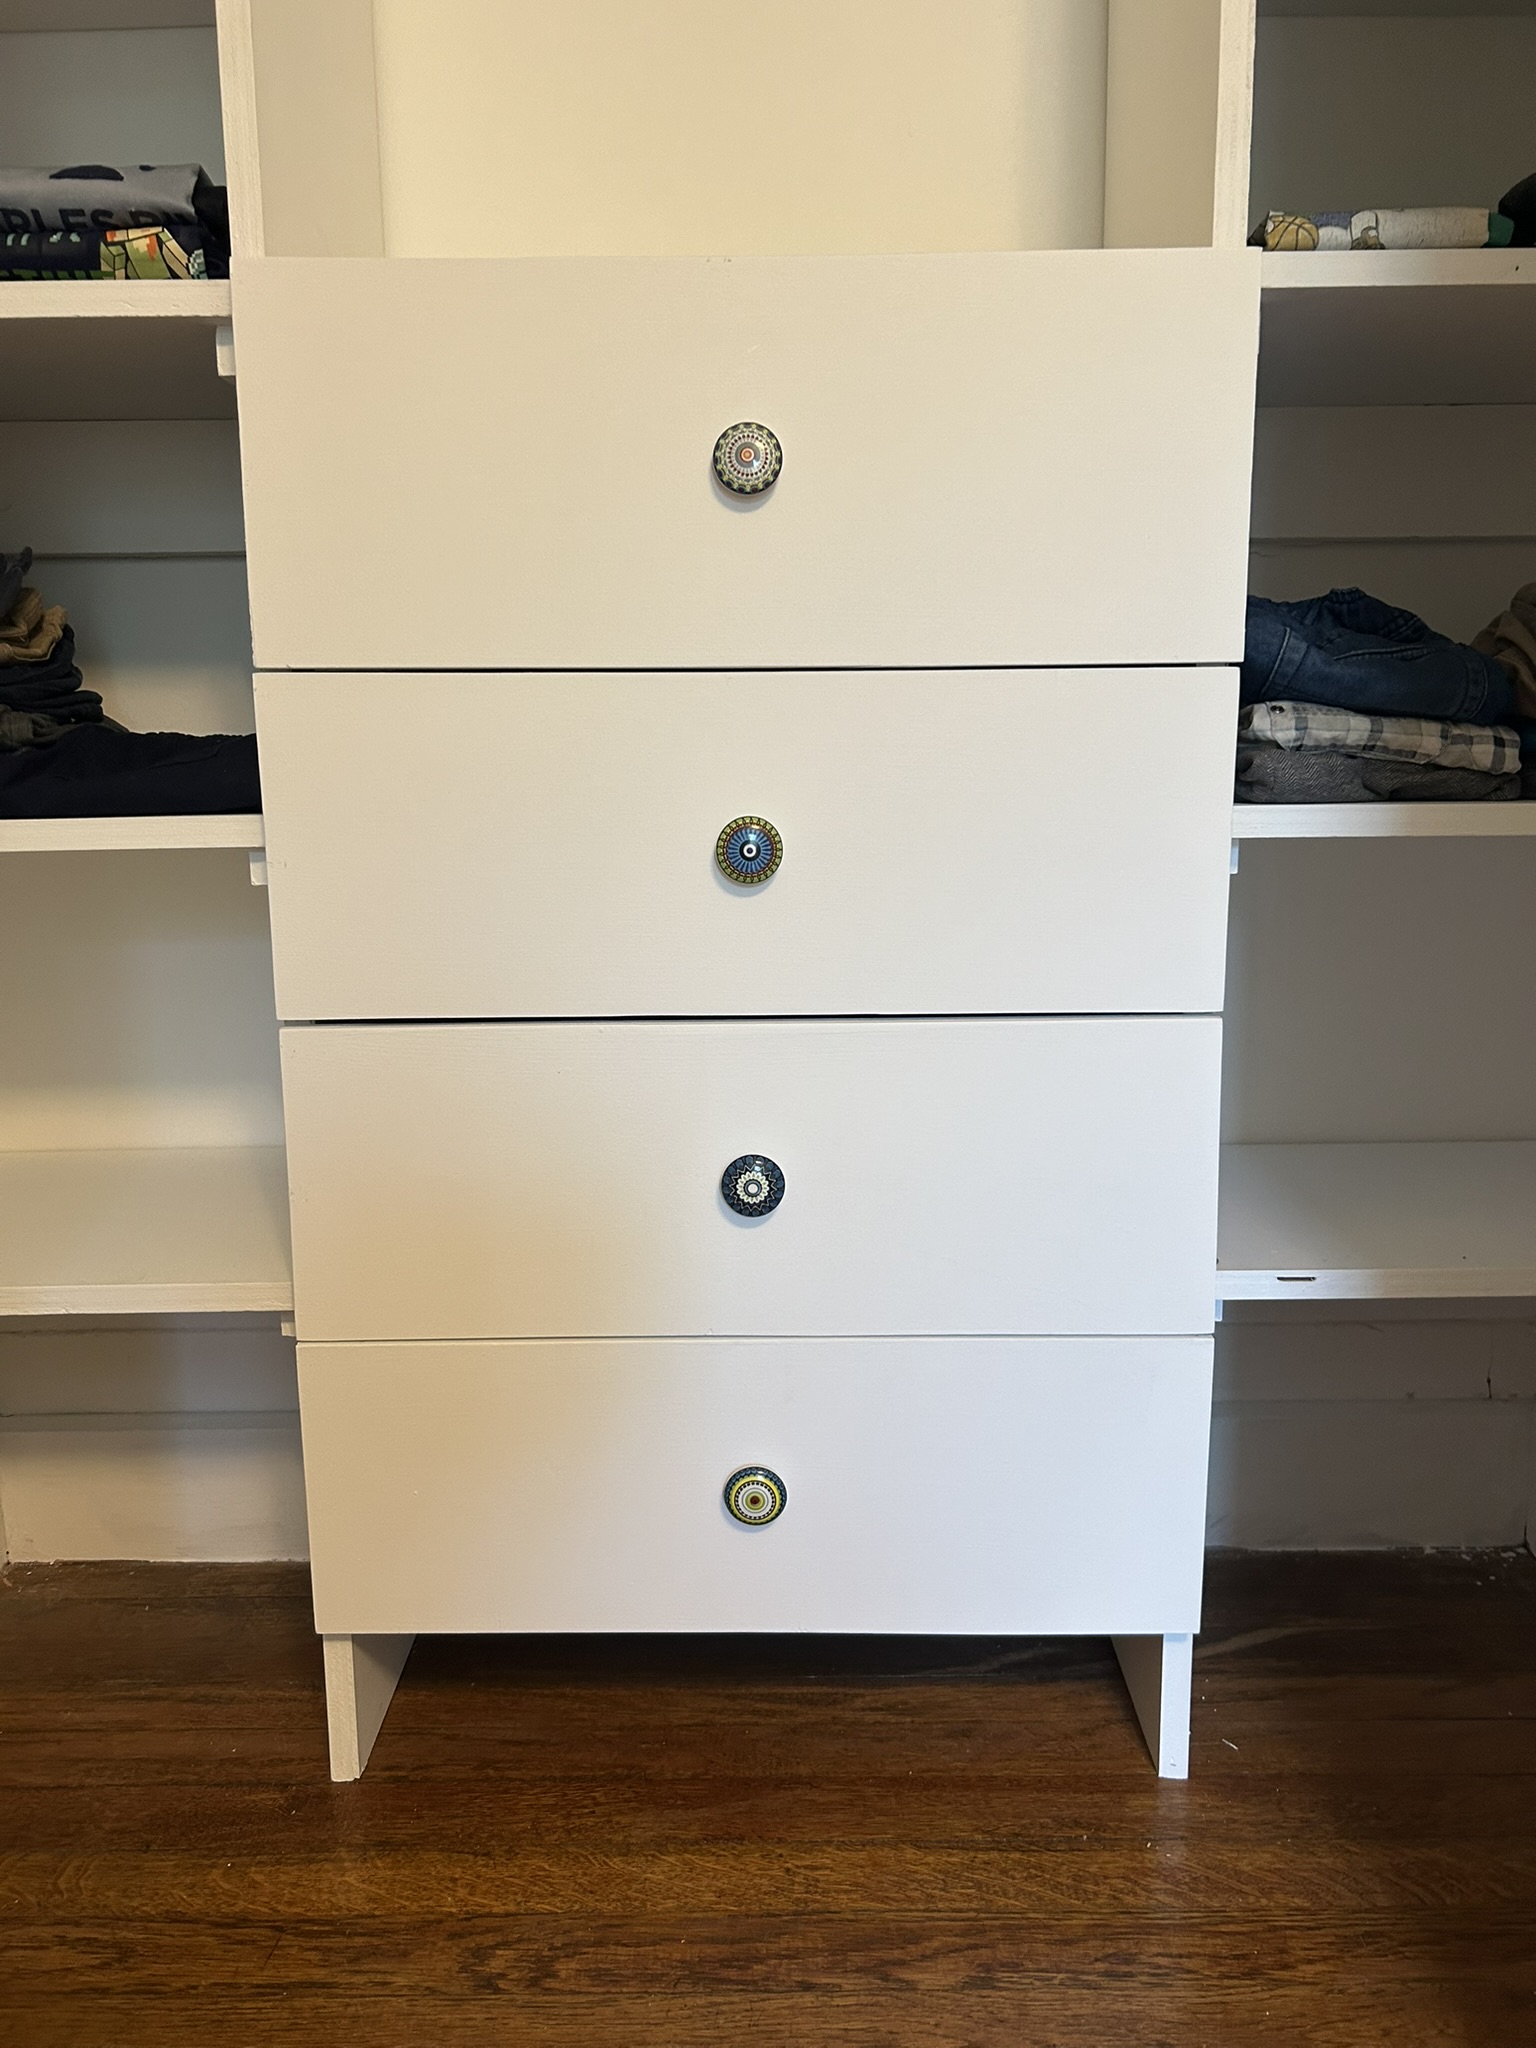
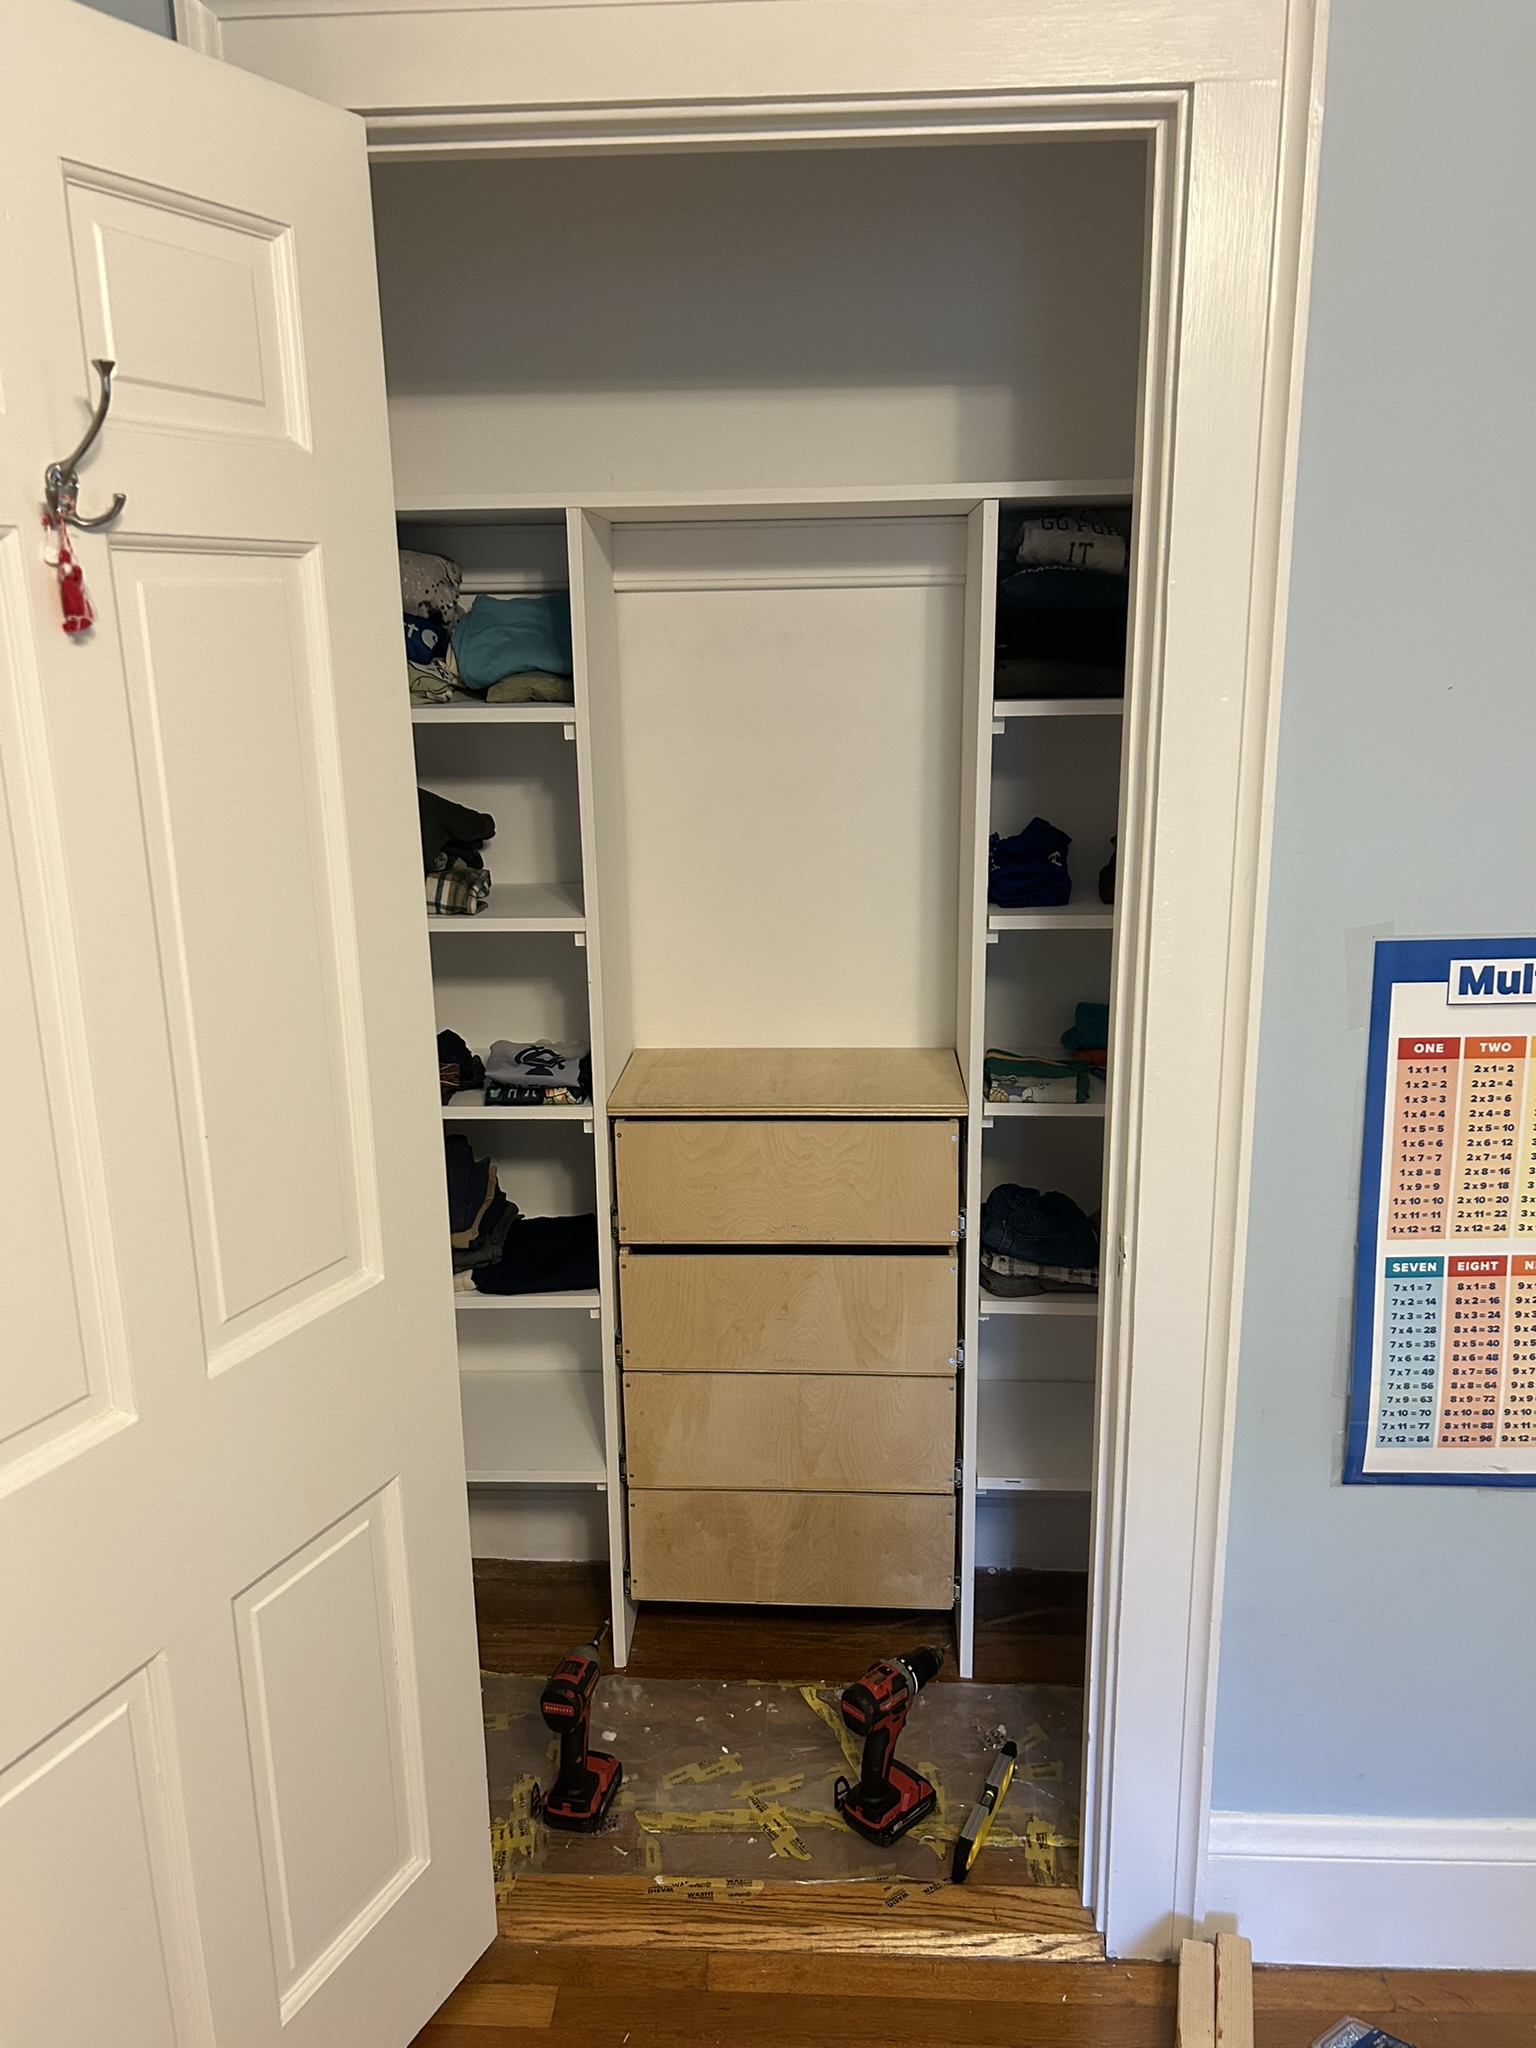
- Center zone — 20 inches wide: hanging rod above 34.5”, four shallow drawers below
- Full-width top shelf at 67 inches resting on the existing wall support
Tools and materials
Tools:
- main tools: drill, impact driver, jigsaw, miter saw, circular saw, sander
- other: Clamps, big and small spirit levels, square ruler, pocket hole jig
Materials:
- 3/4 inch birch plywood (shelving and dividers)
- 1/2 inch birch plywood (drawer box sides, fronts, backs) and 1/4 inch (bottoms)
- white primer and white paint
- other: drawer slides, screws, wood glue
Build process
The store cut my plywood into 12-inch strips on their panel saw, which made transport easy and reduced my circular saw work significantly.
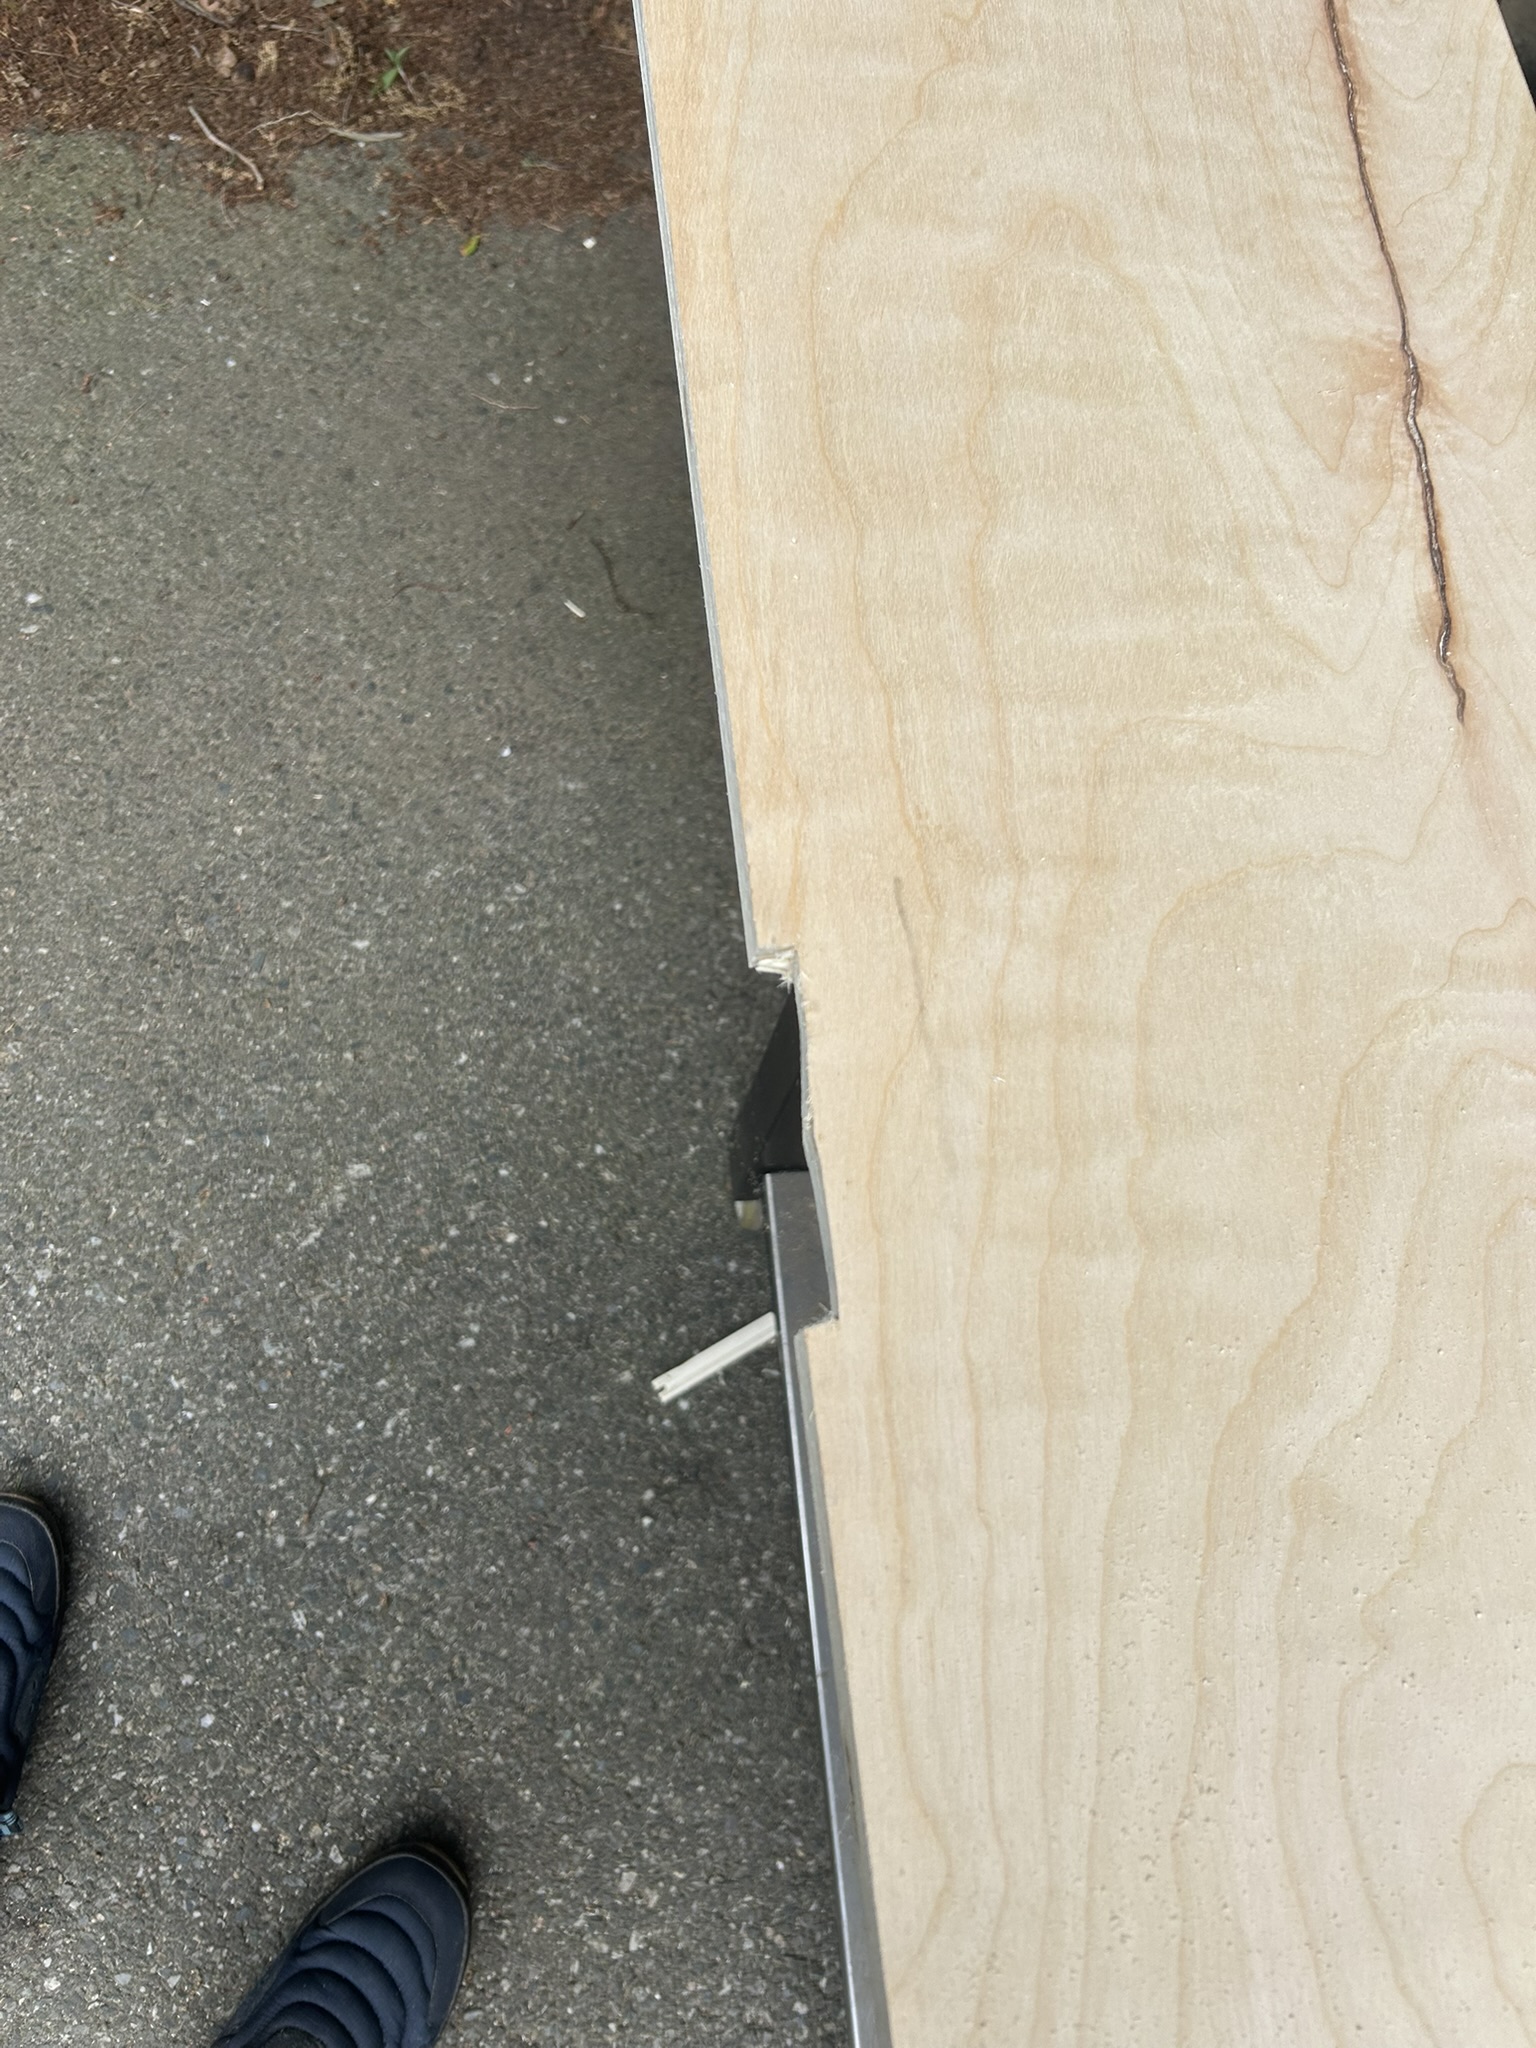
Divider panels first. Each panel needed three notches cut from the back edge to clear the wall supports: baseboard (0.75 deep × 5 tall), mid support (0.75 deep × 3.75 tall, starting at 30.75 inches), and top support (0.75 deep × 3.5 tall, from the top). I did a terrible job with a cheap jigsaw but it will work.
Dry fit everything before committing. I assembled the full structure with one temporary screw per divider panel before any glue or painting. This confirmed the notches cleared correctly, the top shelf sat level, and the proportions looked right in person. A few minor adjustments.
Cleats for shelf support. I cut simple 11-inch wooden cleats from offcuts (3/4 × 1 inch strips) and glued and screwed them to the wall faces and divider panel faces at each shelf height. At shelf positions that coincide with the existing wall supports, the support itself carries that side and only the divider-side cleat is needed.
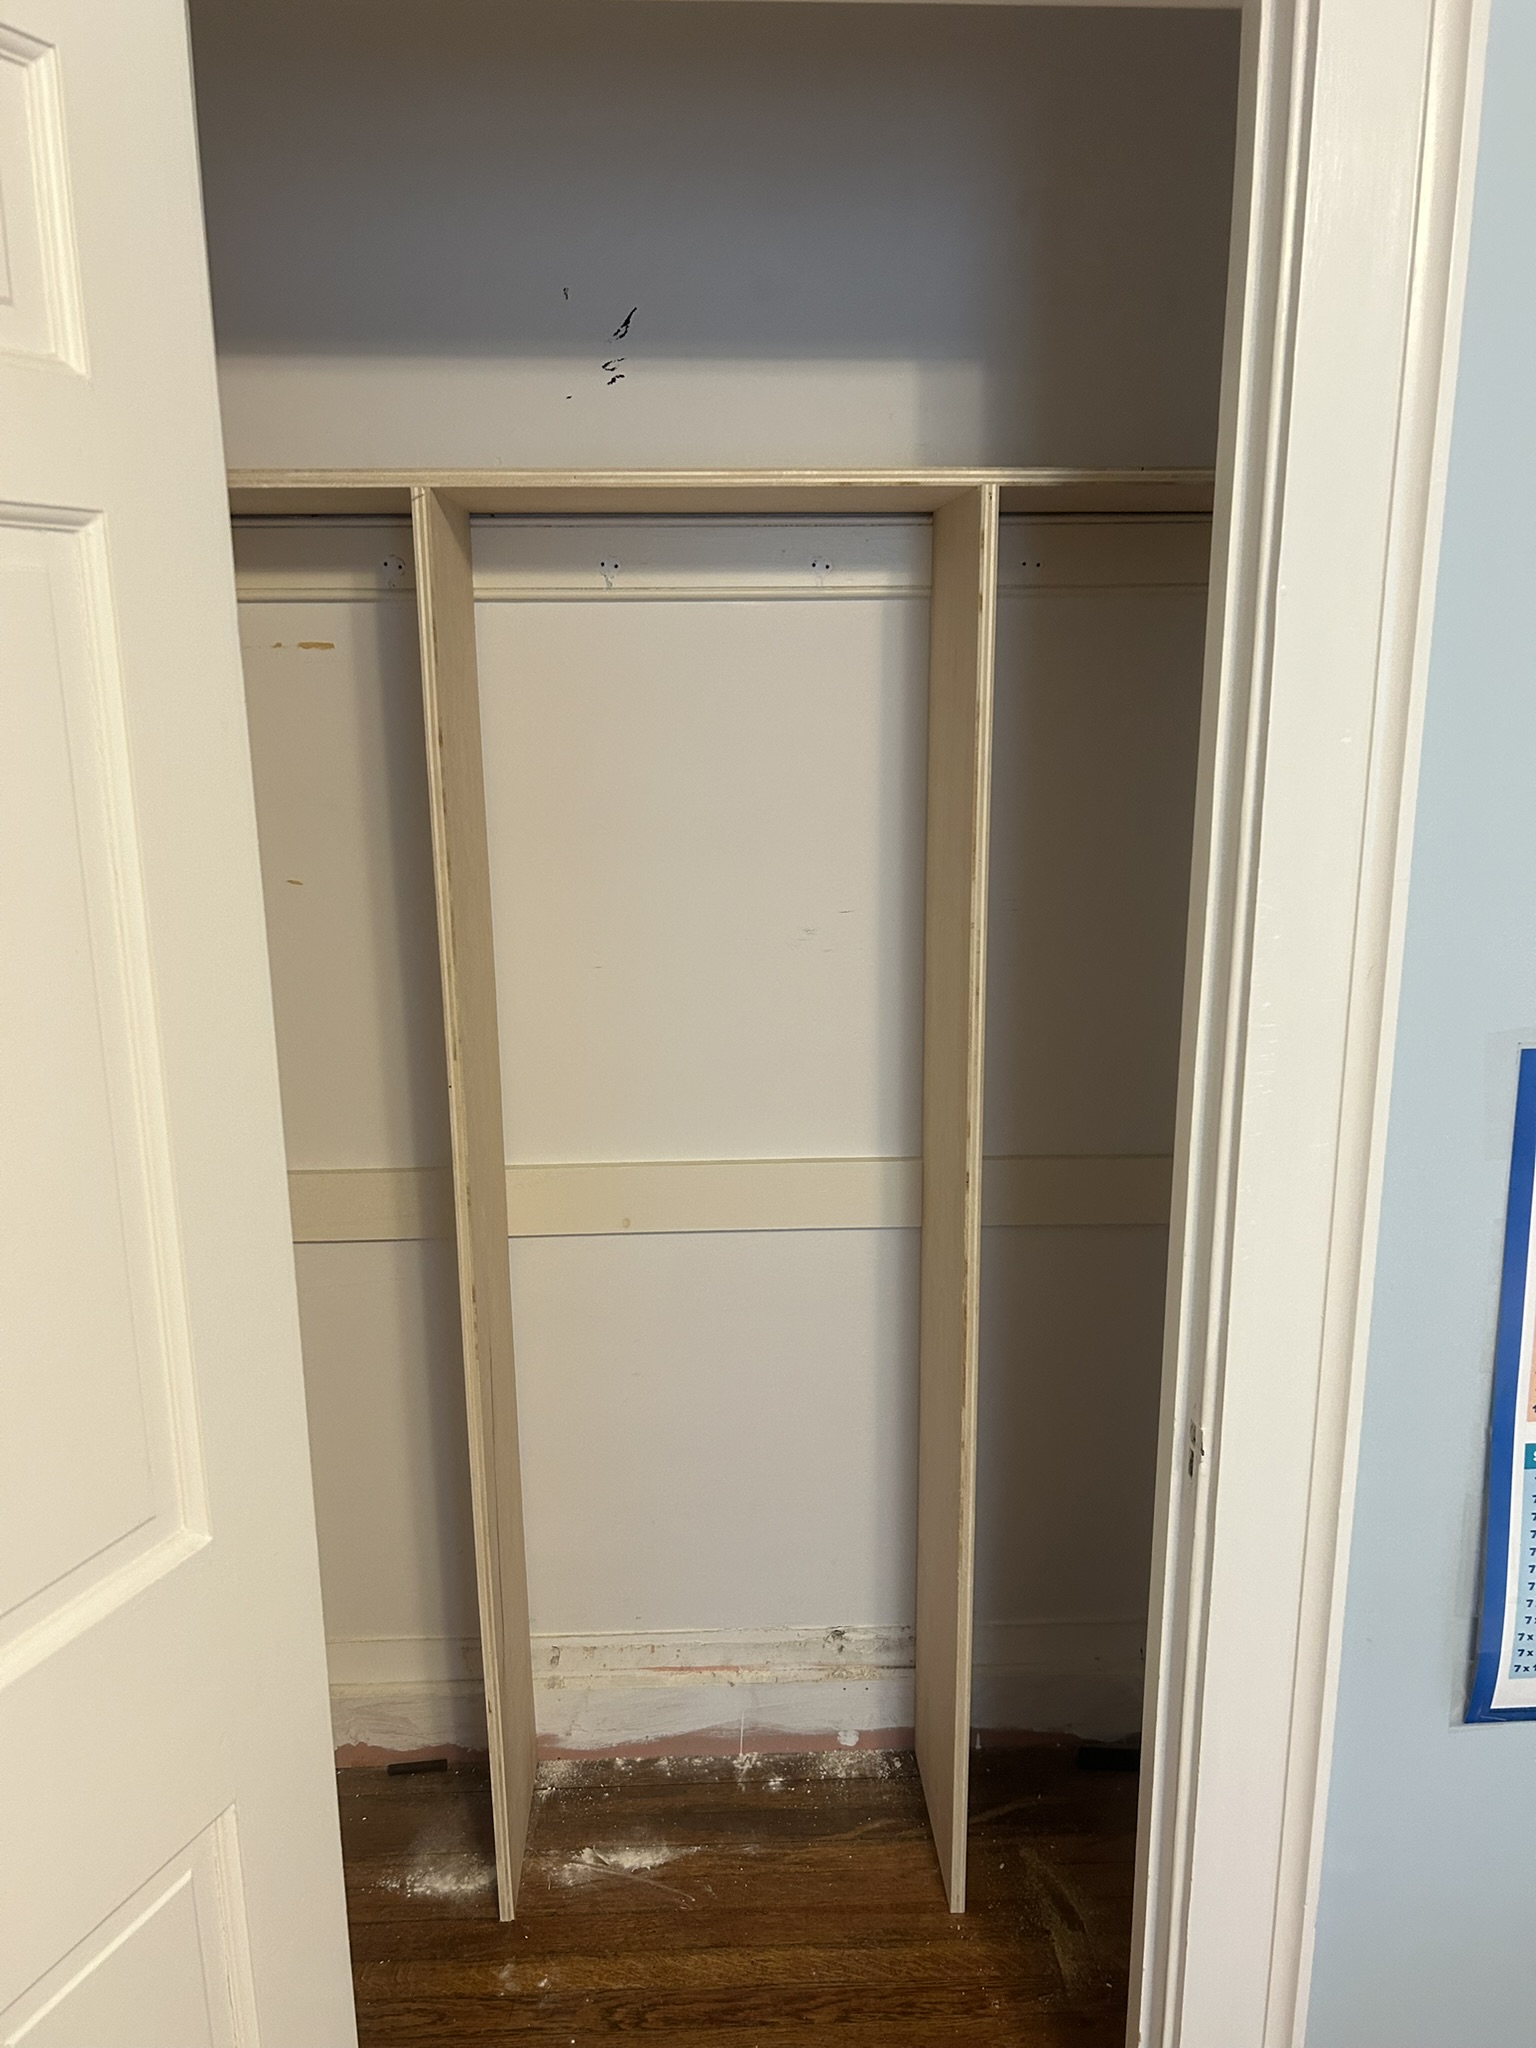
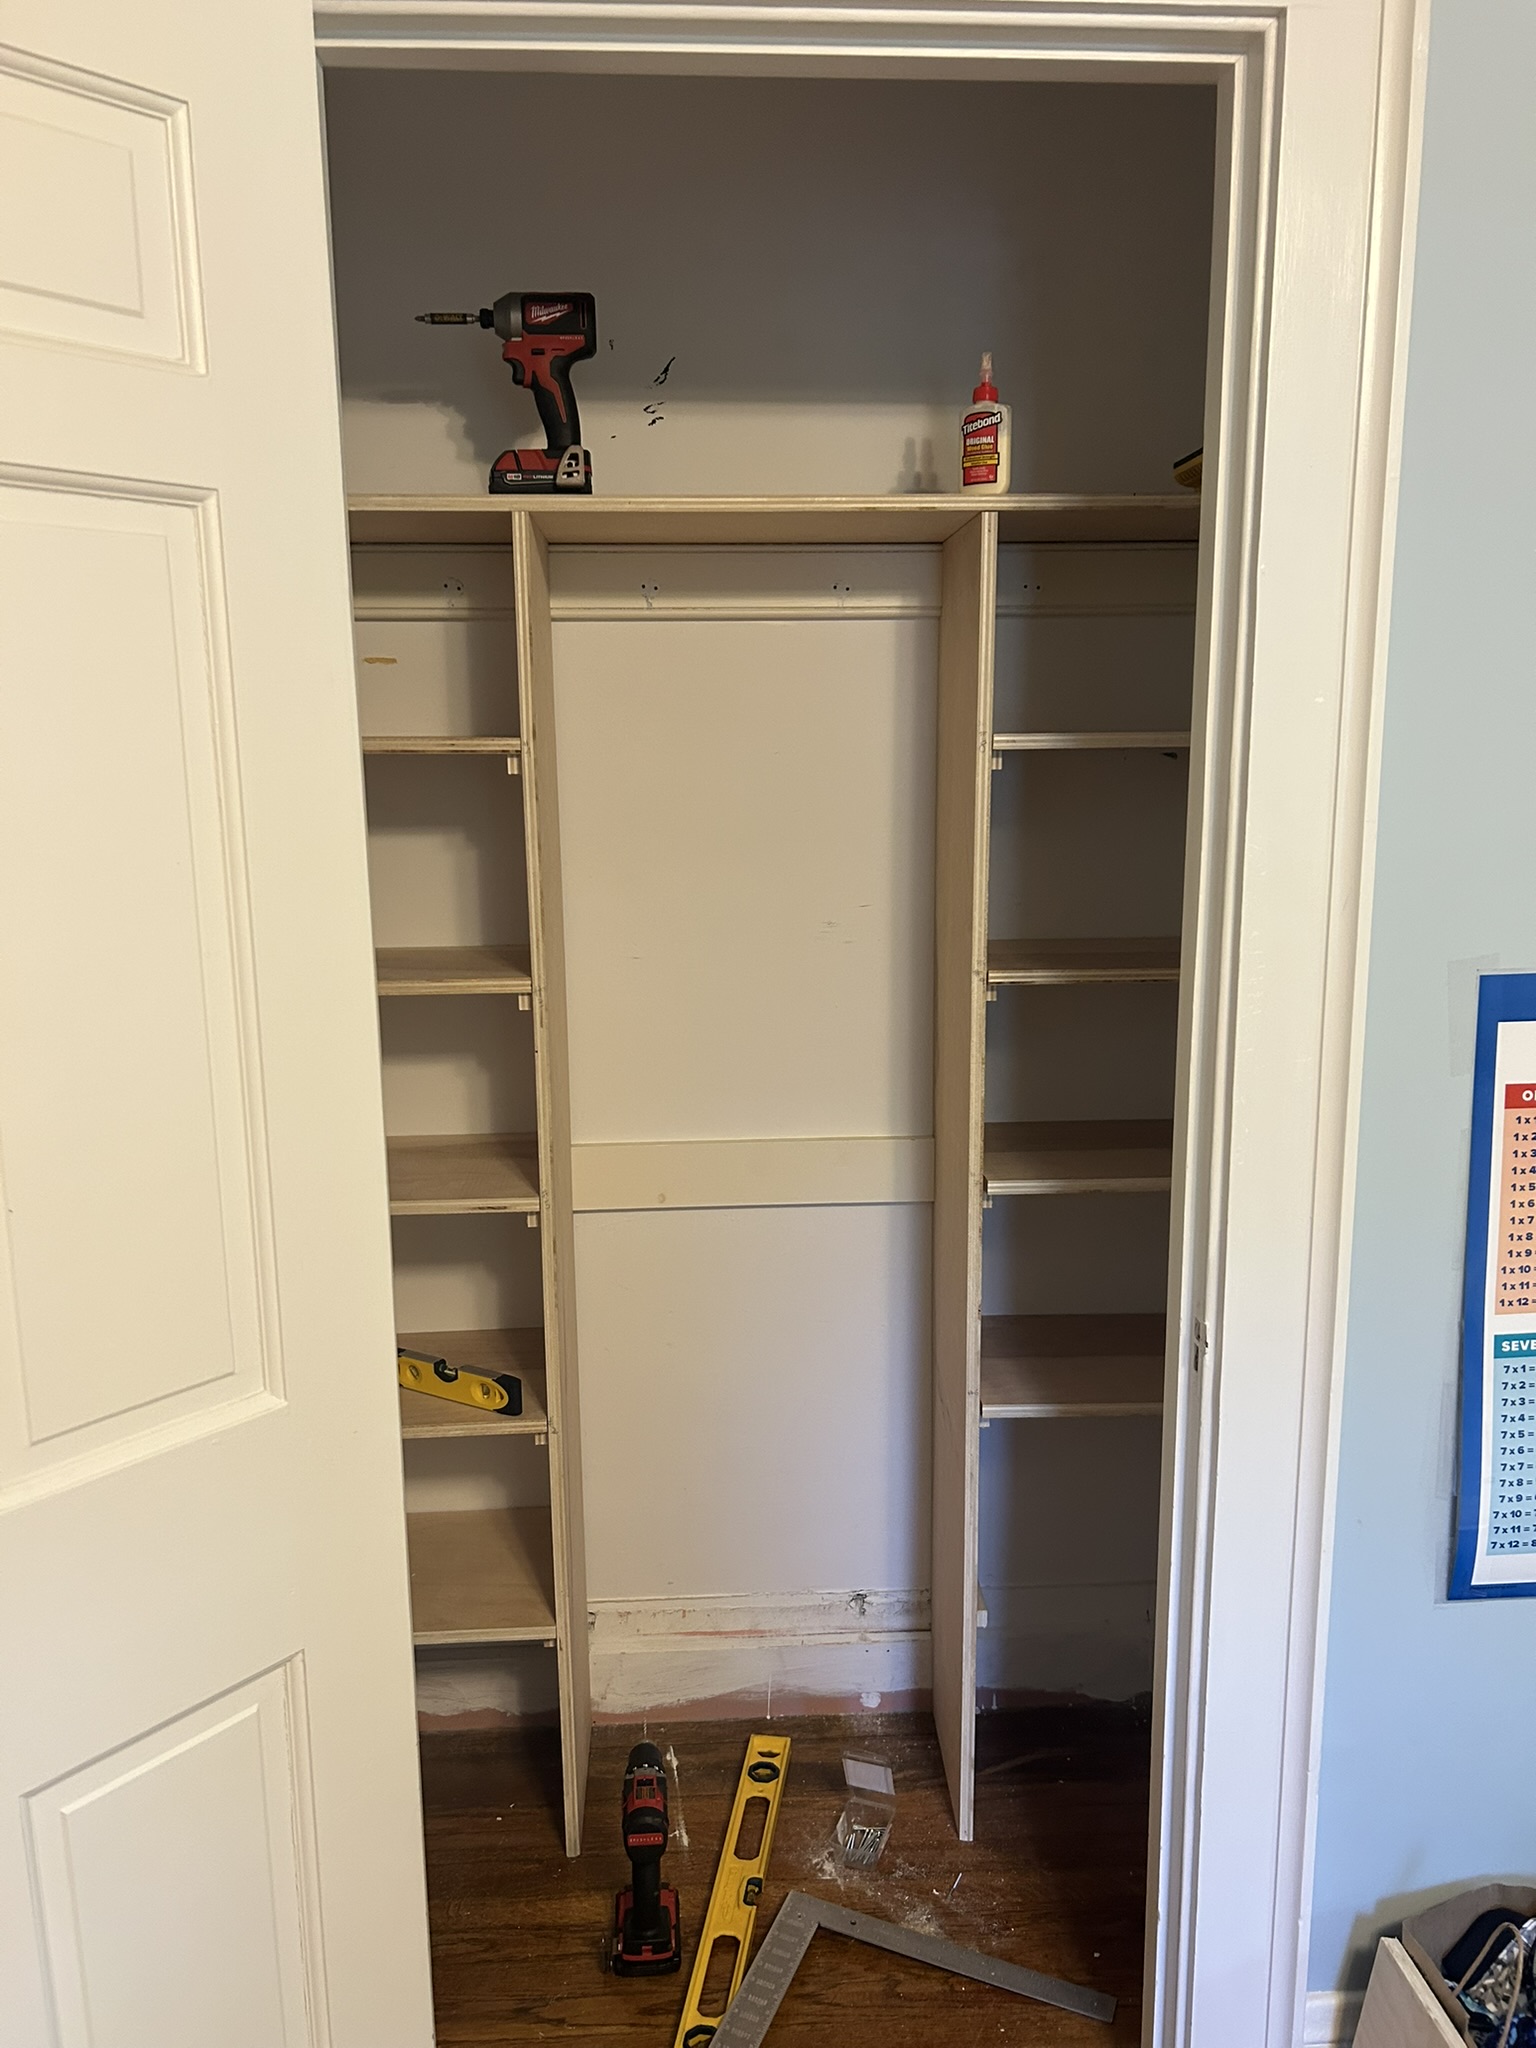
Paint before final assembly. I sanded everything to 220 grit outdoors, primed one coat, lightly re-sanded, then applied two coats of matte white. Should have done semi-gloss but bought the wrong paint and will leave with it.
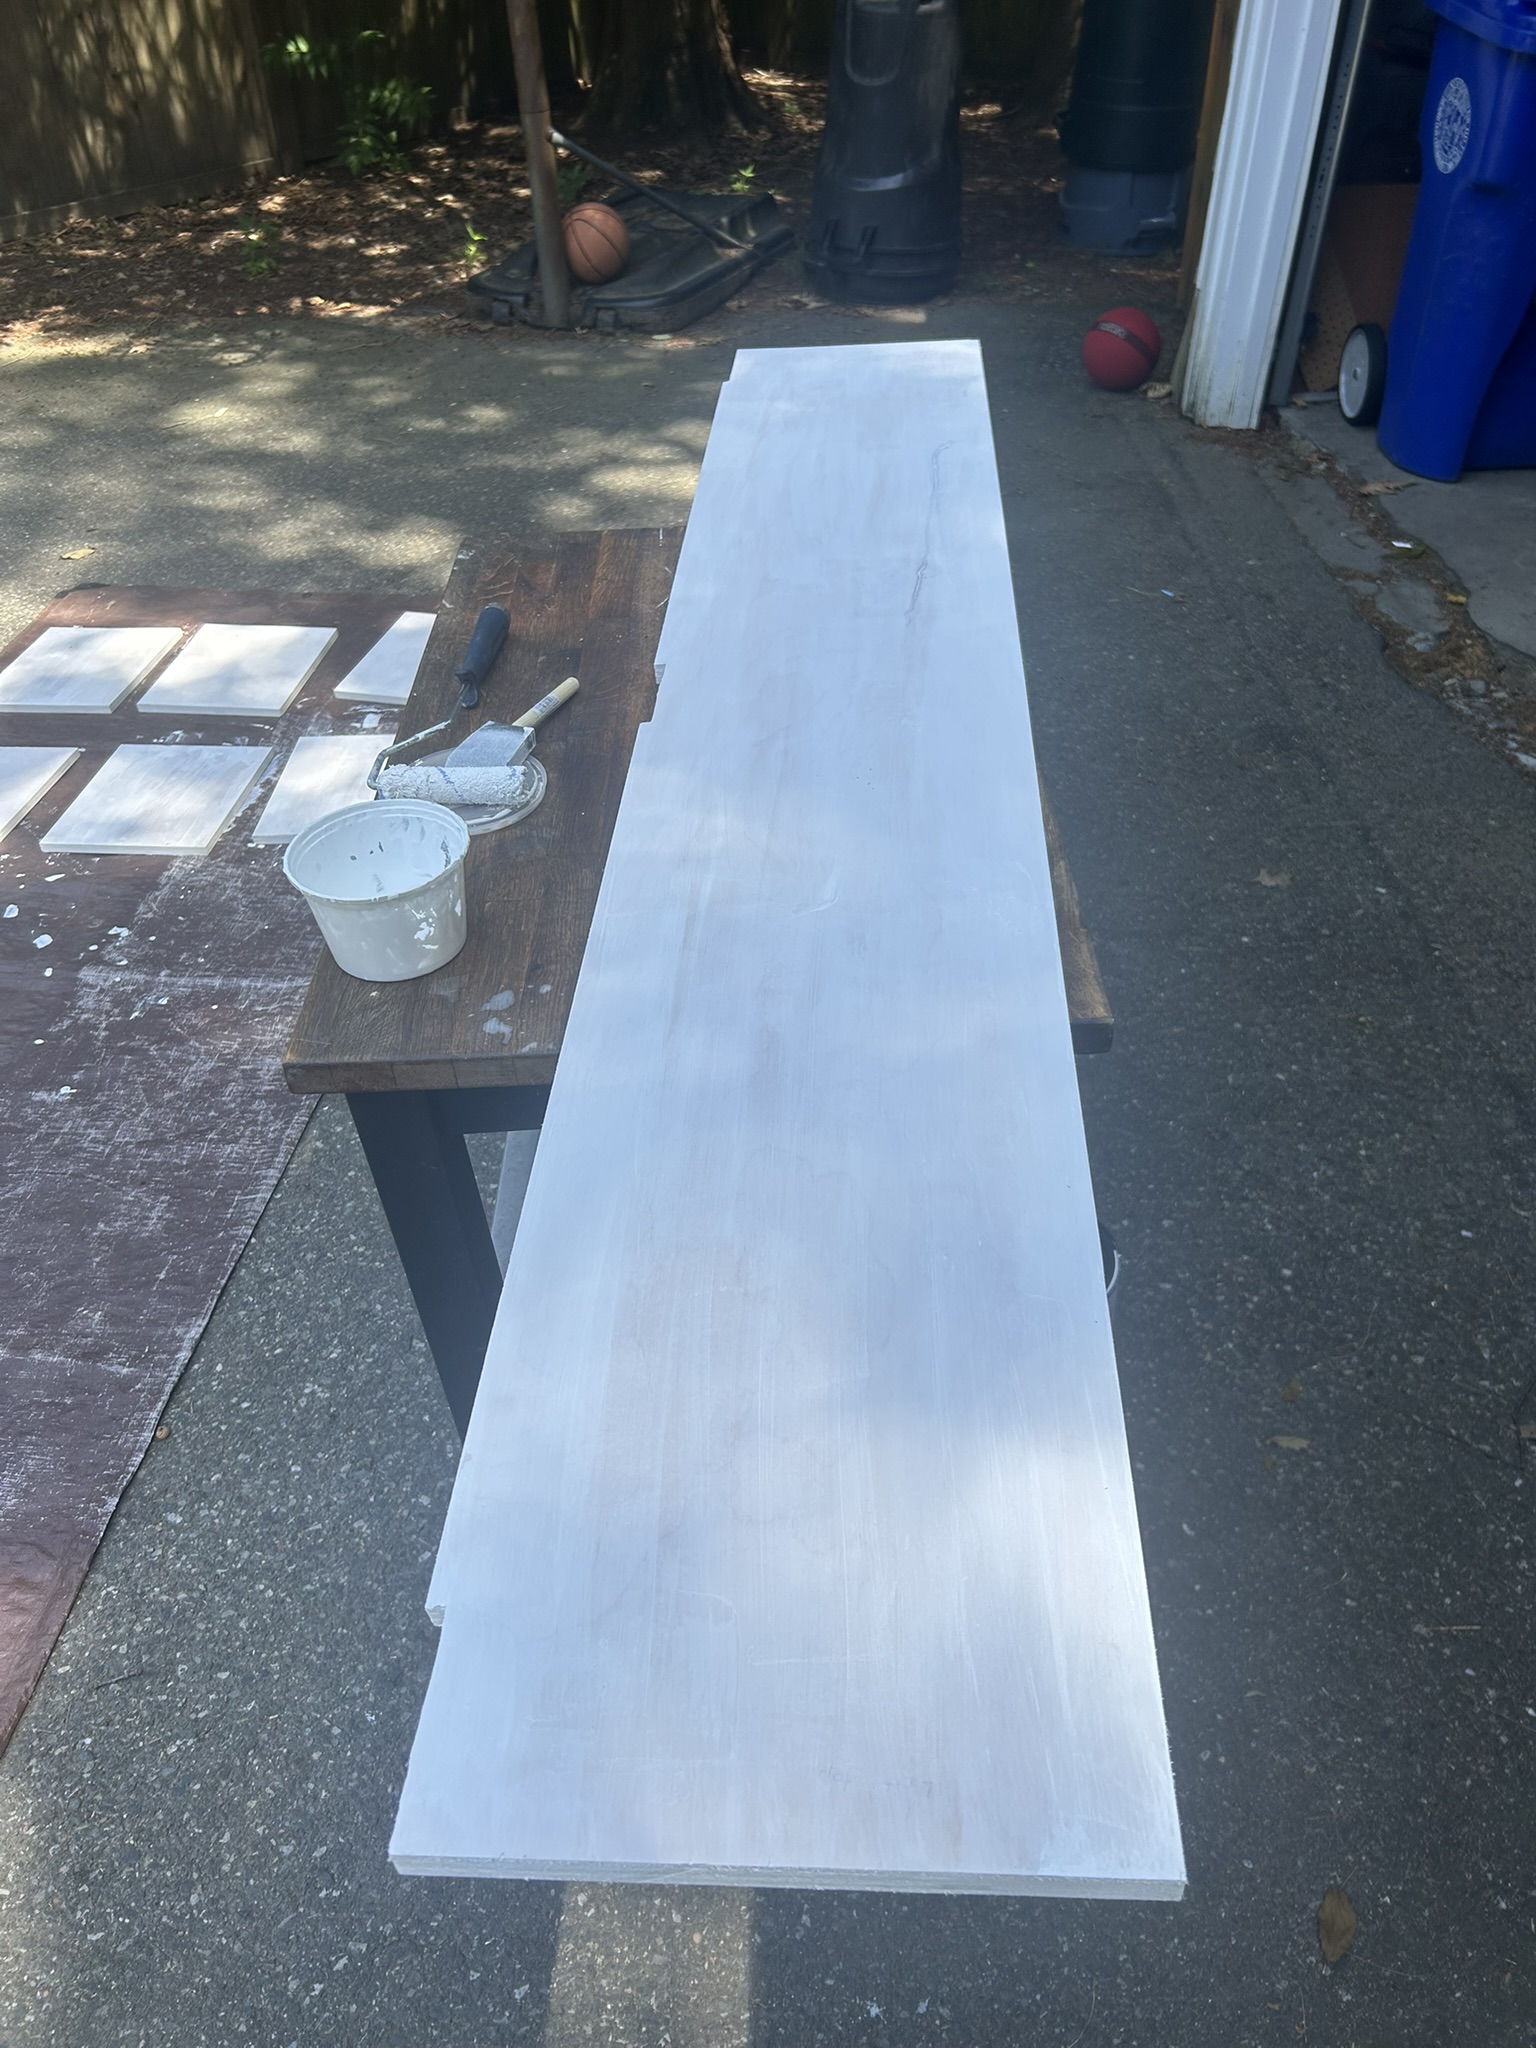
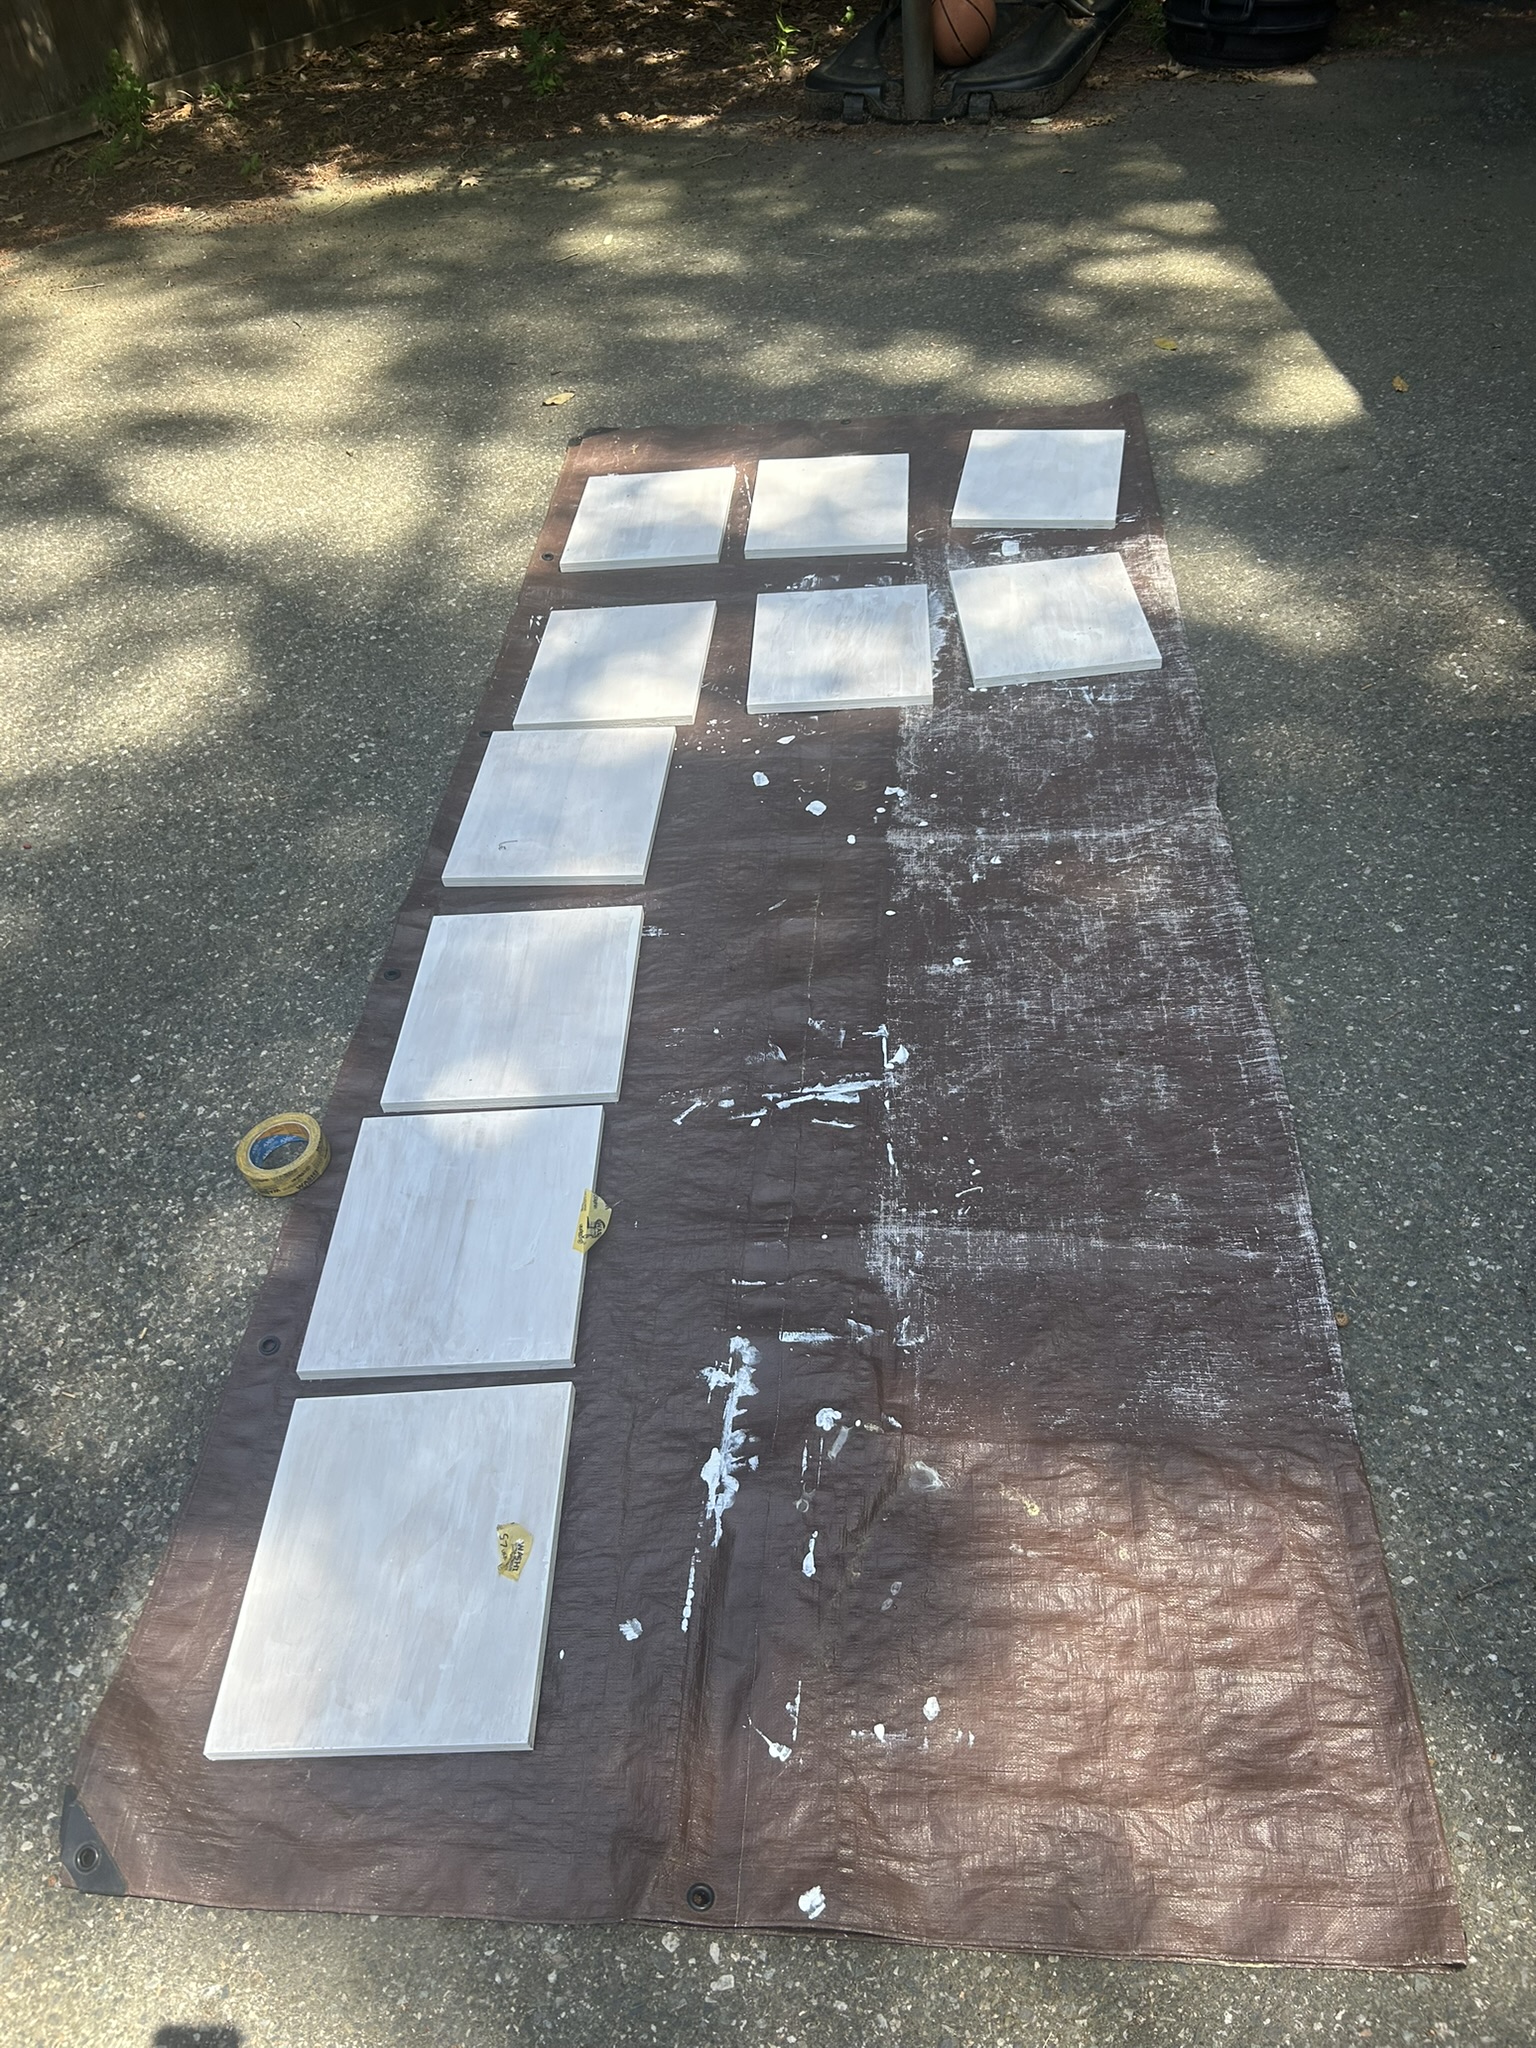
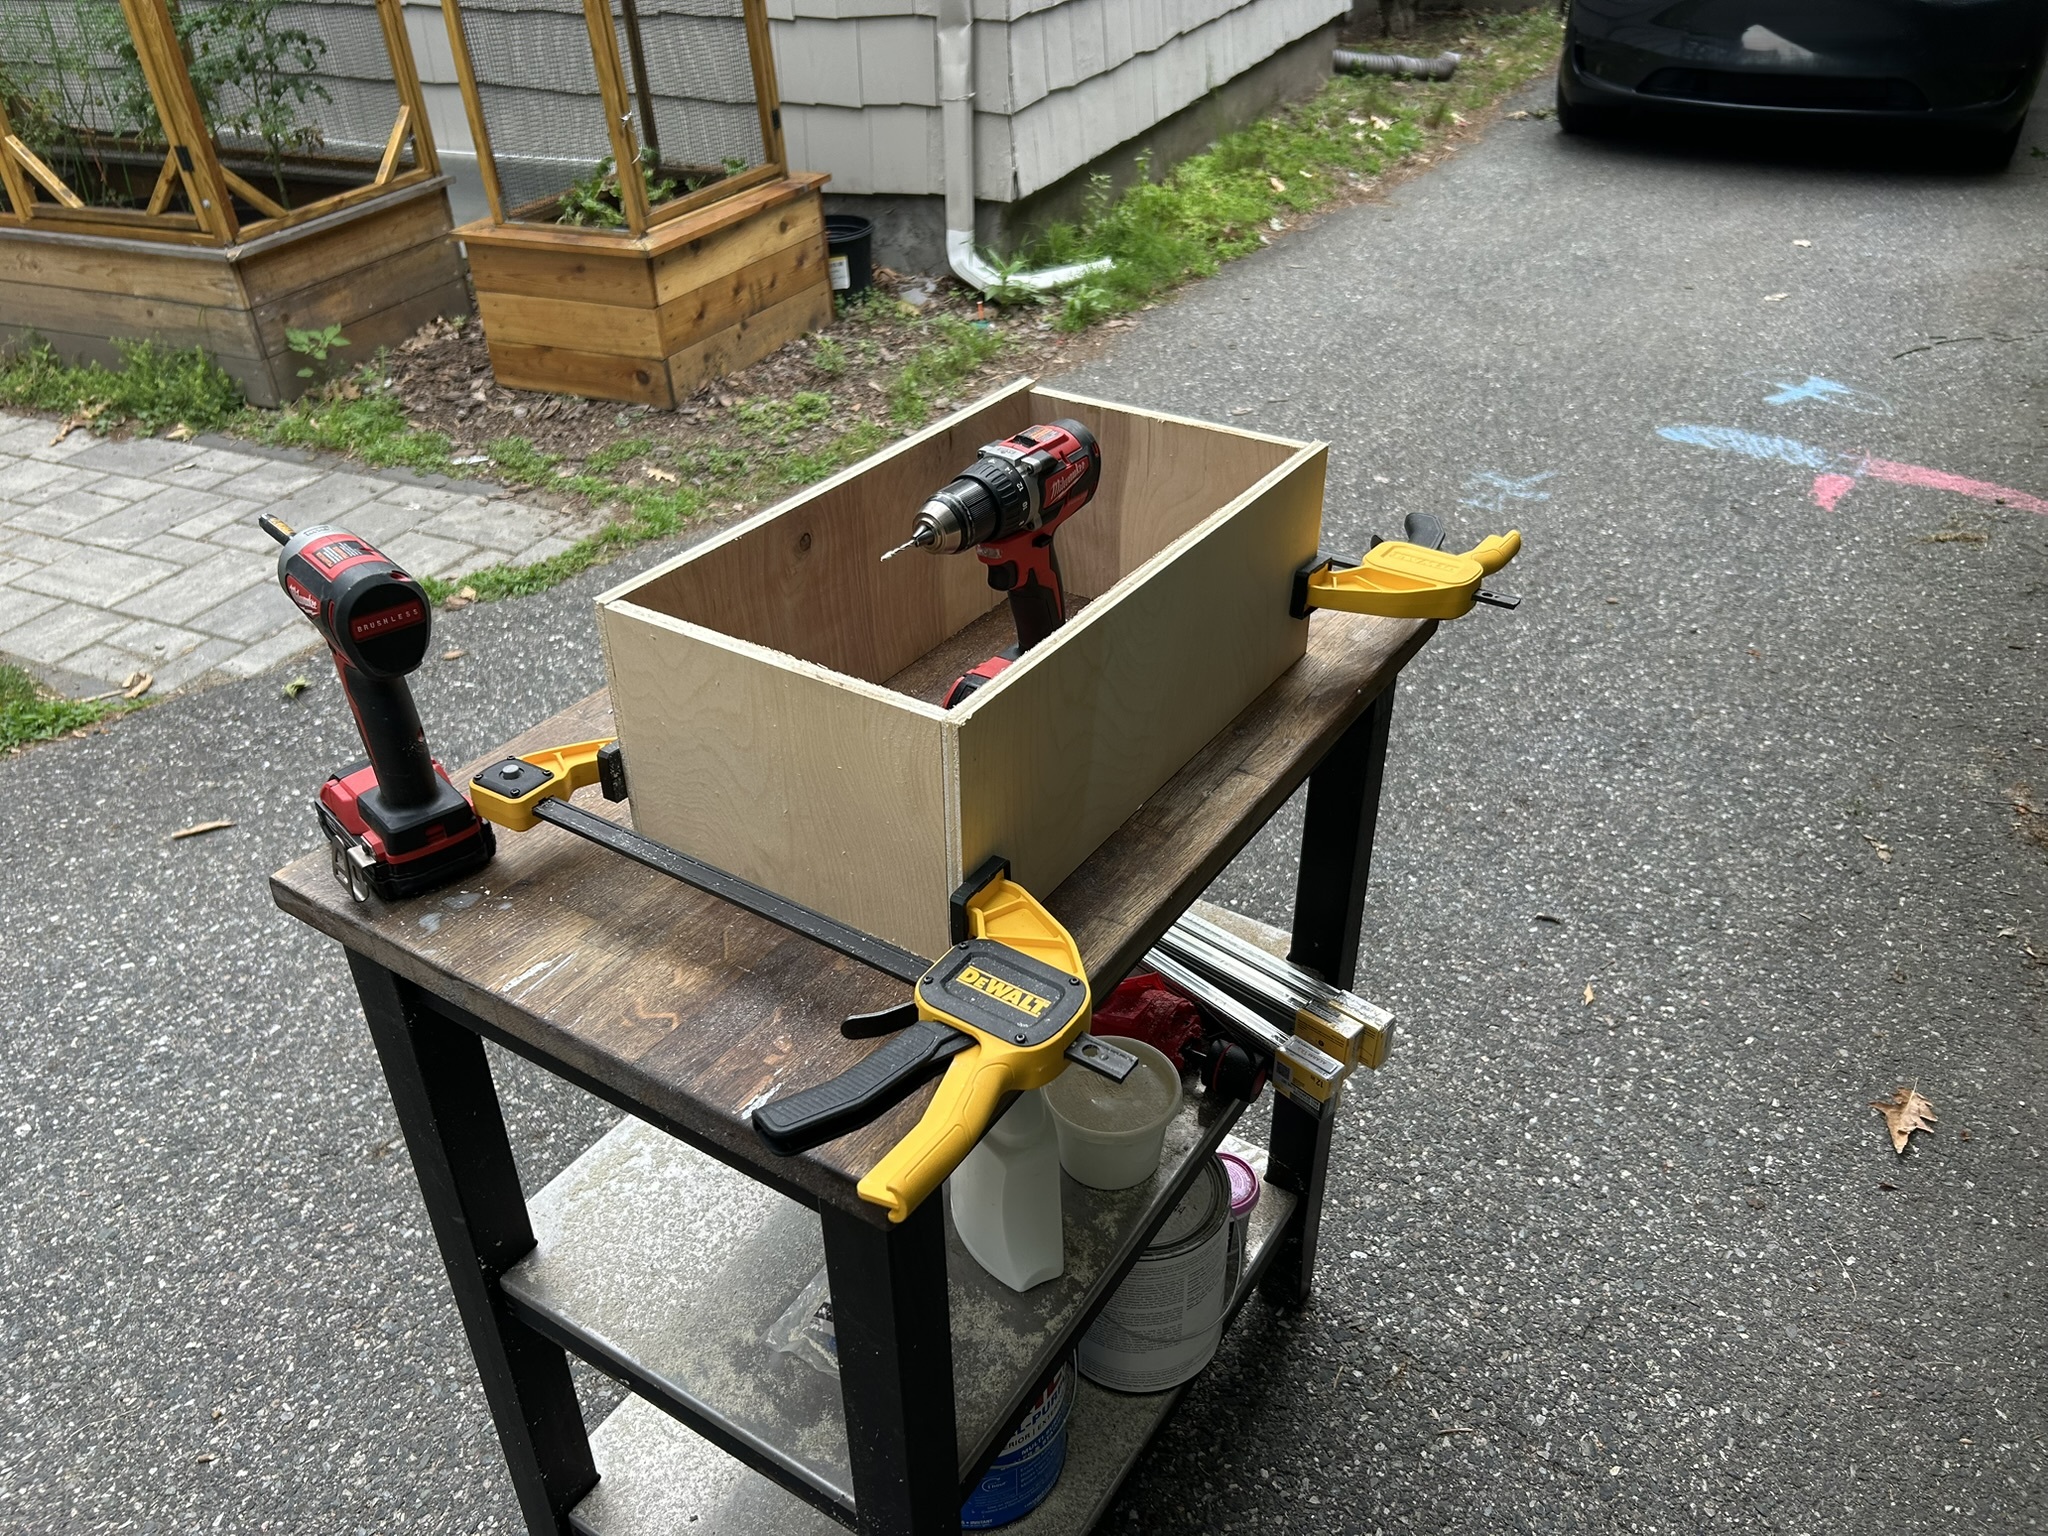
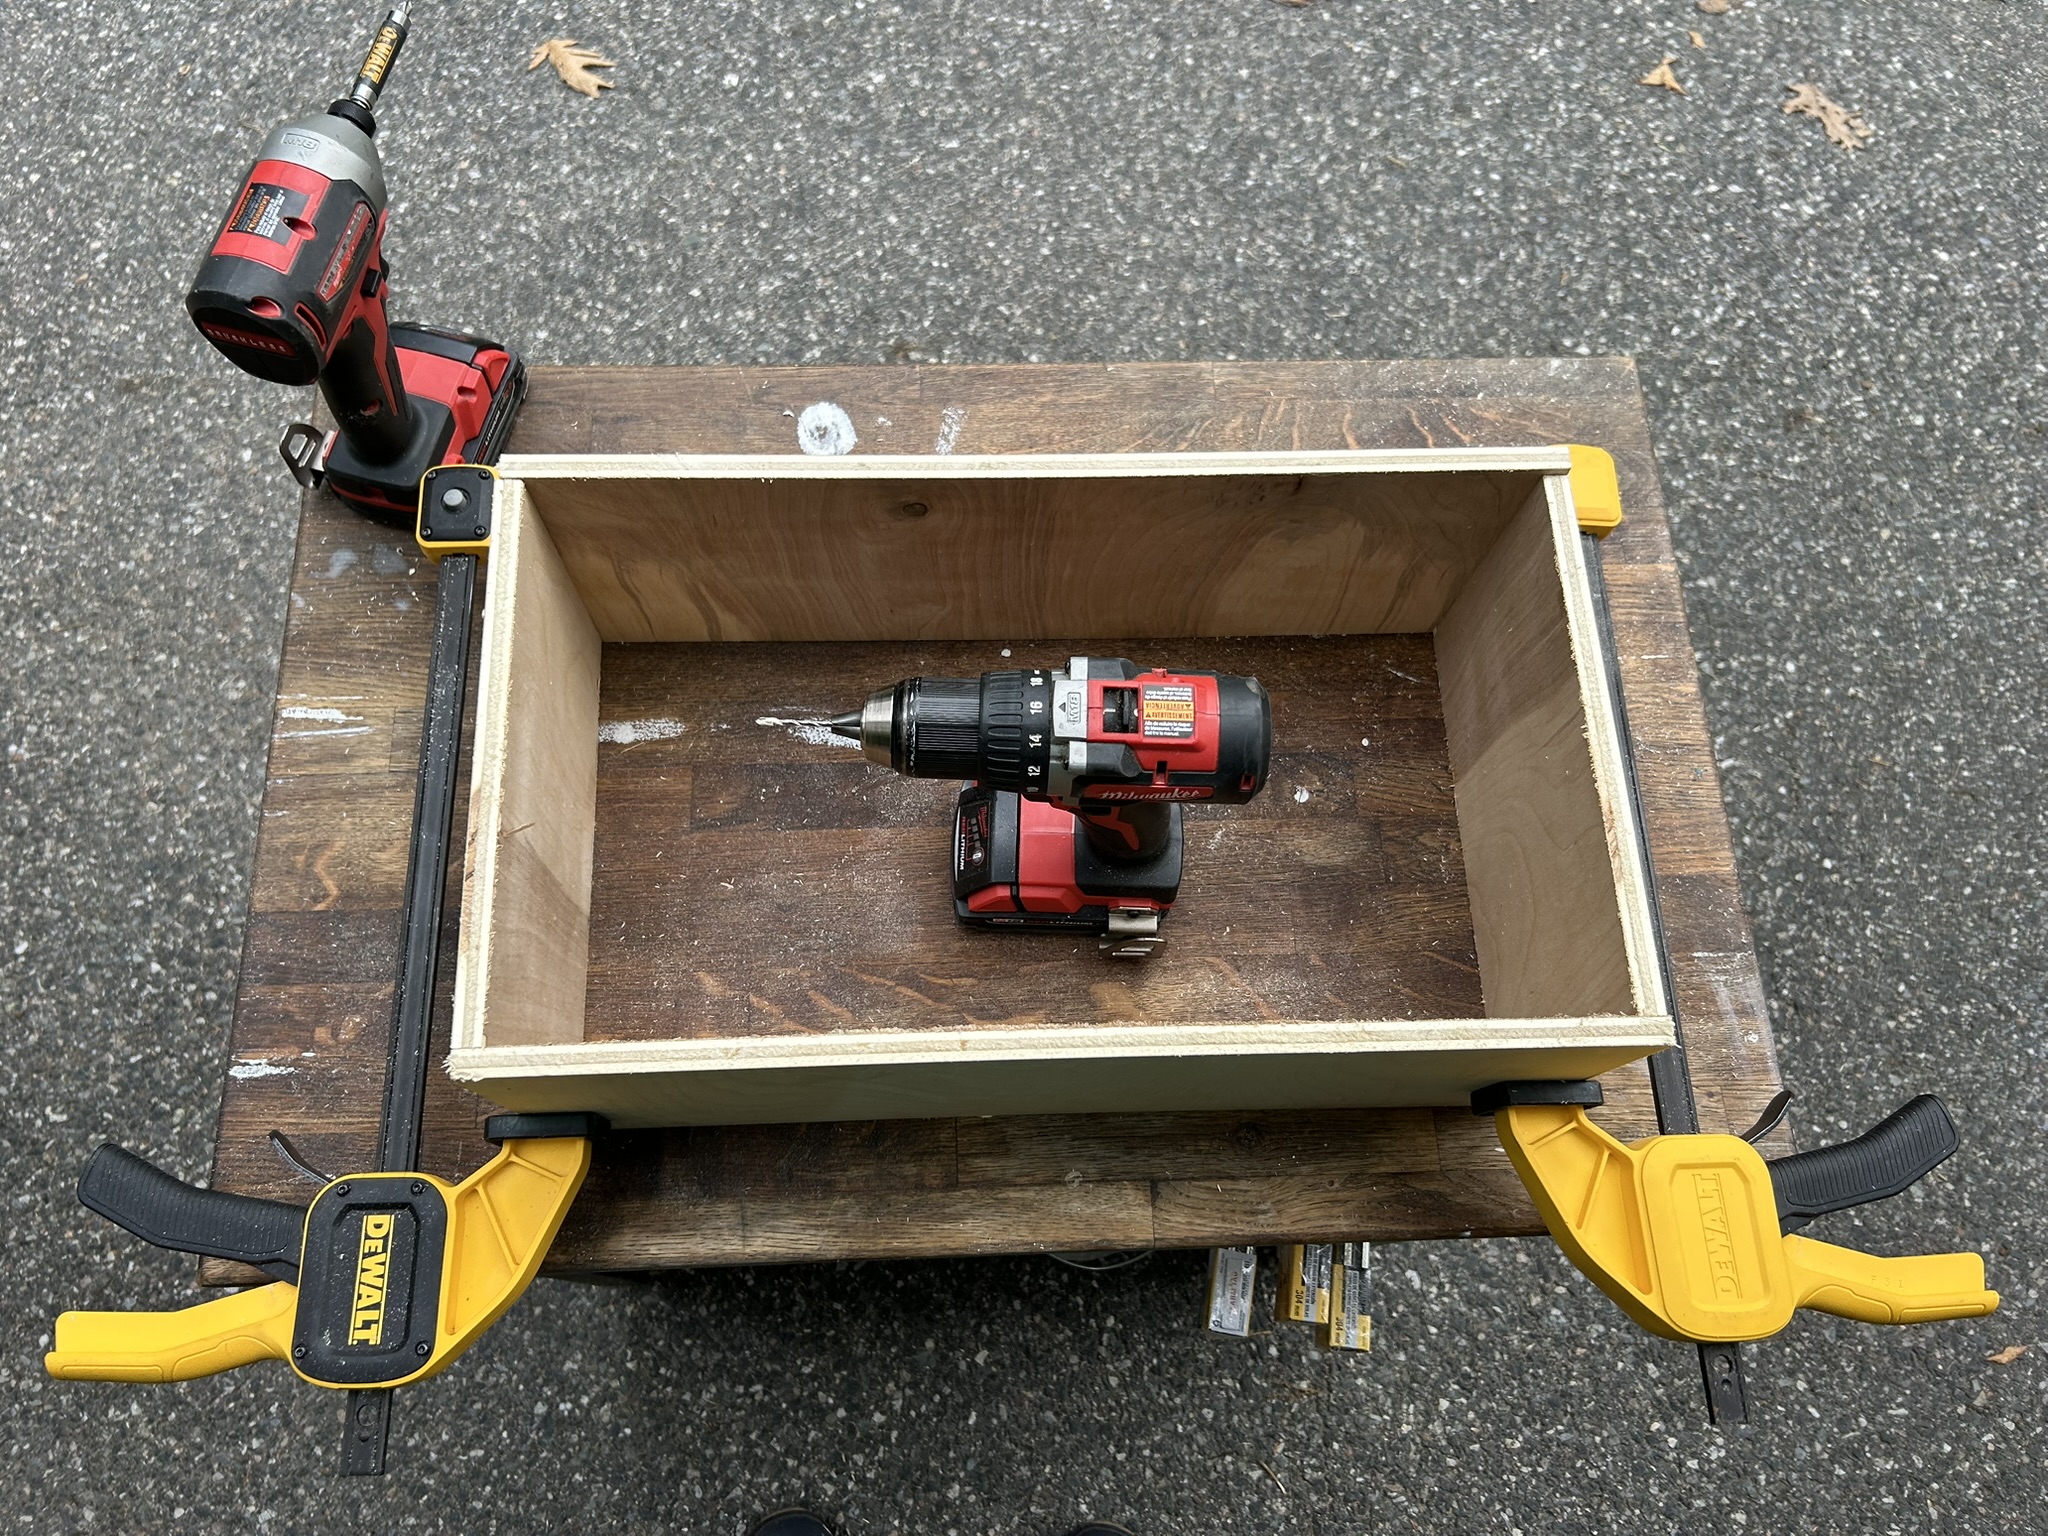
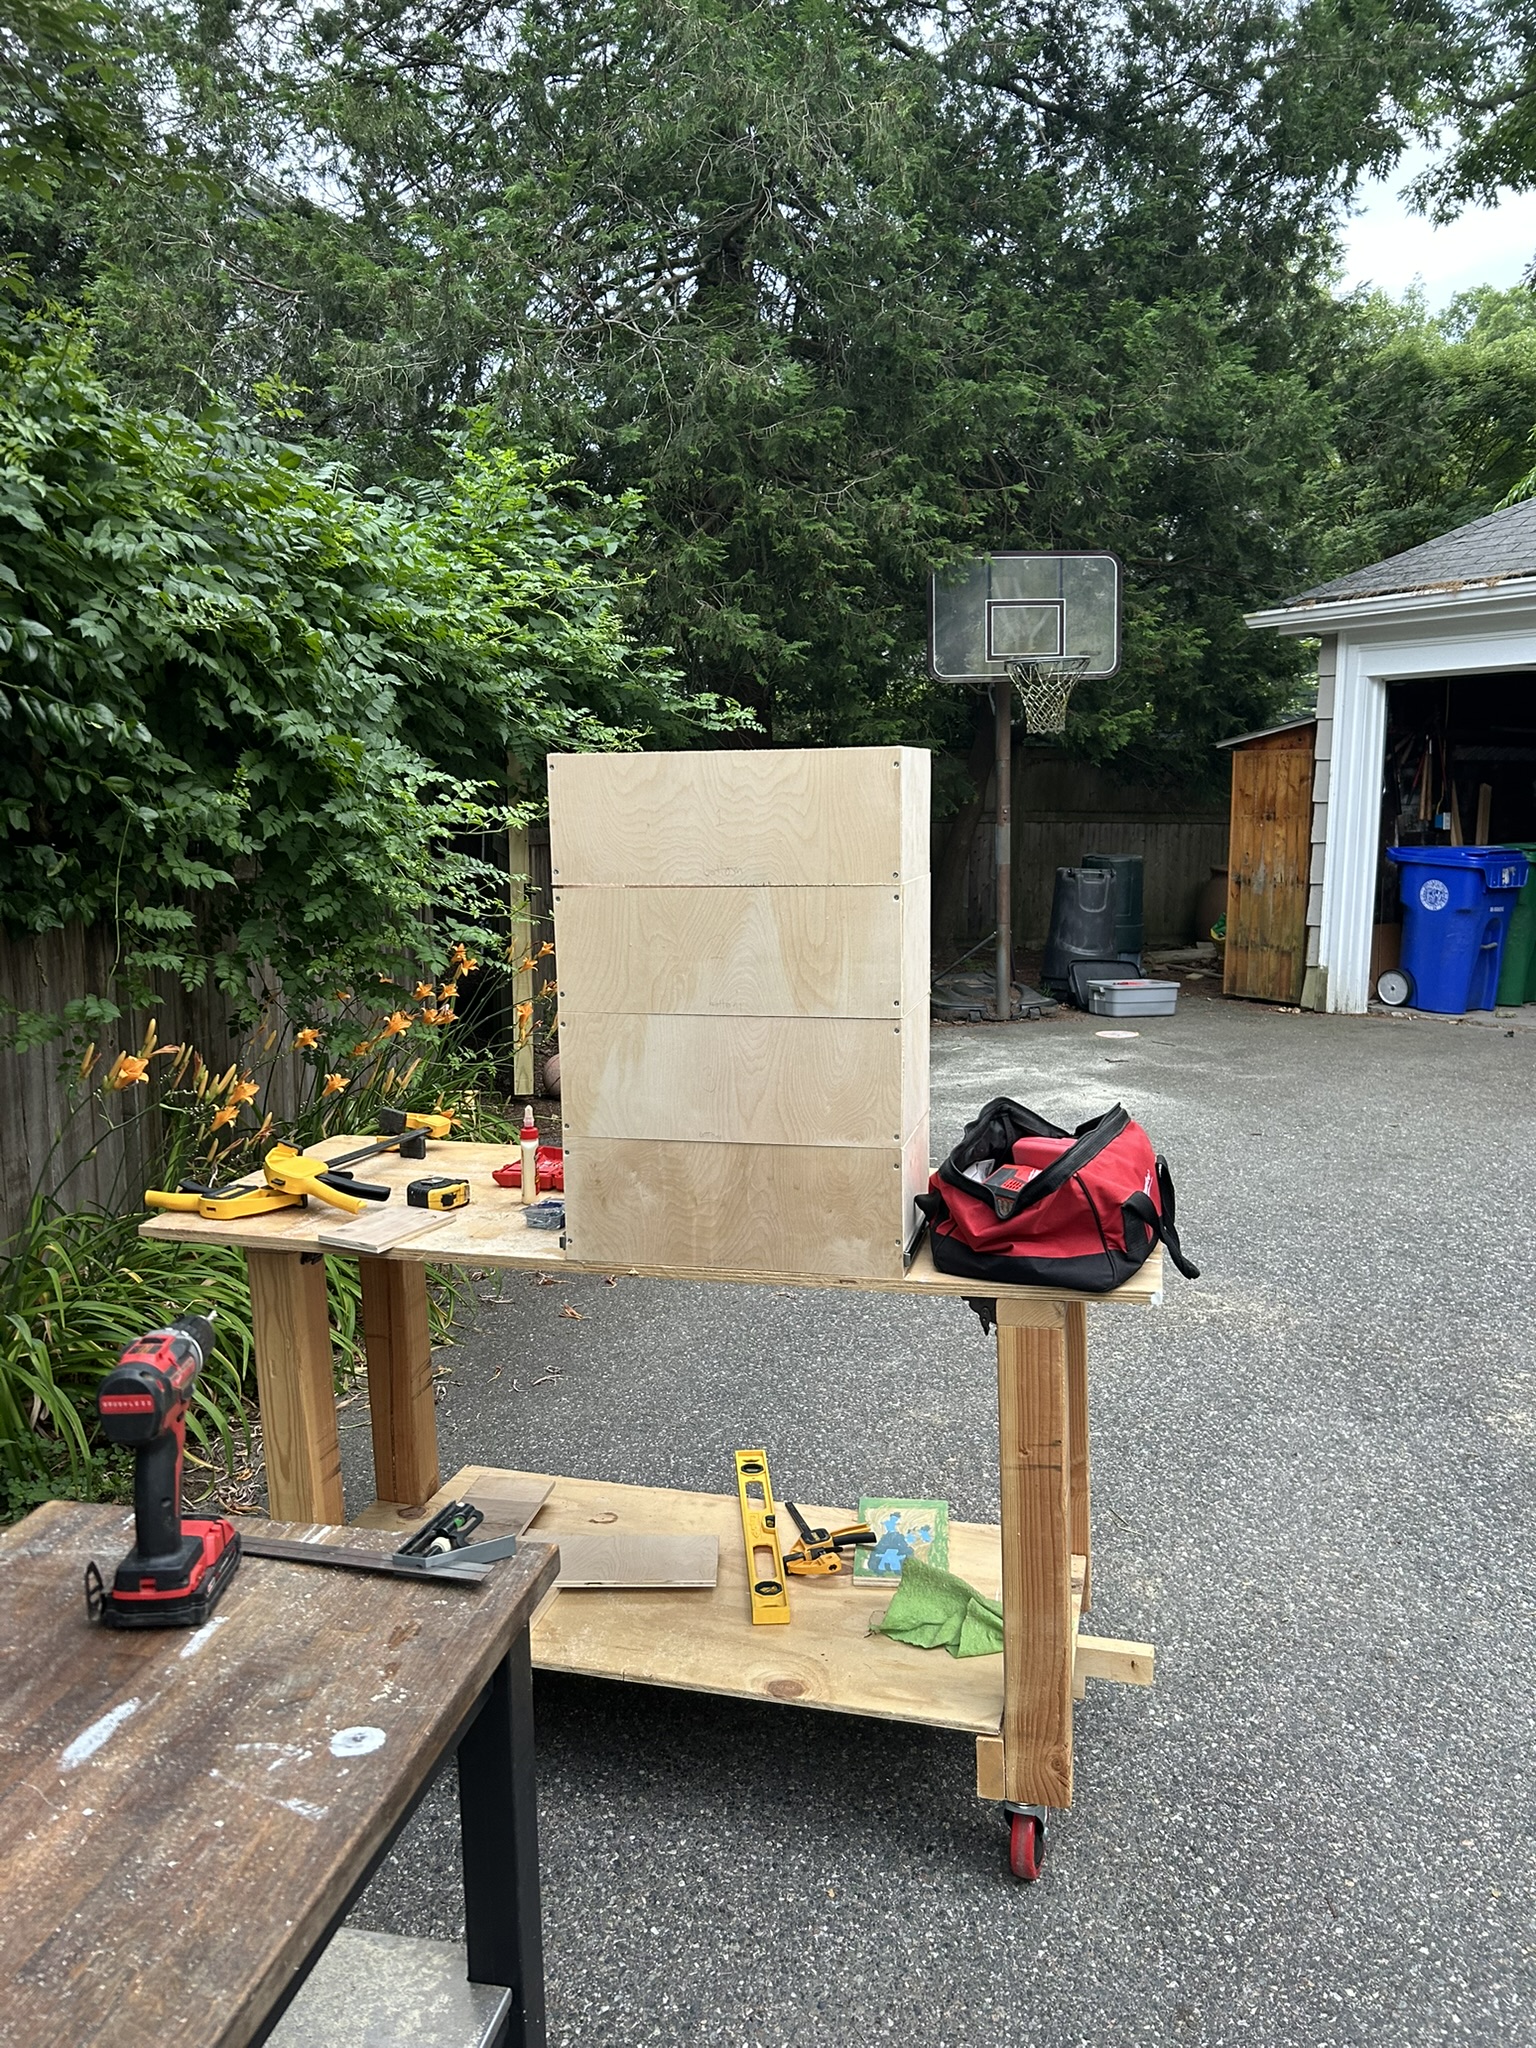
Drawers built from scratch. Each drawer box: front and back at 19.25 × 7 inches, sides at 10 × 7 inches (10 inches to account for the front and back panel thickness), and a 1/4 inch plywood bottom at 19.25 × 11 inches. Assembled with wood glue screws.
Slide heights from the floor (with 1/8 inch offset per Everbilt instructions):
- Drawer 1: 5 and 1/8 inches
- Drawer 2: 12 and 5/8 inches
- Drawer 3: 20 and 1/8 inches
- Drawer 4: 27 and 5/8 inches
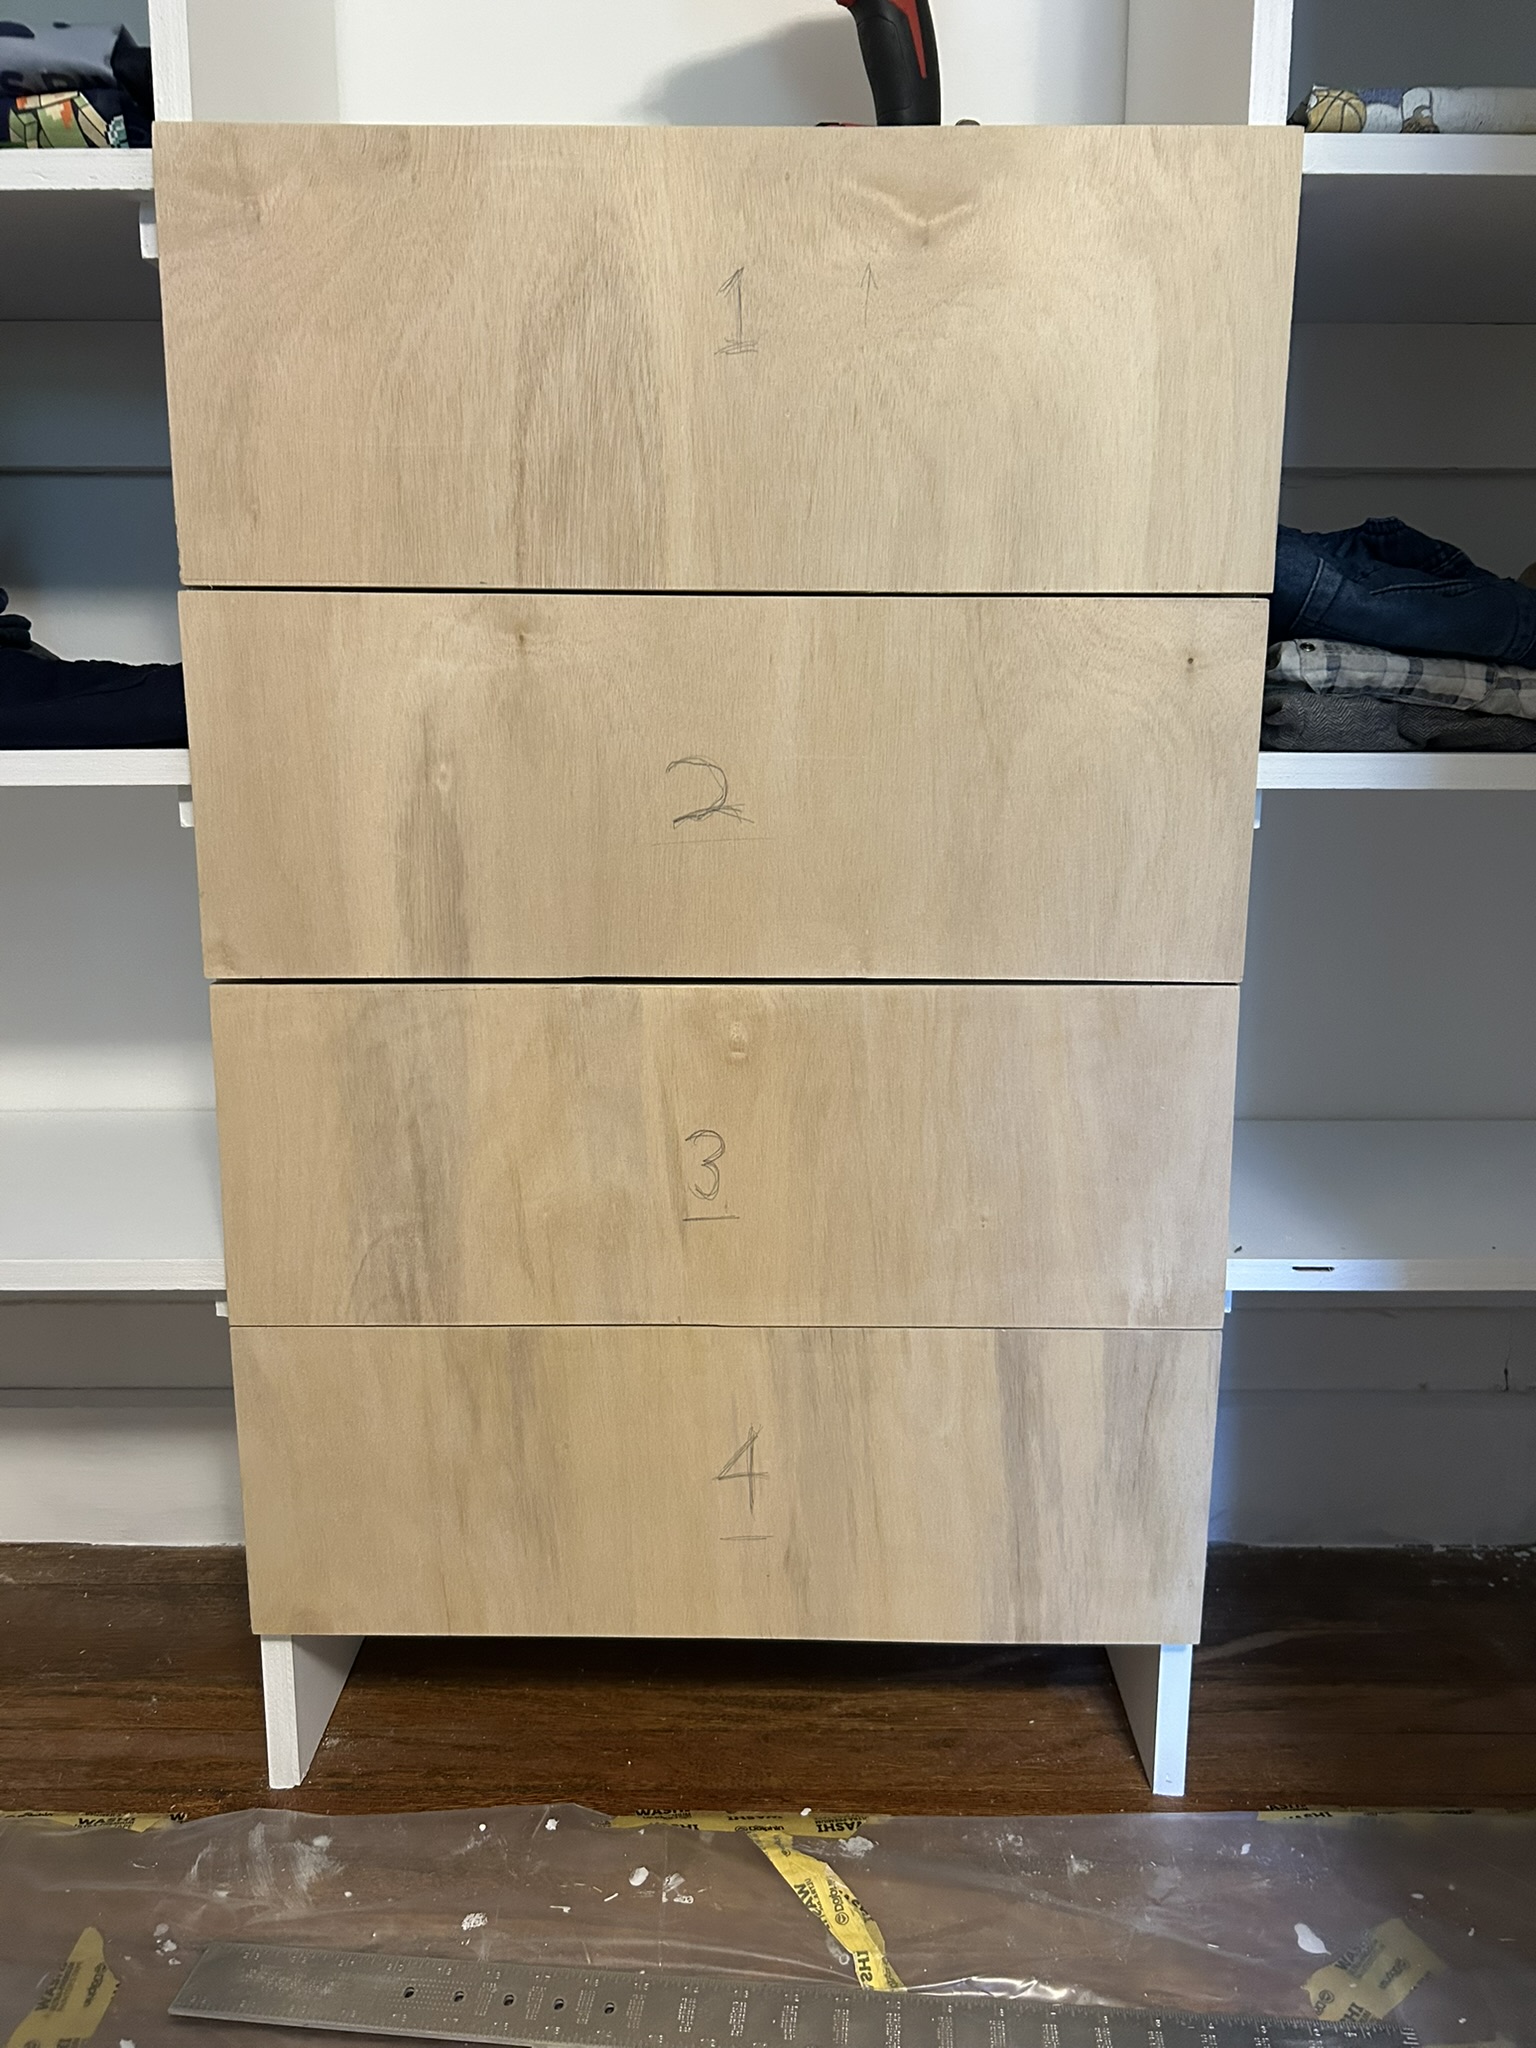
Drawer faces cut at 21 × 7.5 inches (full overlay, covering the 20.25-inch opening with slight overlap onto the divider panel faces). Positioned using a US quarter as a consistent 1/16-inch spacer between faces, starting from the bottom drawer and working up. This was not 100% perfect, but they work.
Lessons learned
Use the store’s panel saw. Getting the store to rip your sheet goods into 12-inch strips saves enormous time and effort.
Dry-fit before painting, label before disassembly. Mark every piece with a pencil before you take it apart.
Wooden cleats are underrated. I considered shelf pin strips, L-brackets, and other hardware, but simple plywood offcut cleats glued and screwed in place are strong, cheap, and I think they look nice.
Pocket screws need the right length. 1-1/4 inch Kreg screws are for 3/4 inch material. For 1/2 inch drawer box material I had to switch to standard wood screws — the Kreg jig isn’t set up for thin stock without a different collar setting and shorter screws. Plan ahead.
Measure slide heights from the actual installed base, not the theoretical one. My baseboard height was 4.5 inches, not 5 inches as I’d initially thought. Small difference, but it cascades through all four slide heights if you get it wrong.
Drawer face positioning: don’t use a coin as a spacer. This was annoying in the end. Next time I’ll plan ahead and have something better as a spacer.
What I’d do differently
- Face panels. Seeing 3/4 inch plywood edges makes this look like a dad’s DIY project (which it is), not a professional job. Next time I might plan for something more.
- Plan better. If I did this again I’d spend more time drawing this out.
- Invest in a better stud finder earlier. I’ve done this now.
- Double-check dimensions if Home Depot does the cuts. After getting 1x 48-inch piece cut into 4 pieces, I had 3x 12-inch widths, and 1x ~11 inch. I forgot to account for minor variances.
- Semi-gloss paint for the shelving. I used matte, which looks clean, but semi-gloss would be more durable and wipeable for a kids’ room.