Installing the F5 CIS OpenShift Operator programmatically

I’ve installed F5 Container Ingress Services (CIS) into OpenShift a different ways over the years - raw manifests, Helm, and the OperatorHub tile. This week I wanted to install it via the OperatorHub operator, but skip the console entirely and do it from the CLI instead. The goal is to replicate, step by step, what a customer’s GitOps pipeline does when it subscribes to an operator, so I understand exactly what objects get created and in what order.
This post walks through:
- A quick reminder of what’s actually happening when you click “Install” in OperatorHub
- Doing the same install manually through the console, for reference
- Doing it again from the CLI, object by object
- Deploying the CIS operand (
F5BigIpCtlr) with a plain YAML manifest once the operator is running
Cluster is OpenShift 4.21, freshly built, nothing else installed yet.
Why bother with the CLI when the GUI already works
A few reasons this was worth the time:
- GitOps. If a customer manages their cluster with ArgoCD or Flux, the operator subscription is just another manifest in a repo. Understanding the underlying objects means I can hand them exactly what they need instead of “go click around in OperatorHub.”
- Repeatability. I rebuild lab clusters constantly.
oc apply -fthree times beats re-navigating the console every time. - It demystifies OLM. The console hides a sequence of object creations behind a single “Install” button. Once you’ve created the
Namespace,OperatorGroup, andSubscriptionyourself, the rest of Operator Lifecycle Manager (OLM) stops being a black box. None of this is news if you’ve installed operators via CLI before, but it’s the first time I’ve done it specifically to mirror a customer’s workflow with the F5 CIS operator, so I wanted to write it down.
What OLM actually creates
OperatorHub installs, whether from the console or the CLI, boil down to the same three objects:
| Object | Purpose |
|---|---|
Namespace |
Where the operator (and usually the operand) will live |
OperatorGroup |
Tells OLM which namespace(s) the operator should watch |
Subscription |
Declares the package, channel, catalog source, and approval strategy; this is what triggers OLM to generate an InstallPlan |
The InstallPlan and the resulting ClusterServiceVersion (CSV) are generated automatically by OLM in response to the Subscription - you never author those two yourself. Red Hat’s official walkthrough of this is in Administrator tasks for Operators in OpenShift Container Platform, specifically the “Installing from OperatorHub using the CLI” section. (If you’re on 4.21 docs and the link above 404s, just bump the version number in the URL - Red Hat’s doc structure is stable across releases.)
Part 1: Installing via the console (for reference)
I’m not going to dwell on this part since it’s not the point of the post, but for completeness:
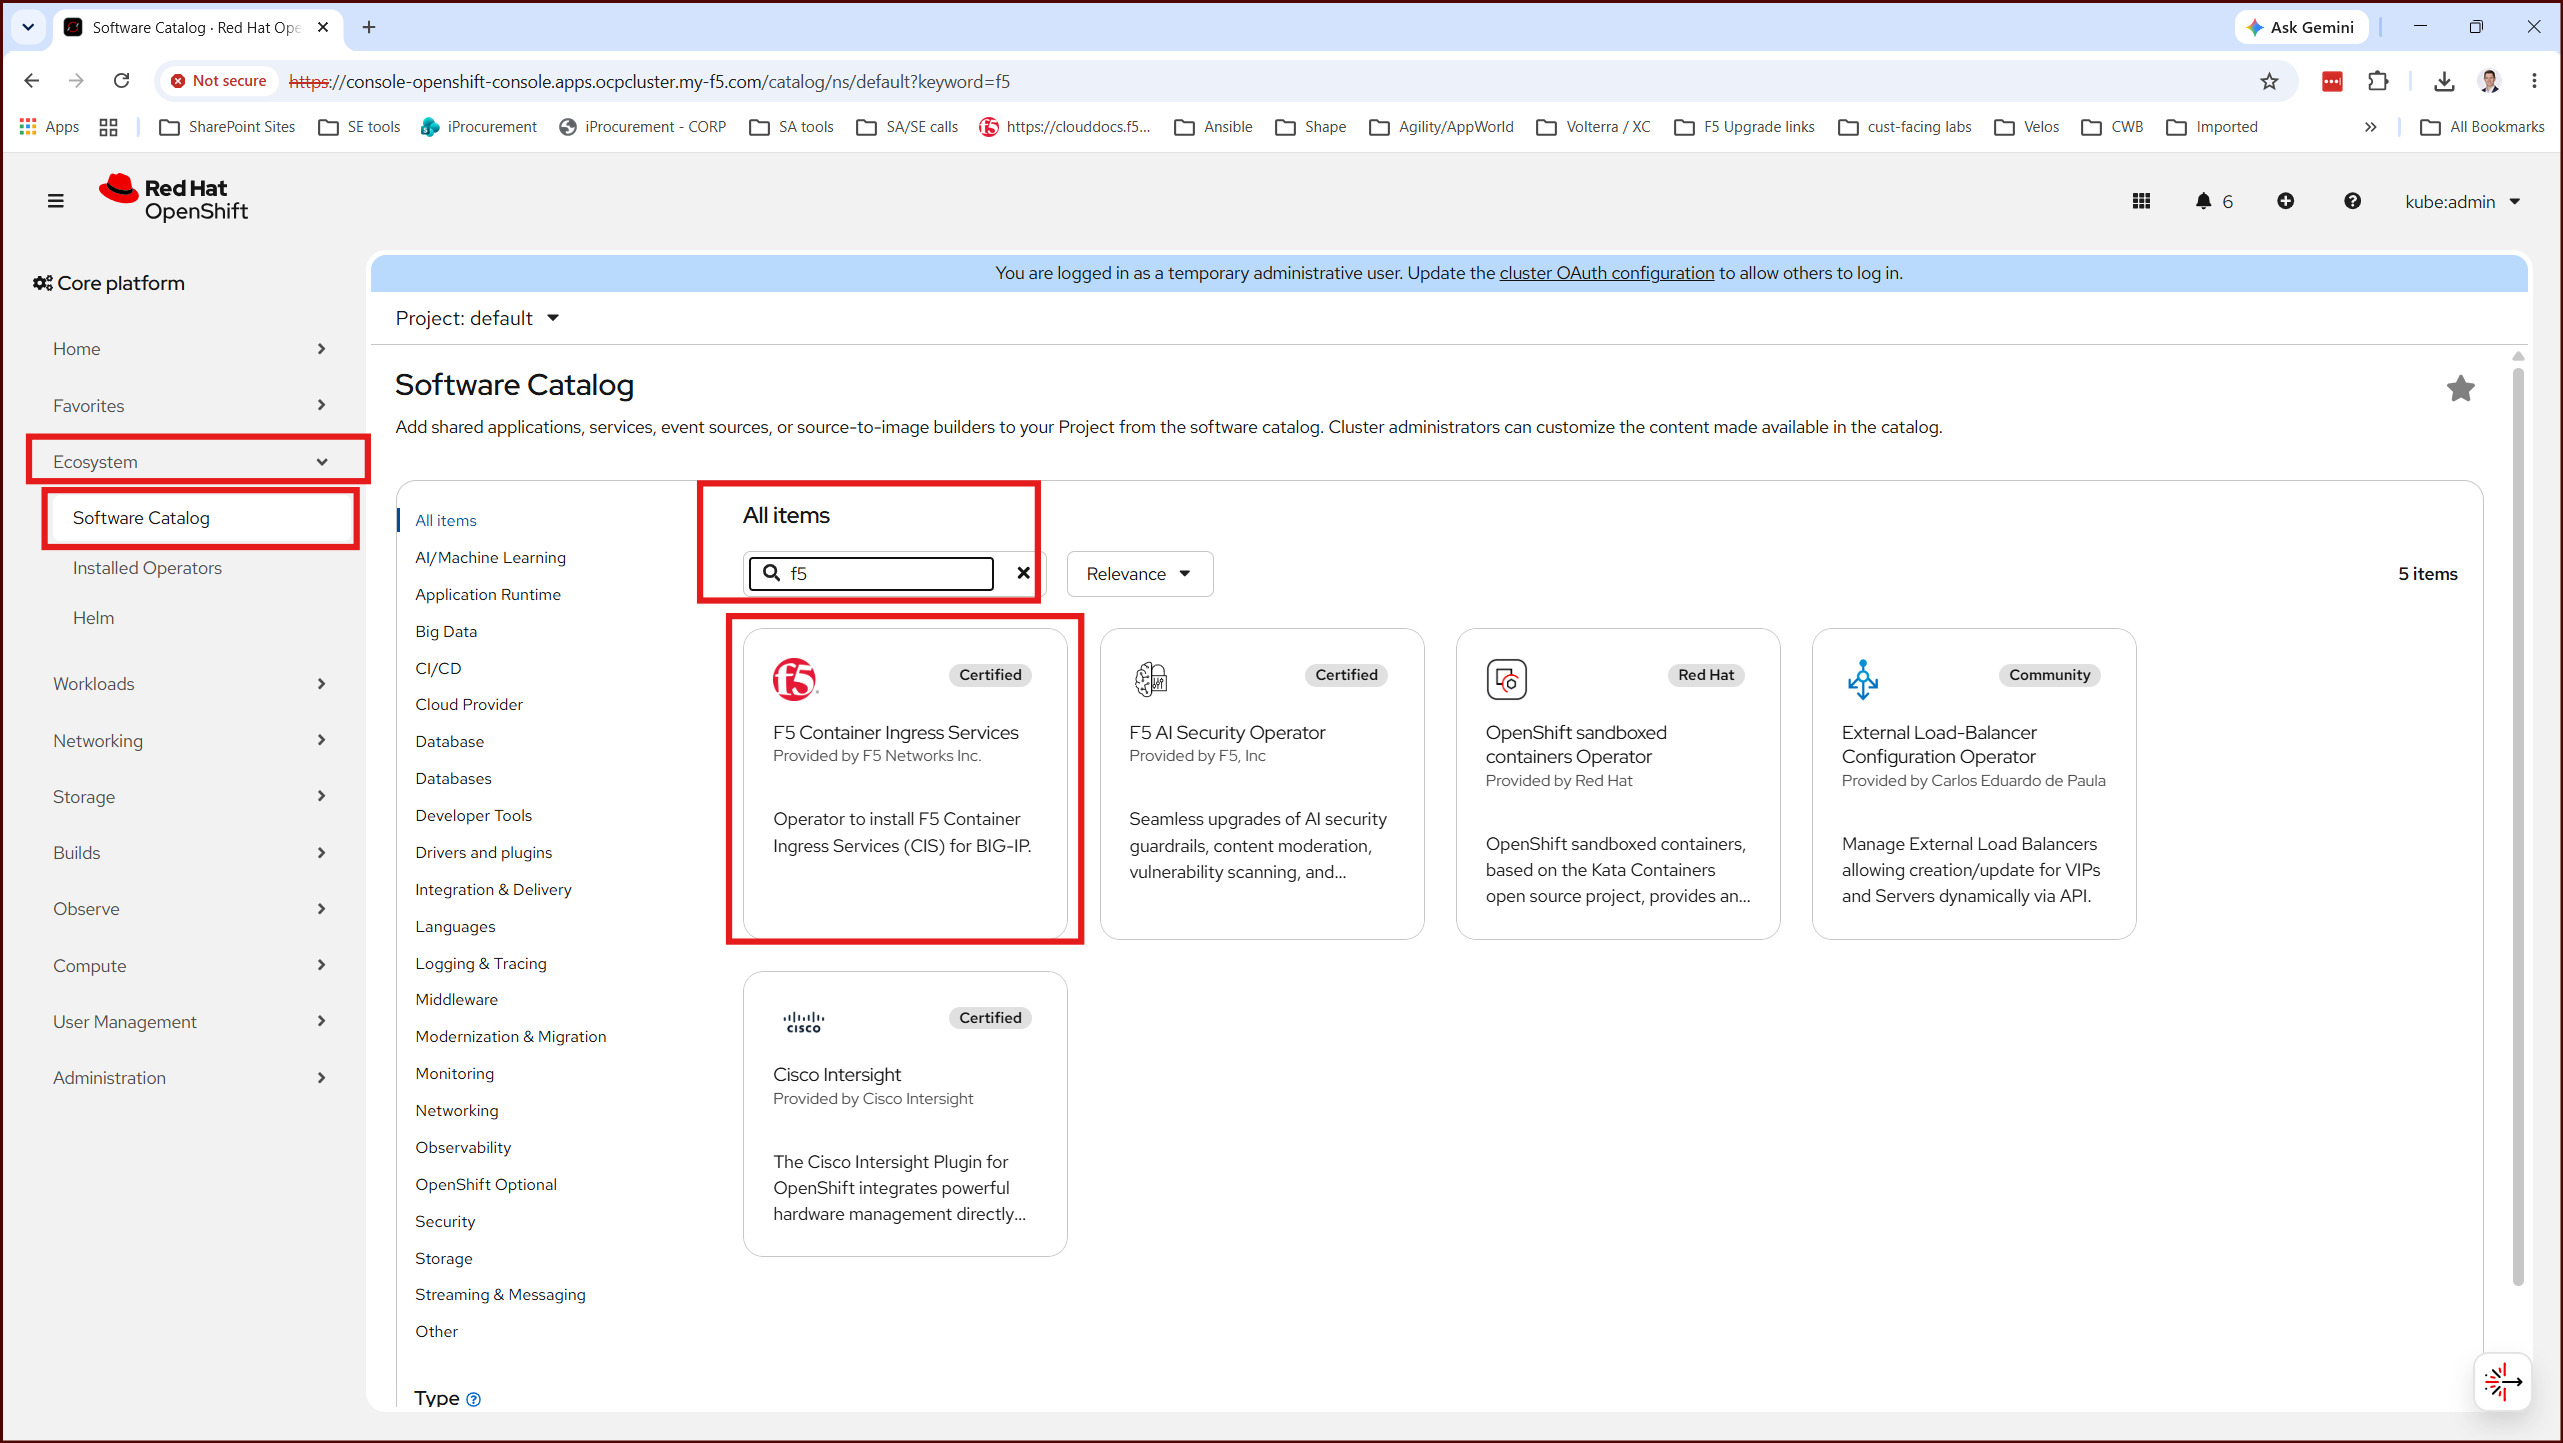
- Operators → OperatorHub, search for
F5 - Select F5 Container Ingress Services, click Install
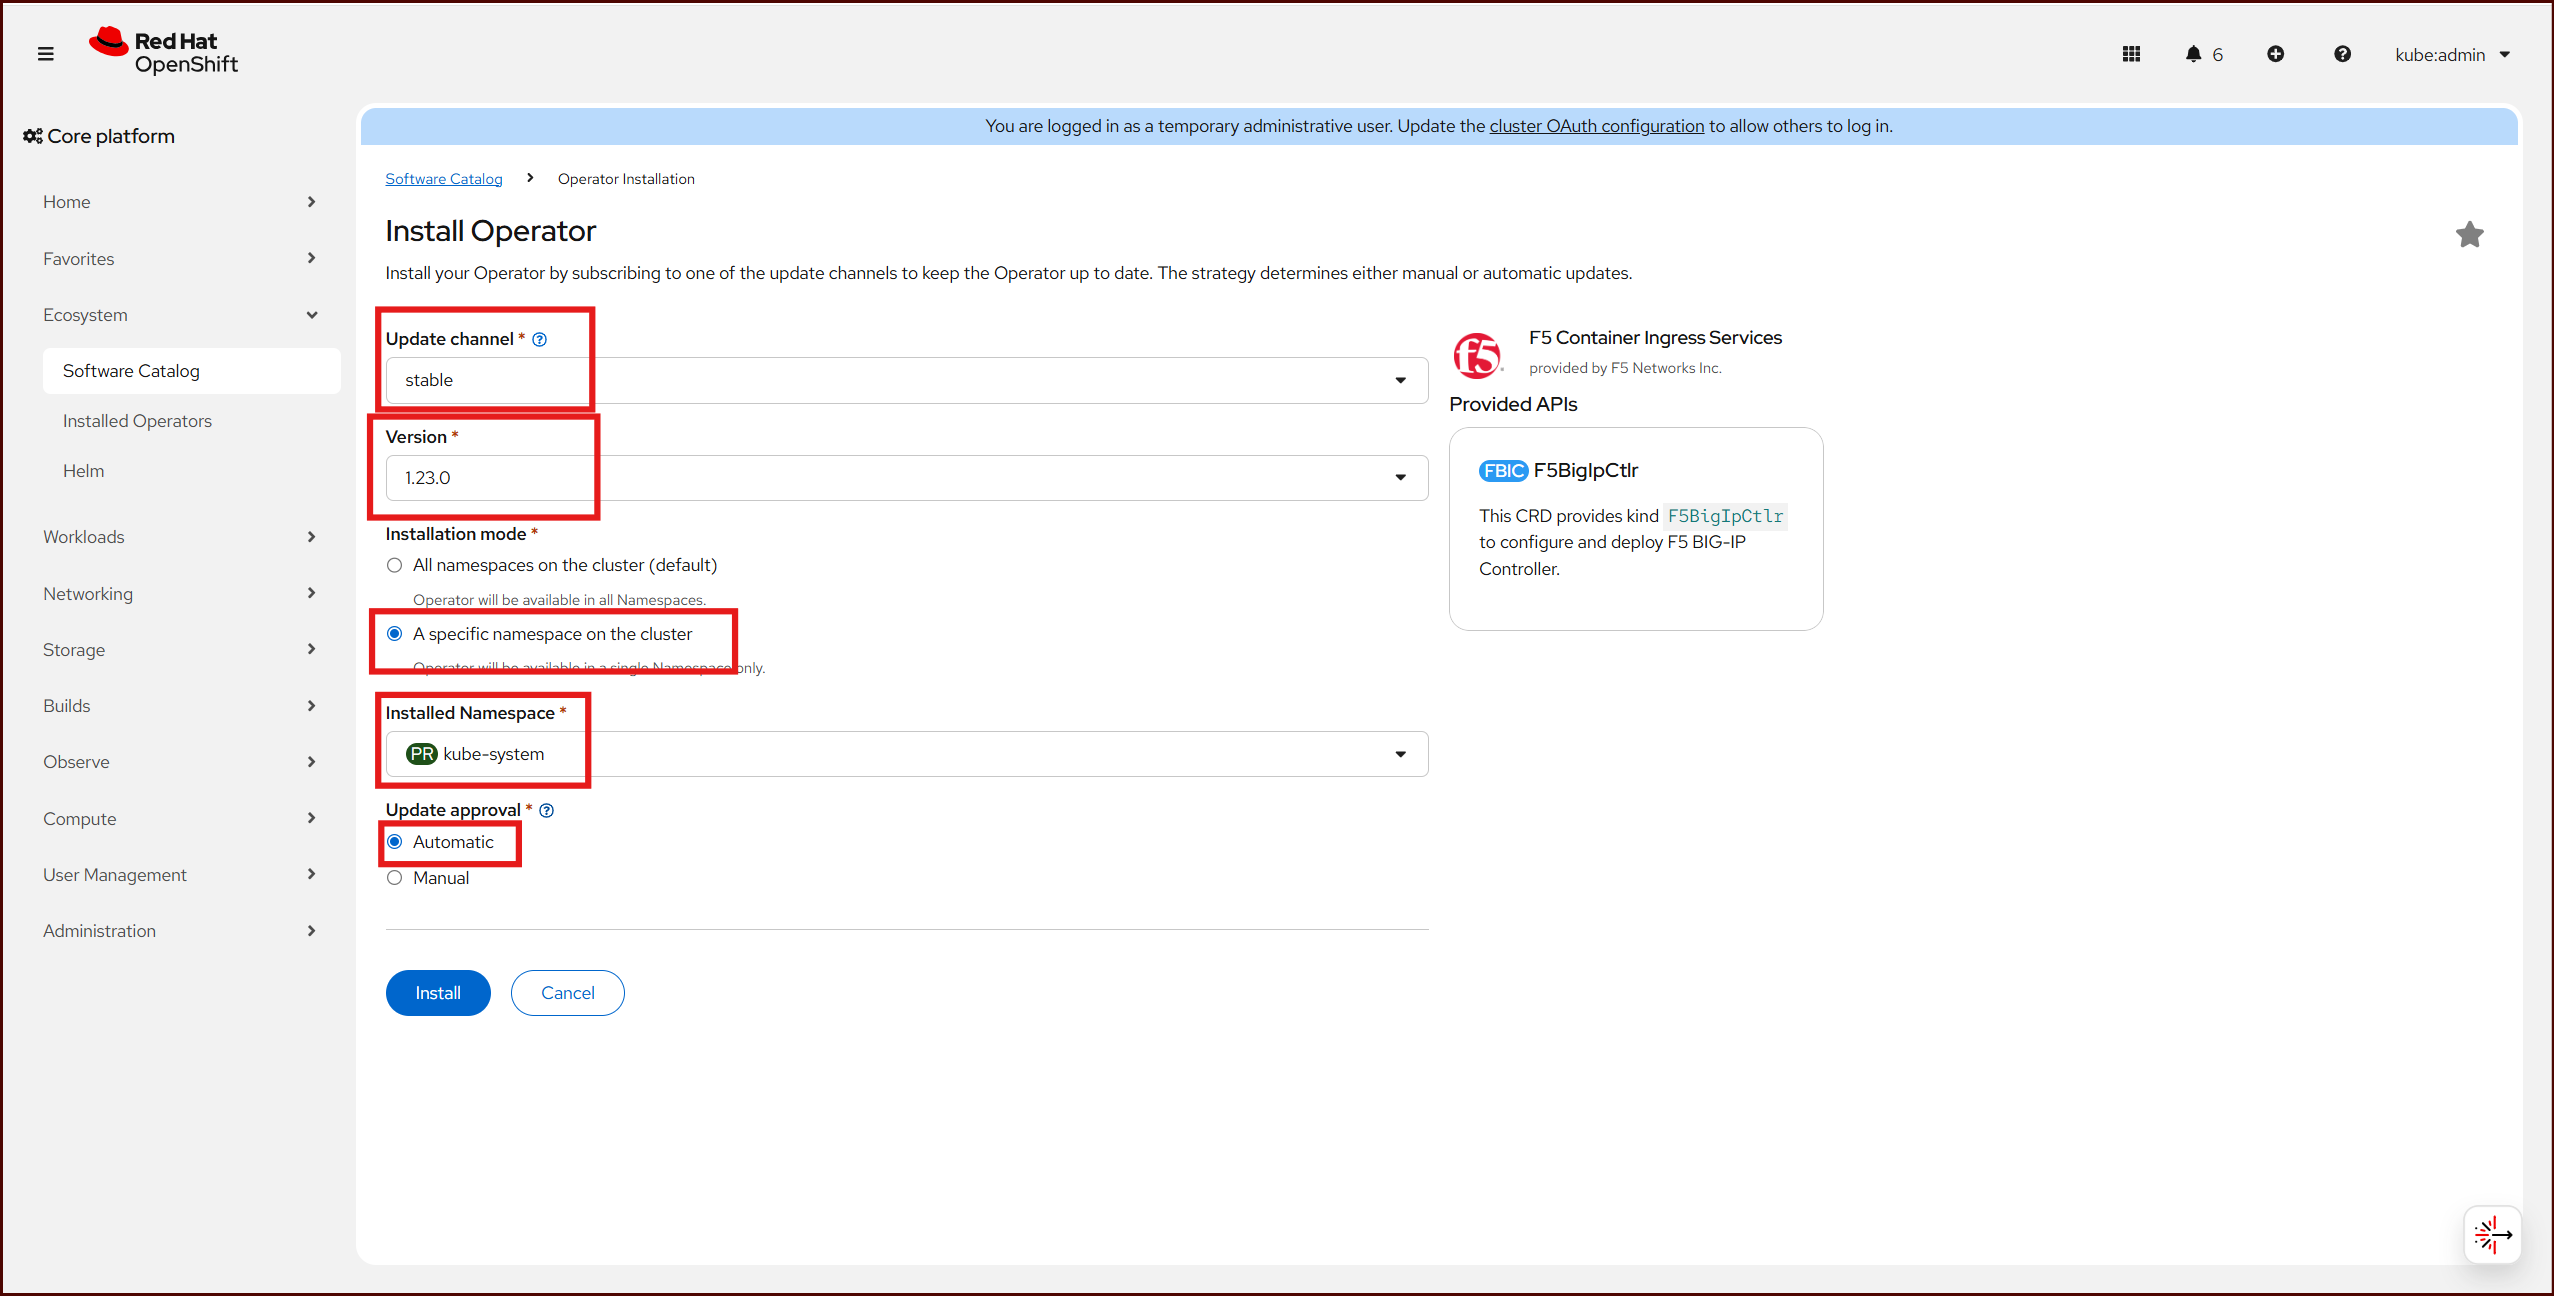
- Choose an installation mode (kube-system namespace, in my case), an update channel, and an approval strategy
- Click Install again and wait for the CSV to reach
SucceededThat’s the entire console flow. Behind the scenes it’s creating the sameNamespace/OperatorGroup/Subscriptiontrio described above - the console just bundles the choices into a wizard.
Part 2: Installing via the CLI
Prerequisites from the F5 documentation:
- Create BIG-IP secret:
oc create secret generic <SECRET-NAME> -n kube-system --from-literal=username=<USERNAME> --from-literal=password=<PASSWORD> - Install CRD’s:
oc create -f https://raw.githubusercontent.com/F5Networks/k8s-bigip-ctlr/${CIS_VERSION}/docs/config_examples/customResourceDefinitions/customresourcedefinitions.yml
Step 1: Find the exact package name and channel
Don’t guess at the package name. Query the catalog directly:
1
oc get packagemanifests -n openshift-marketplace | grep -i f5
Then get the details for the one you want:
1
oc describe packagemanifest f5-bigip-ctlr-operator -n openshift-marketplace
This output tells you three things you need for the Subscription: the available channels, the catalog source name (e.g. certified-operators), and the default channel.
Step 2: Create the Namespace
(Since we are going to install the Operator into the kube-system namespace which already exists, we won’t worry about this)
Step 3: Create the OperatorGroup
The OperatorGroup scopes which namespace(s) the operator watches. Since I only need CIS watching one namespace, this is a single-namespace install:
1
2
3
4
5
6
7
8
apiVersion: operators.coreos.com/v1
kind: OperatorGroup
metadata:
  name: f5-cis-og
  namespace: kube-system
spec:
  targetNamespaces:
  - kube-system
1
oc apply -f operatorgroup.yaml
Step 4: Create the Subscription
This is the object that actually kicks OLM into action.
1
2
3
4
5
6
7
8
9
10
11
apiVersion: operators.coreos.com/v1alpha1
kind: Subscription
metadata:
  name: f5-cis-subscription
  namespace: kube-system
spec:
  channel: stable
  name: f5-bigip-ctlr-operator
  source: certified-operators
  sourceNamespace: openshift-marketplace
  installPlanApproval: Automatic
A couple of fields worth calling out:
channel,name, andsourcecome straight from thepackagemanifest describeoutput in Step 1 — don’t hardcode mine without checking yours1
oc apply -f subscription.yaml
Step 5: Watch it converge
1
2
3
oc get subscription f5-cis-subscription -n kube-system -o yaml
oc get installplan -n kube-system
oc get csv -n kube-system
Once the CSV’s PHASE reads Succeeded, the operator pod is up and the F5BigIpCtlr CRD is registered on the cluster.

Part 3: Deploying the operand with a YAML manifest
The operator itself doesn’t do anything until you create an instance of its CRD. For the F5 CIS operator, that CRD is F5BigIpCtlr under the cis.f5.com/v1 API group. Since this is a Helm-based operator, the spec fields map directly onto the underlying Helm chart’s values.yaml keys - which is the whole reason this operator is “just” a packaging layer on top of Helm.
1
2
3
4
5
6
7
8
9
10
11
12
13
14
15
16
17
18
19
20
21
22
23
24
25
26
27
28
29
30
31
32
33
apiVersion: cis.f5.com/v1
kind: F5BigIpCtlr
metadata:
  name: cis1
  namespace: kube-system
spec:
  namespace: kube-system
  args:
    bigip_url: 10.0.4.11
    bigip_partition: openshift
    log_level: DEBUG
    insecure: true
    pool_member_type: cluster
    manage_routes: false
    custom_resource_mode: true
    static_routing_mode: true
    orchestration_cni: ovn-k8s
  bigip_login_secret: bigip-login
  image:
    repo: f5networks/cntr-ingress-svcs
    user: registry.connect.redhat.com
    pullPolicy: Always
  version: 2.20.4-ubi10
  ingressClass:
    create: false
    defaultController: false
    ingressClassName: f5
  rbac:
    create: true
    namespaced: false
  serviceAccount:
    create: true
1
oc apply -f f5bigipctlr.yaml
Confirm the controller pod comes up:
1
2
oc get pods -n kube-system
oc logs deploy/cis1-f5-bigip-ctlr -n kube-system
Final thoughts
None of the individual steps here are complicated. What’s useful about going through them by hand is seeing exactly which three objects OLM needs (Namespace, OperatorGroup, Subscription) versus which two it generates for you (InstallPlan, CSV). For my purposes - matching a customer’s deployment workflow rather than just getting CIS running - that distinction matters more than the YAML itself.
If you’re doing this for real rather than as an exercise, feel free to reach out!